
By Jo Miller
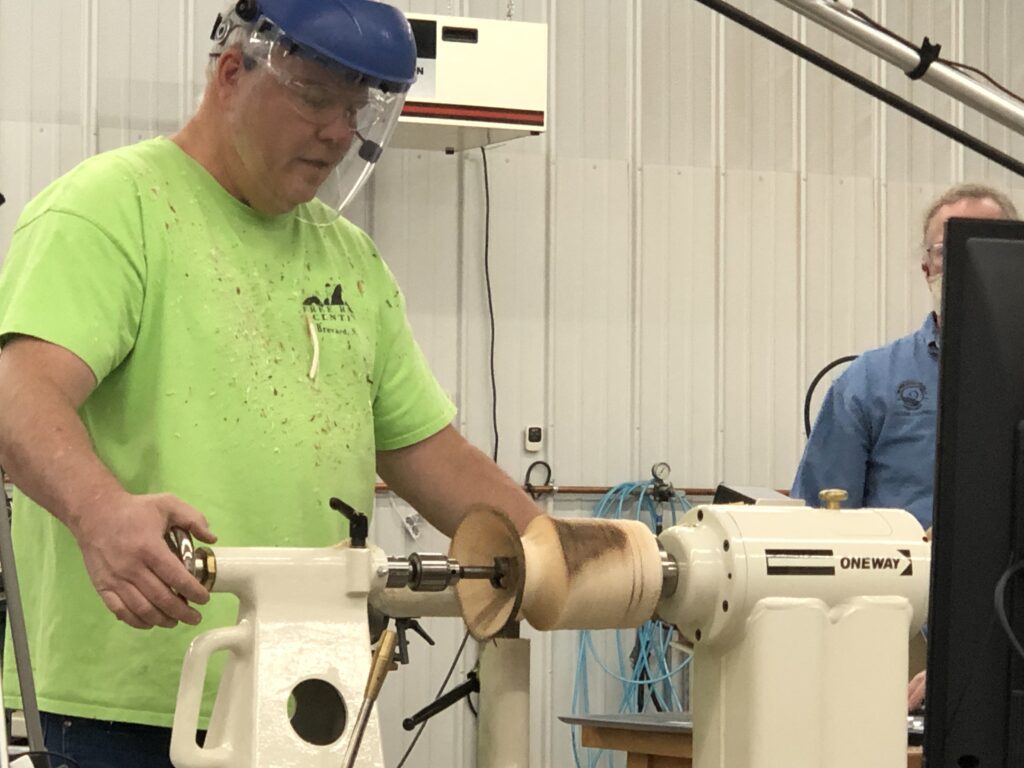
Our November demonstrator was our own Kevin Felderhoff who showed us how to make a vase from a green log. He began with a piece of maple 9” long 5-6 “ in diameter. Even though this piece is end grain, it should not crack if the wall thickness is ~ 3/16“
1. With the piece between centers, he began prepping for a faceplate by cutting into the grain to make a flat surface. A faceplate is preferable when using green wood, since a tenon will be compressed in a chuck and allow the piece to shift as you turn.
2. Turn the piece round at the bottom so that the faceplate is centered. It is possible to make it off-centered depending on the opening you want
3. Design your vase using the power of 3 – i.e., 1/3 down will be the neck of the vase and the narrowest part; 2/3 down will be the thickest part of the vase
4. Begin turning the vase. Use a slower speed – 5-600 RPM especially if you have “wings” or a natural edge, or if the vase is not at a even diameter
5. Cut down hill to the neck. Start with your gouge face up and close the tool as you get to the neck. Kevin softens the edge of his gouge to prevent bruising the wood. Kevin prefers a parabolic gouge – he feels this is less “grabby” especially with “air turning” or intermittent cutting. More information and charts about gouge flutes can be found at: www.turnawoodbowl.com–
6. Remove the lower bark and round the vase. You can leave some bark on depending on your blank. Once the vase is round you can speed up the lathe
7. Flatten the top and begin hollowing by cutting into the center. At this point the tail stock is still up. Move the tool rest parallel to the cut as you go into the center. The tool flute starts in the open position and closes as you go to the center. If you get bouncing, turn the flute slightly into the wood at the edge. If the bark is thicker on one side, this means the wall thickness is thicker on the that side. To correct, start at the edge and go in smoothly. Using a flashlight, you can see through the wood – this is easier on end grain pieces. Remove tail rest and remove the “nub” left using a gouge
8. Prepare for hollowing: If the vase is longer than 9” you may need a steady rest. Kevin usually uses either a 1 ½ or 13/4 “ Forsner bit at lower speed. The hole should be ~ ½ inch less than the diameter of the neck. Mark where the bottom of the vase should be – the faceplate screws are ~ 1” into the wood. Begin using the largest Forsner bit you can use. Remember to bring the bit in and out of the wood to keep it from getting stuck. If you cant get to the bottom of the wood because of the Jacobs chuck, switch to a straight bit to get the bottom of the vase. Then finish turning the neck using a smaller gouge
9. Hollowing: for this demonstration, Kevin used a hollowing system with a Vicmark articulating arm with a CCTV camera attach. Tape was put over the monitor to prevent the edges from marring the wood. The camera was attached to a monitor to allow you to see the tip of the hollowing tool
First turn from the neck to the top before shaping the vase itself. This will prevent shattering.
Shattering indicated you are taking too much wood, your speed is too fast, or the wood has shifted in the chuck
In the beginning the goal is to get rid of wood by working your way down the vase – Once you’ve gotten to the bottom, you can begin to hollow the body of the vase. Blow out your shavings as you go. The primary goal is to be consistent in your wall thickness as you go.
10. Scraping the interior
Begin shaping the bottom when you have hollowed ~ ½ of the vase bottom. Use a shear scrape with the tool closed and the tool rest parallel to the tool. Kevin used a 22 degree angle round scraper tip for smoothing the inside. As he moved us the vase, Kevin uses a straight scraper first, then a hooked tool scraper. To remove the nub, move from bottom up to “slice” off the nub – you can use a termite tool or a S hook for this as well as a circular tool
11. Defining the bottom: Undercut using a parting tool to define the bottom of the vase. Smooth the bottom of the vase to continue the vase shape.
12. Remove the face plate, reverse the vase using a cone on the chuck and bring up the tail stock. Pad – but don’t use padding with a “grid” since it will leave a mark on the vase. Put on a small tenon that will be used later for sanding. Undercut the tenon to eliminate mass and decrease drying time. Let dry to ~ 10-12% and bring inside to dry more.
13. Sanding: Using a cone in the tail-stock Put the tenon in the chuck loosely, and make around again before tightening it. Sand the outside of the vase to ~320/400 grit and the inside as far as you can feel – ~ 120 grit
14. Turn around again and remove the foot using a slight undercut. Sand off nub and bottom to finish
15. Finishing
2-3 coats of Danish oil both inside and out. Let sit 2-3 days to dry. Follow with shellac or other finish
Mesquite – often has cracks. Kevin fills them with turquoise using CA glue for small cracks or epoxy for larger cracks. For larger cracks, build up in layers. Spray the crack with accelerator, add CA then stones. You may have to sand down the larger stones. Mesquite does not shift much when drying but maple shifts a lot – so be careful that Maple pieces are dry before filling any cracks
You can get inlay products premixed but they have a short half life even when they haven’t been opened.