
By Jo Miller
February CMW virtual demonstrator – Kimberly Winkle
Kimberly comes to us from Tennessee where she is a Professor of Art and the Director of the School of art, Craft and Design at Tennessee Technological University. She has a BFA in Ceramics and a MFA in furniture design as well as several artist residencies. Her work has been exhibited nationally and internationally and she teaches workshops at several craft schools.
This months demonstration was composed of two parts : spindle turning a candle stick and working with milk paint for embellishing.
The Candlestick:
Kimberly prefers using kiln dried Poplar in her work because it is dimensionally stable and easily obtainable. The candle stick was made from 2 pieces of 8/4 poplar – 4 inches wide that have been glued together with tight bond and allowed to cure ~4-8 hours. This produces a 4×4 block that can be cut to the length you want. A 7/8thinch hole is drilled into the top center ~ 1 ¼ inch deep to hold the candle cup grommet. She puts a 7/8 inch dowel piece into this hole ~2 ½ inches. This moves the piece away from the tail stock to prevent paint from getting onto the lathe.
In the design process, she creates a template using heavy weight tracing paper adhered to masonite or hard board with spray adhesive. The design is drawn onto the board keeping in mind the rule of 3’s. Keep in mind that at the top, there will be a 7/8thinch hole for the candle. In addition, since most candles are ~10 inches high, you will need to maintain mass at the bottom to prevent the candle from tipping over. She drew a line down the middle of the design board to help with maintaining symmetry in the piece. In her example, the neck of the candlestick was ~ 1/3 of the piece and the widest part was at ~ 2/3rdof the piece. She likes to make a small arc at the bottom of the piece to create a visual lift to the piece. Once satisfied with the shape, measure the diameters at the top, at the neck and at the widest part at the bottom. These will be used while turning. Cut the template in half and remove the inside shape of the piece. This will be used to check the progress during turning and will assist in making multiple pieces of the same shape. Transfer the measurements onto the template. The template can be reduces or enlarged on a printer or using a design program if you would like to make multiple candlesticks of proportionate sizes.
To turn the candlestick, use a roughing gouge to turn a cylinder. Use your template to transfer points of transition. Use a parting tool to trim down to the appropriate size. Kimberly uses calipers with blunted ends or with balls on the ends to prevent damage to the wood and establishes the dimensions of the shape at the top, neck and widest part. These calipers can be purchased at Rdgtools.co.uk – 6:calipers balls at a cost of 12.08 #. Make gentle curves moving into transition points. Periodically use the template to check the shape and make high points with a pencil.
Design the shape of the bottom: Kimberly used an “armor” design from the top of the curve of the base to the bottom. She estimated the distance between cuts – but this could be measured if an exact measurement is desired. She then gently slopped down to the transition mark above.
Painting:
Milk paint was used on the piece – a product that is good at highlighting texture and is mad up as a mixture of clay, natural earth pigments, casein and lime. Three different colors were used and layered on each other.
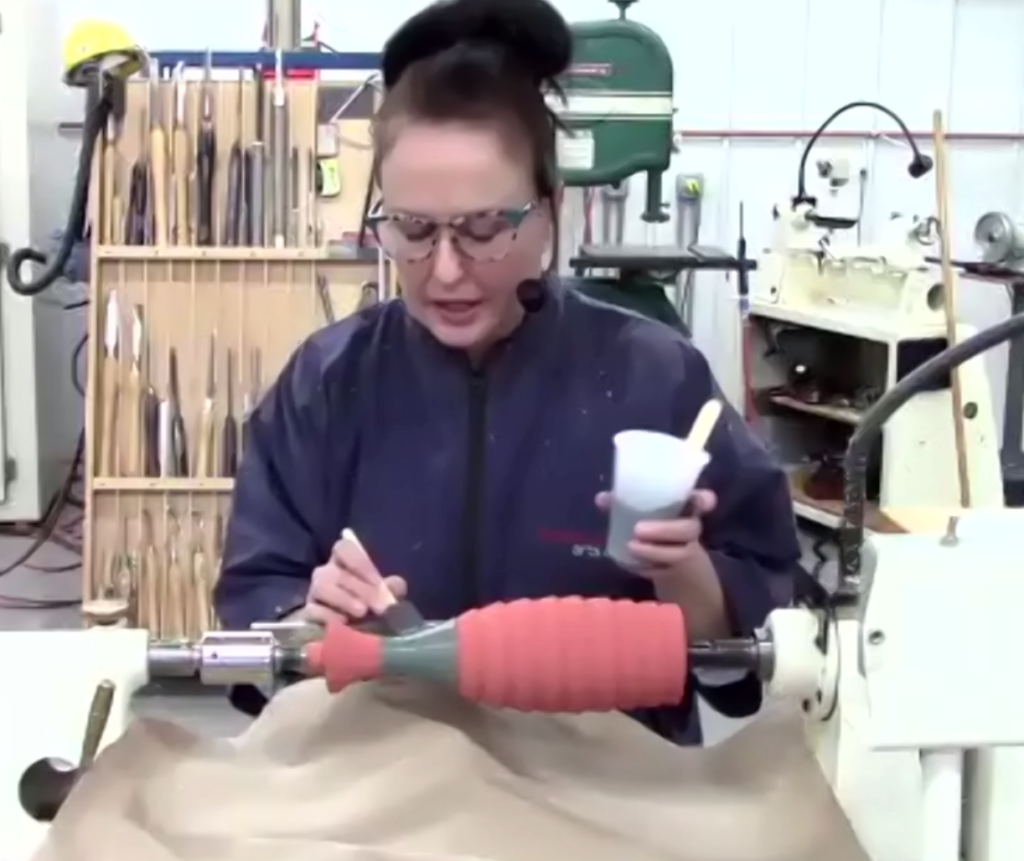
Kimberly prefers the Old Fashion Brand of milk paint. It comes in a fine powder, so use a facemask. Once the powder is opened, store in a dry, airtight container. The powder is mixed 1:1 with water to make a paste using a craft stick and allowed to set ~ 15 min until it thickens slightly – you want the consistency of heavy cream. You want to see bubbles created by the interaction of casein and lime– this means the binder is working. The paint can be filtered to remove any clumps using a fine wire mesh kitchen strainer, cheese-cloth, nylon stockings, or a paper filter.
The paint is applied using a foam brush with the piece on the lathe turning at a slow speed. For this piece, 2 coats of Salmon, plus 1 coat of Sea Green plus 1 wash coat of Drift wood was used. Each layer must dry before adding the next layer – this takes ~ 20 min. To speed thinks up you can use a hair dryer – on low heat. If you use high heat, the paint will crackle. If you want a crackle finish, you can use this method or Milk Paint has a crackle finish product that can be used beneath the color you want to crackle – it dries at a different rate than the paint. Once all the colors are added, you sand gently using 150 or 220grit paper to reveal the colors below. Sand with the piece moving in reverse. When you have the sanding where you want it, burnish using 0000 steel wool. Milk paint is very durable, but not water tight. To seal, use MinWax wipe-on or a penetrating oil like Watco or Liberon. Polyacrylics can also be used but Polyurathanes will yellow. Kimberly usually paints the interior of the candle collet hole with a gold paint before adding the collet.
The rule of thumb for layering is that the darkest color is added last – this puts the dark color in any cracks/texture and looks like a shadow. If you use a red paint, then krackle finish then black, the black krackles and shows the red underneath. Mahogany contains natural tannins that react with the lime in the milk paint. To use mahogany, you will need to seal it with shellac and add extra-bond to the milk paint (2pts paint + 1 part extra-bond) to help the milk paint adhere to the non-porous surface
Other tips:
- Kimberly recommends doing a paint sample to make sure you like the color combinations
- You can burn through milk paint but the burners “don’t like it”
- You can paint, then carve through the paint.
- You can also add a foot – Kimberly turns a foot using a screw chuck, then screws it onto the bottom of the candle stick through the screw hole.
- You can create a textured surface on the piece using something like a microscraper before you paint.