
11-20-2
Contact information:
Rudolphlopez.com
Rudy Lopez comes to us from Tampa Florida. His experience includes cabinetry, photography as well as woodturning. His message to us is to have fun and not worry about making mistakes.
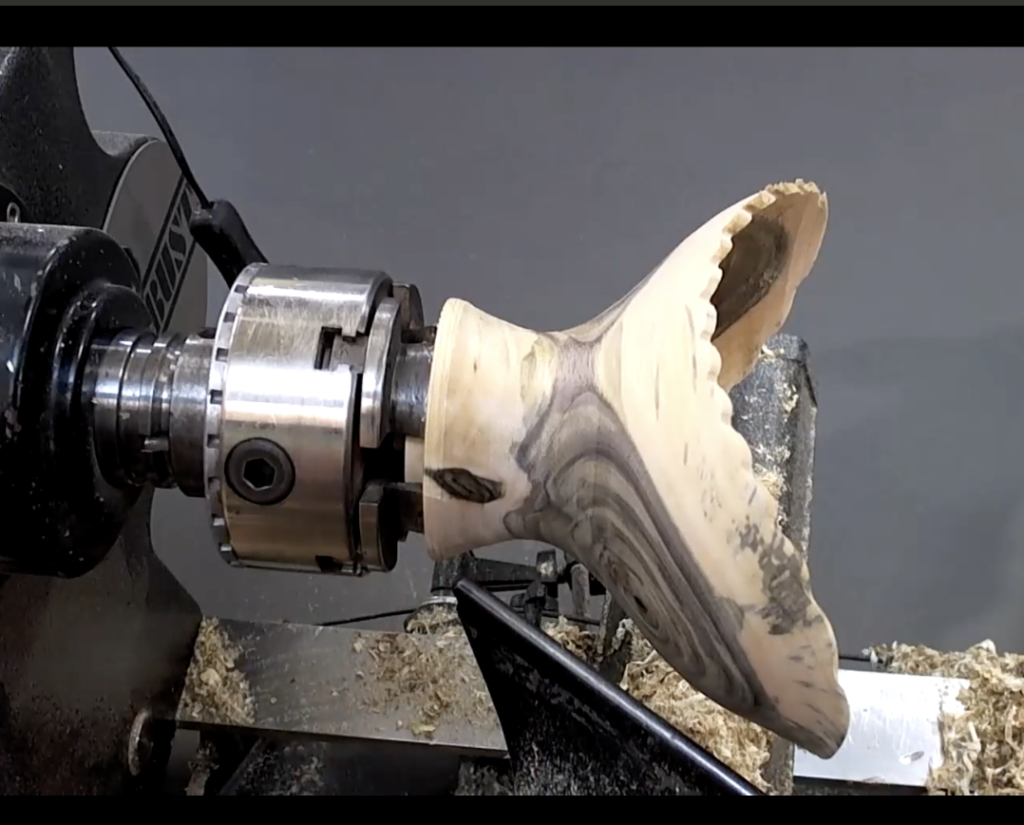
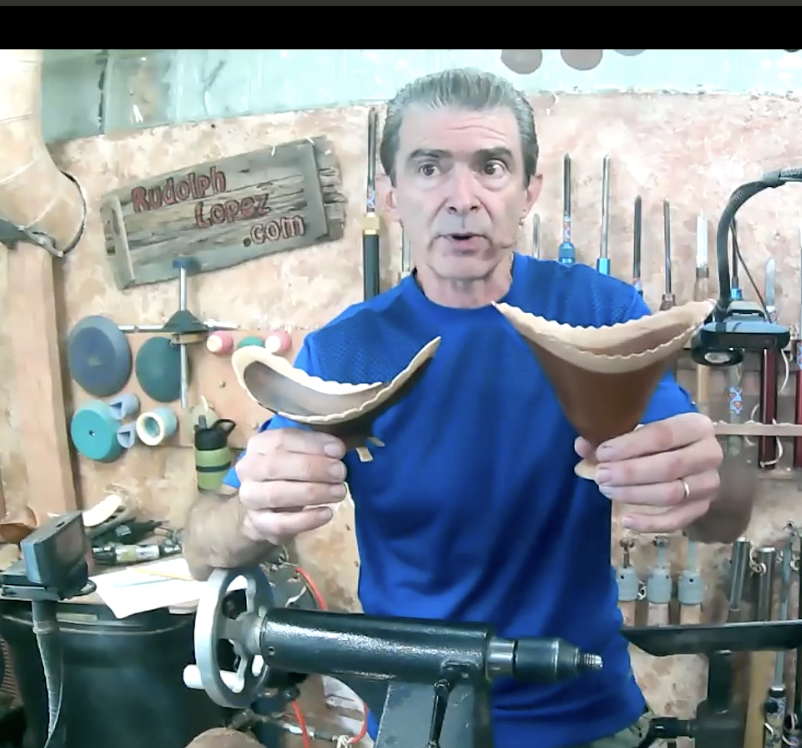
Today’s demonstration is for creating a Deco Rim Vase with Feet. It involves 2 directional turning – one direction is used in the creation of the scalloped edge of beads and coves, and the other direction is used in hollowing the bowl shape. This project is particularly stunning if wood with contrasting sap wood is used.
Wood Choice
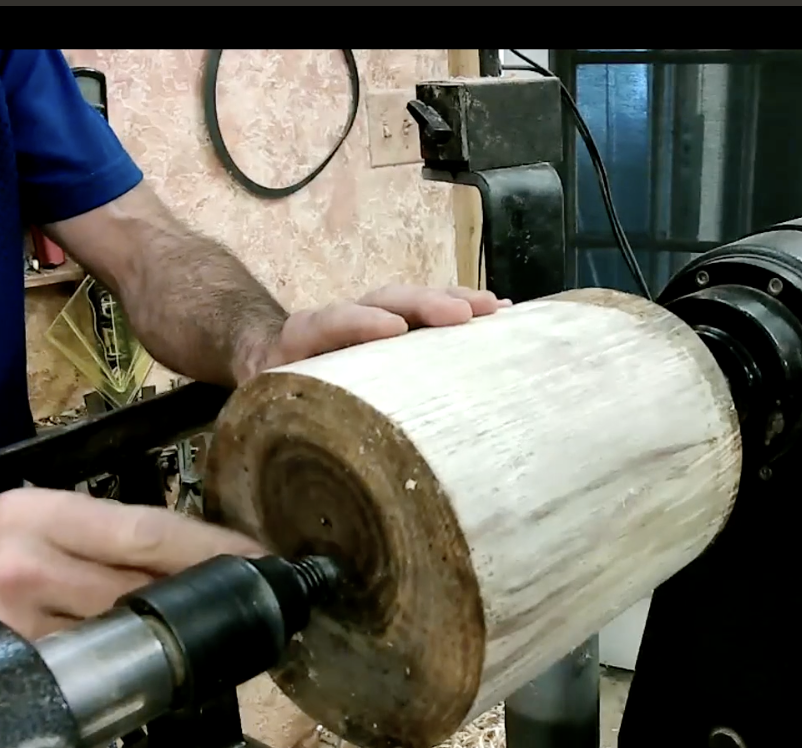
For this demonstration, Rudy used a green walnut log with contrasting sap wood and with the bark removed. In choosing a log consider the following:
- Log length and diameter: If the log length is longer than the diameter of the log, you will create a wider and shallower vase. If the diameter is larger than the log length, you will make a taller vase.
- Pith location: Since he was starting with green wood, you will want to position the pith on a thinner part of the vase. If it is in the stem of the vase, try to position it so that it is on the side of the stem. If it is on the thinner part of the vase, try to position it so that there is more of a curved side near the pith so that when it dries, a potential movement will have some where to go to minimize the potential for cracks– perhaps just creating a small budge.
- Sap wood: Once you decide where to center the log, look at the sap wood distribution. If there is more sap wood on one side, put the side with the largest amount on the bottom where the tenon will be, so that you have sap wood left after removing the tenon
First direction:
- Place the log between centers – you can go off center if you want. For this demonstration, the pith was off center with the heart wood centered. There was more sapwood at the bottom.
- Gouges: Rudy used 5/8 inch parabolic flute bowl gouge with 60 degree, swept-back wing (the Ellsworth grind), and the heel removed off the back, as well as a 40-40 grind bowl gouge that allowed him to make tighter cuts at the bottom of the hollowed part of the vase. The printable template for adjusting the wolverine vari-grind gig for these bevel grinds is found on his website.
- Shape a parallel cylinder the diameter you want. If you need to make a smaller diameter, or remove bark, Rudy suggests that you go into the log from one end in increments up the log rather than moving the length of the log in each sweep. This helps in maintaining a cylinder, rather than slightly tapering the log. If there is a taper, one end of the vase will be different from the other. You then smooth the log when the cylinder is the size you want.
- Square up both ends of the log
Laying out the scalloped edges of the vase:
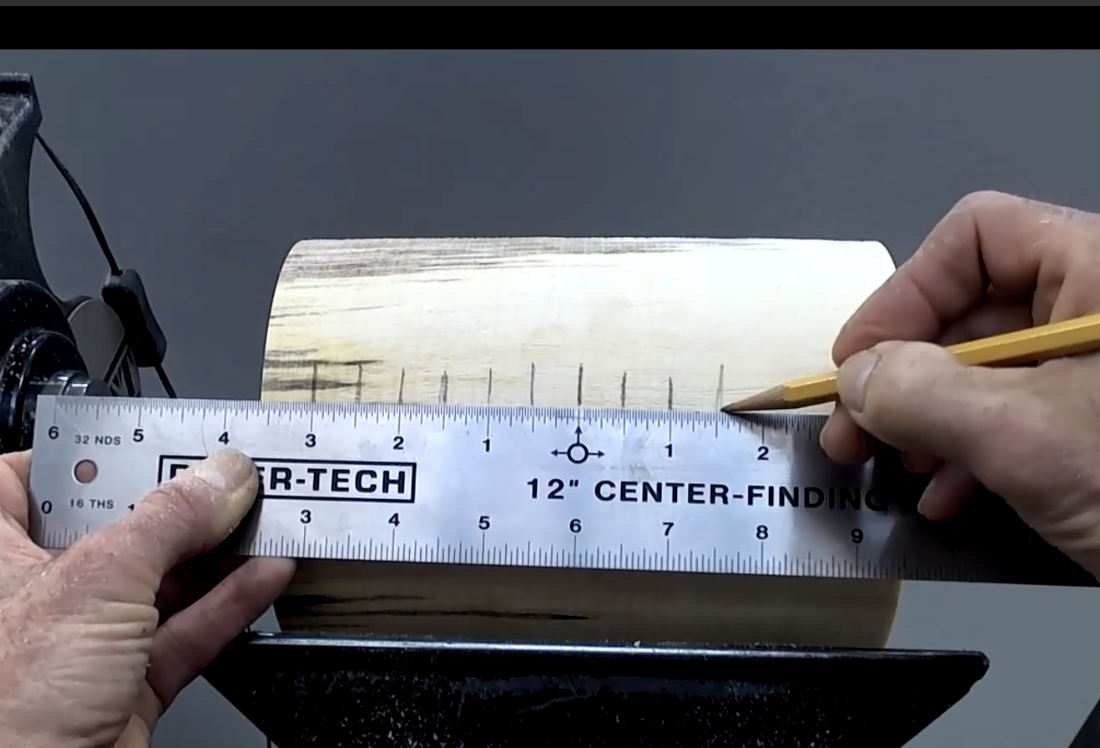
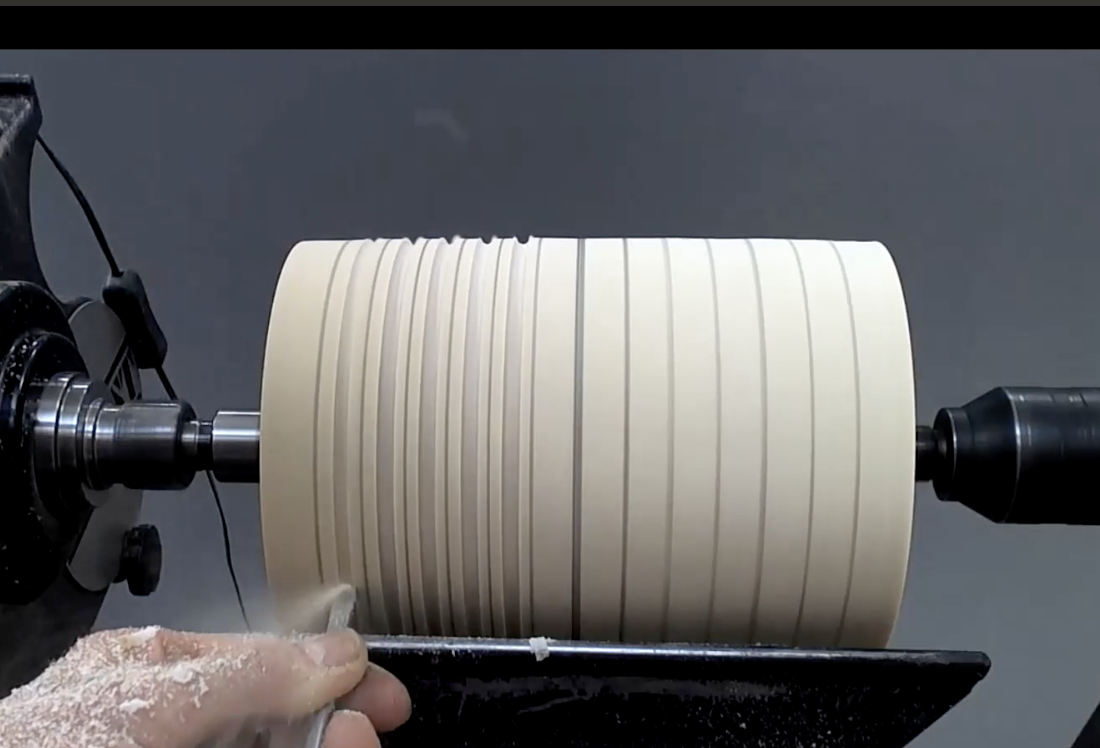
- Find the center of the log. Rudy used a center finder ruler, or you can create your own using an online app where you can print a ruler out and laminate it.
- Lay out the lines for you beads and coves. Make a heavier mark for the center of the log and mark lines from the center in both directions. Rudy used 1/2” increments but the size will depend on the size you would like the beads/coves to be.
- Create your beads and coves using the lines as the top of the beads. Round off the edges of the beads leaving the lines visible. Create the look you like – wider beads with little coves, or more even beads and coves. A “V” shaped cove may have sharp edges.
- Sand lightly – Rudy uses an inertia sander that he makes using PVC pipe and rollerblade ball bearings. He sells them on his website or they can be purchased at Woodturners wonder. These can go into the coves in both directions and over the top of the beads with little scratch marks.
Finding the top and bottom of your vase:
- Mark the top of your vase by looking at the end of your log and considering the position of the pith and heart wood and the amount of sap wood. Mark this spot – it will be on the center line you made when marking for beads and coves.
- Align the top of your tool rest with the center of the length of your log (lathe spindle centerline). Then using the indexing function of your lathe or spindle lock, mark the bottom – 180 degrees from the top mark.
Second direction of turning – this will be used to form the shape of the vase and legs
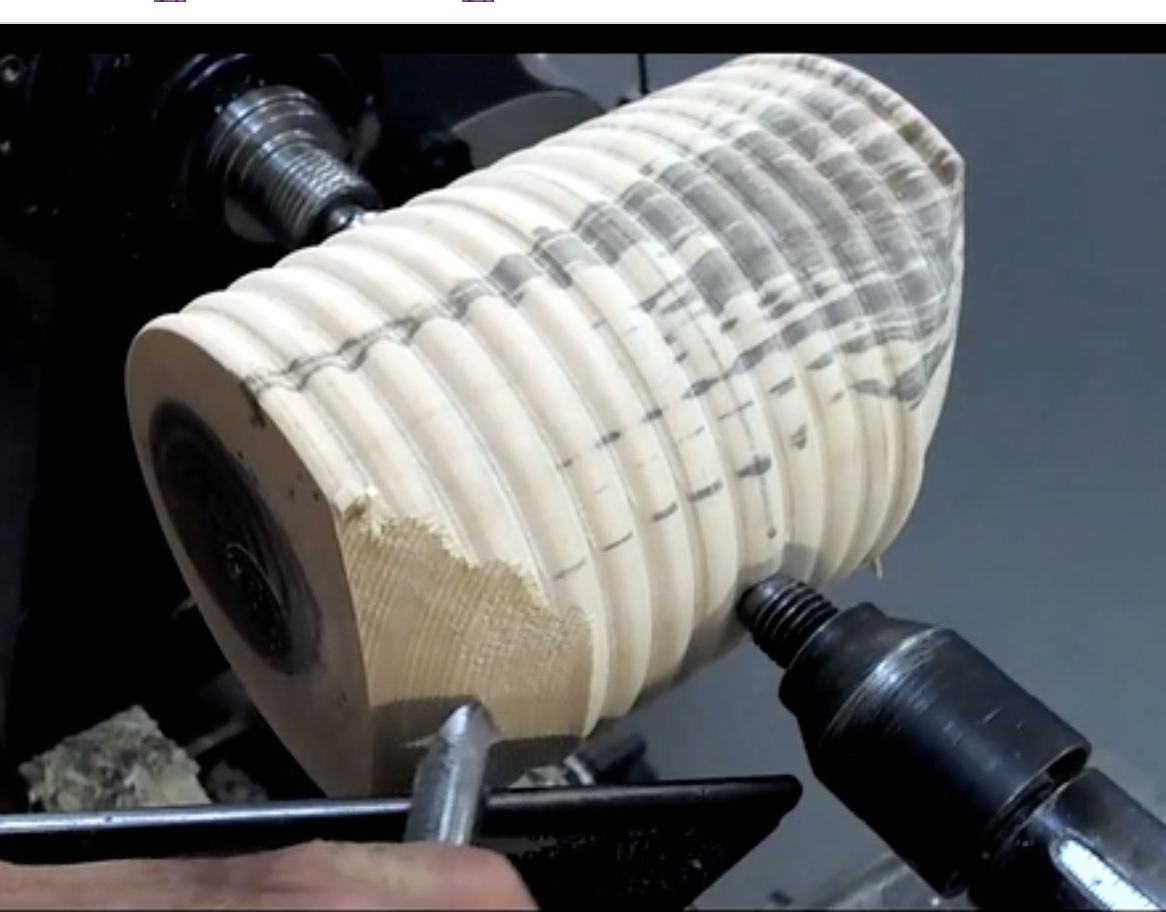
- Rotate the log and place the top and bottom marks you just made between centers. Put the tenon (bottom side) at the live center.
- Start shaping the bottom of the bowl/vase and cut your tenon. Be sure not to reduce the diameter of the base too much at this point, you will need some mass here to hollow the interior of the bowl/vase
- Look to see if you are positioned at exactly 180 degrees from top and bottom. As you make your tenon, you will be able to see if the scalloped edges of the beads are the same depth on each side of the tenon. Adjust your log position if you need too. Small differences are not too critical. If the scalloped edges are off, it means that the wings of your vase may be uneven (one higher or lower than the other).
- Shape the vase
- You will want to shape the base to allow for the feet to be carved
- When deciding on the shape, if the widest part of the bowl is above the center line of the log, you will have a deeper vase. If the widest part of the vase is below the center line of the log, you will have a shallower bowl.
- You are aiming for a thin wall thickness – ~1/8 inch. If its ~1/4 inch, the pith region will crack.
- Move lightly near the top to prevent damage to the corners of the beads
- Sand lightly – being careful not to round off the beads.
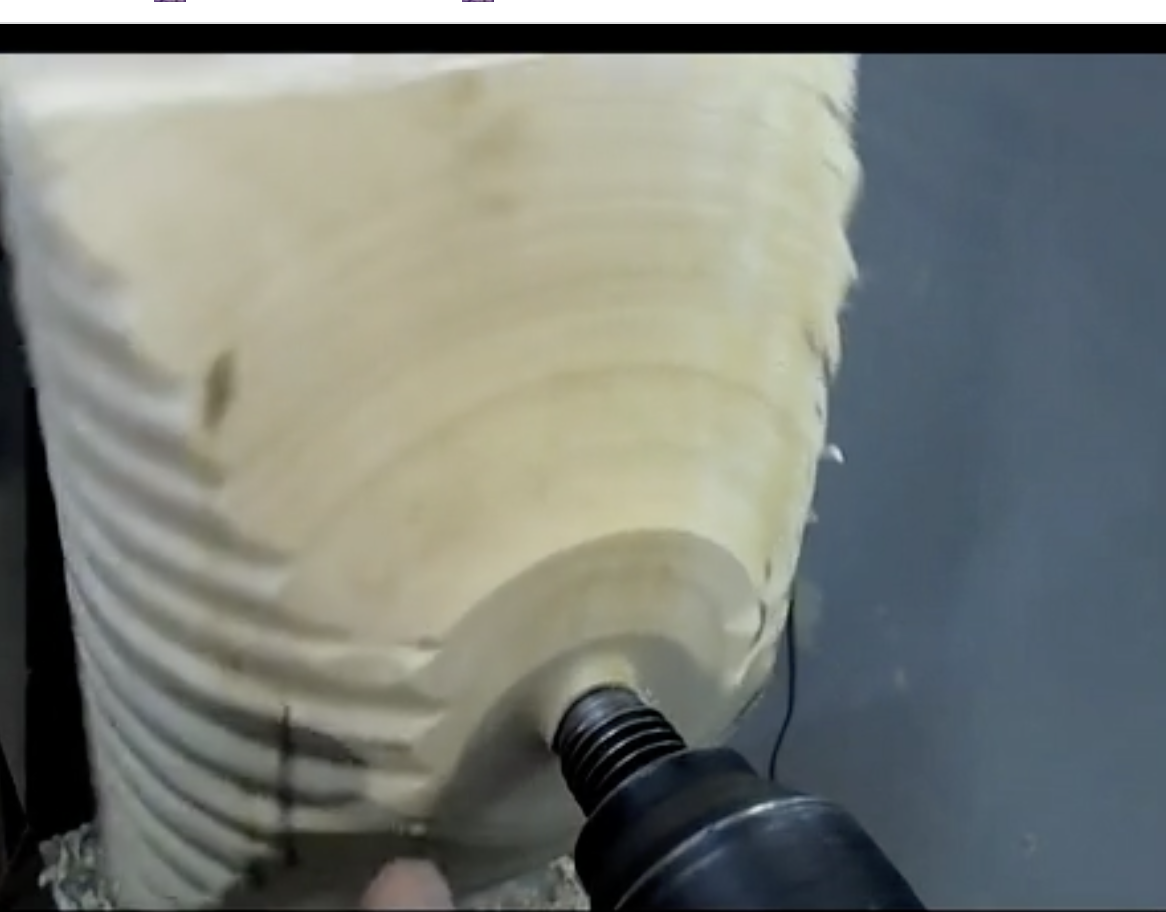
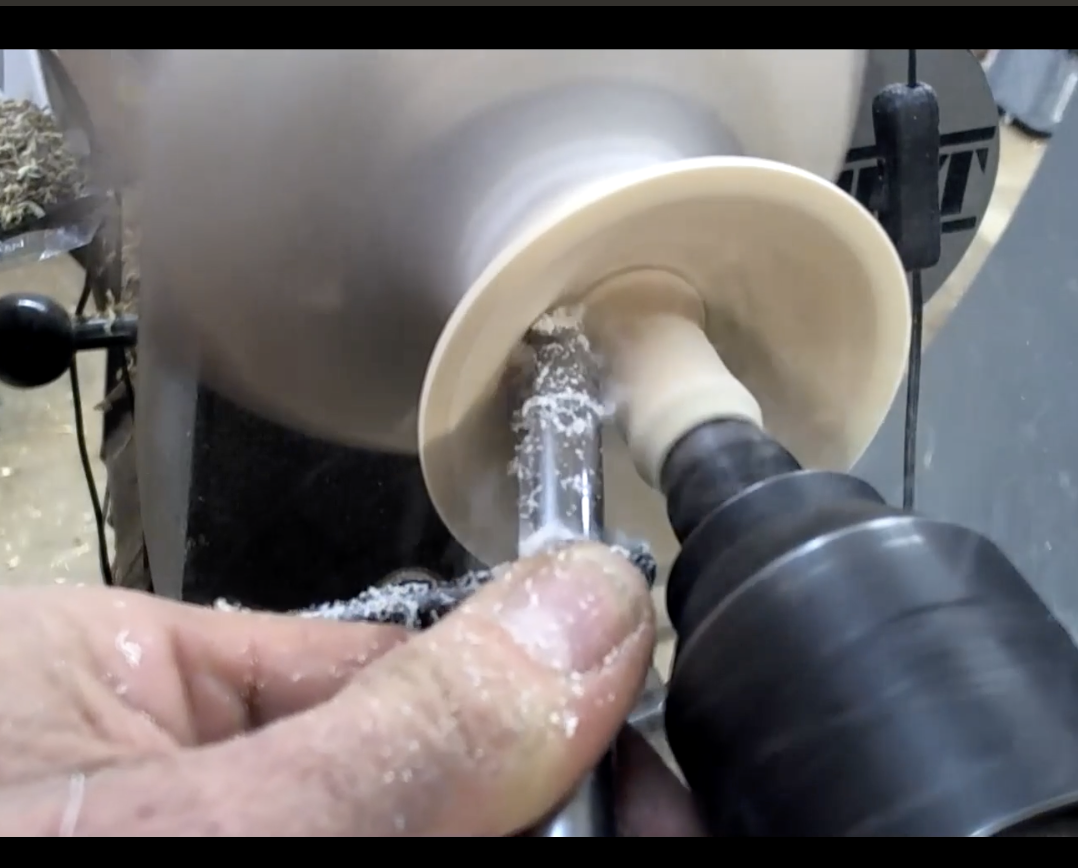
Hollowing
- Reverse the vase and put in the chuck. Make sure the vase is centered and tightening the chuck incrementally. Use the tail stock to help keep the vase centered. The tail stock is kept in as long as possible
- Cut toward the center in small steps. This will produce little “shelves” to help align the gouge in the next cut. Start with the 60 degree gouge and then move to the 40 degree gouge to allow you to go deeper. Go as far as you can with the tail stock in place.
- Watch the shadow of the wings on the opposite side to see your wall thickness. Leave more thickness in the center for stability until you are below the rim.
- Remove the tail stock and cut out the center wood
- Smooth the bottom – you will sand the interior once the vase has dried
- Refine the shape from the outside

- You want the thinnest part at the pith – cut from the top to the pith area if it’s on the bowl to get the right thickness.
- Refine the base to the shape you want. You can create a detail or leave it smooth
- Sand lightly
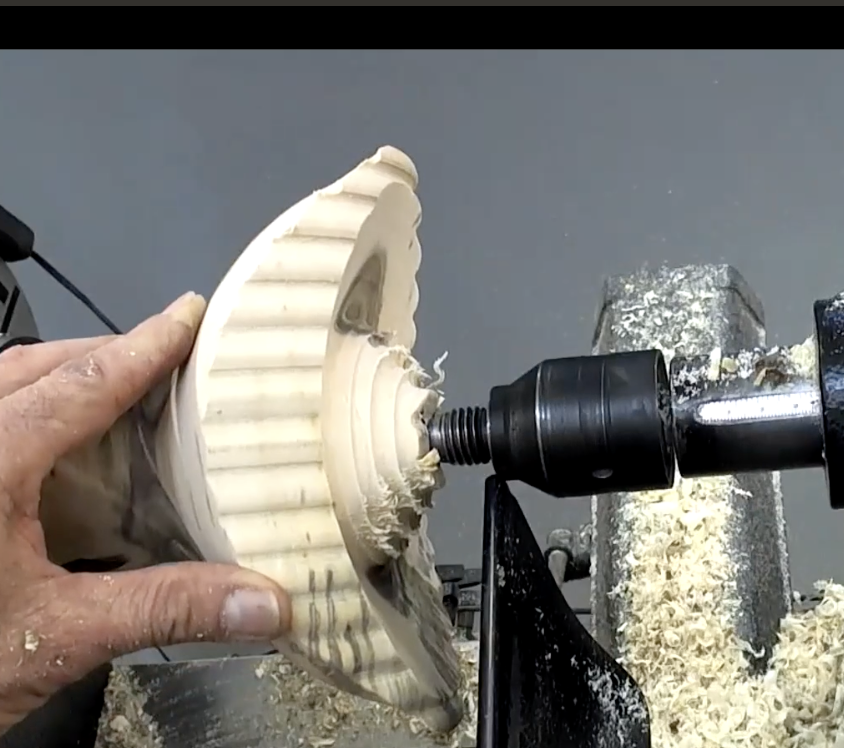
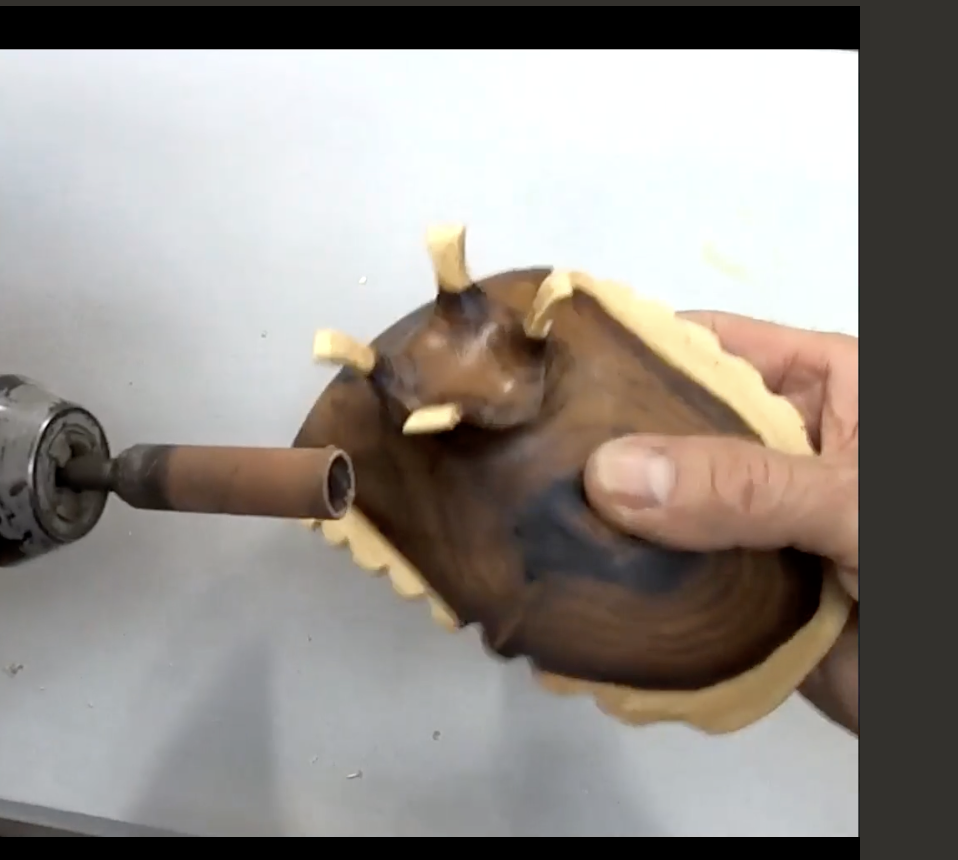
Creating the base and feet
- Remove the vase from the chuck and jam chuck the vase to shape and hollow the base for the feel. Rudy used a “Rubber Chucky” in the chuck for this – he uses the red one that fits into the heartwood. You want to be careful that there is no pressure on the rim.
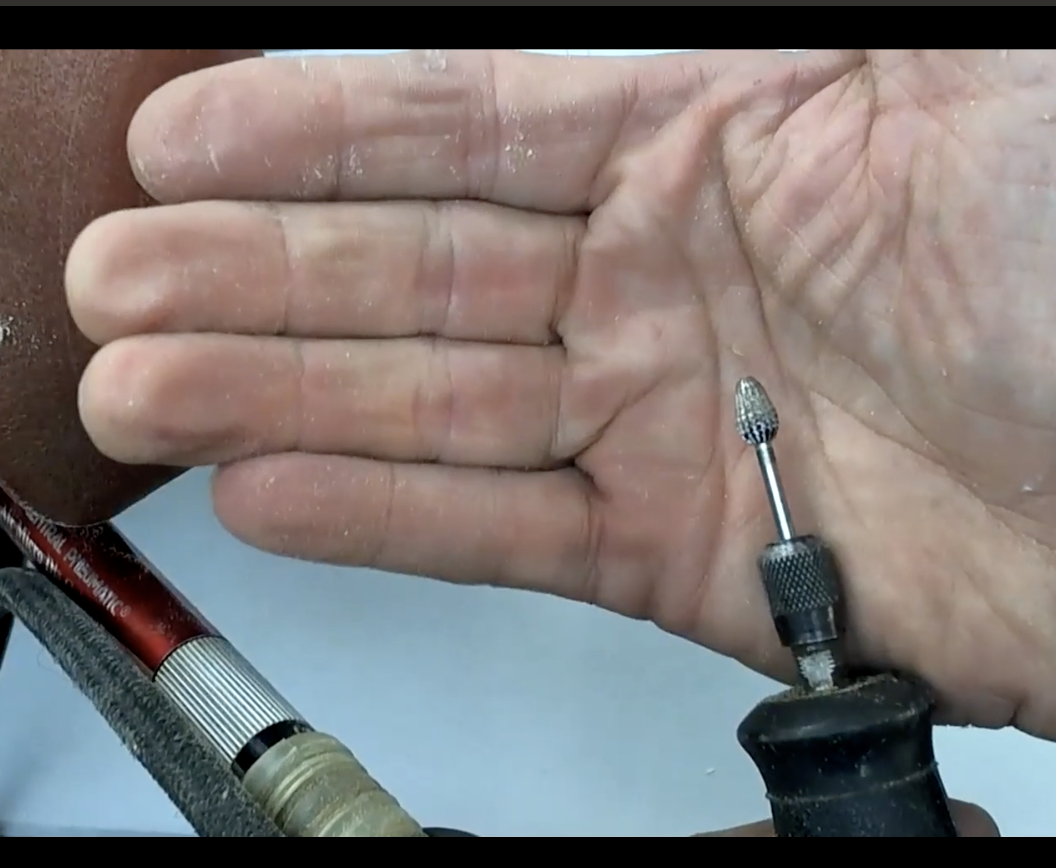
- Hollow out the stem for the feet. Make sure you use a closed flute on your gouge to prevent “skidding” off the side of the base. Once you have removed as much as you can, it’s pretty safe to break off the remaining stem since its side grain.
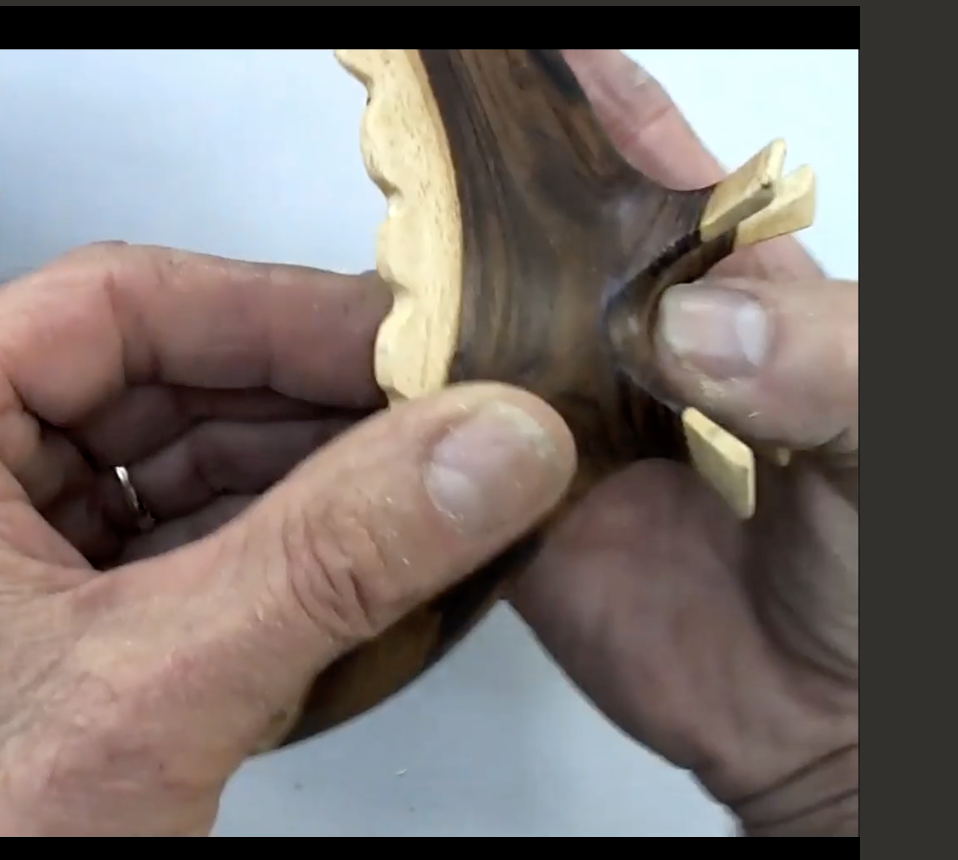
- Shape the feet:
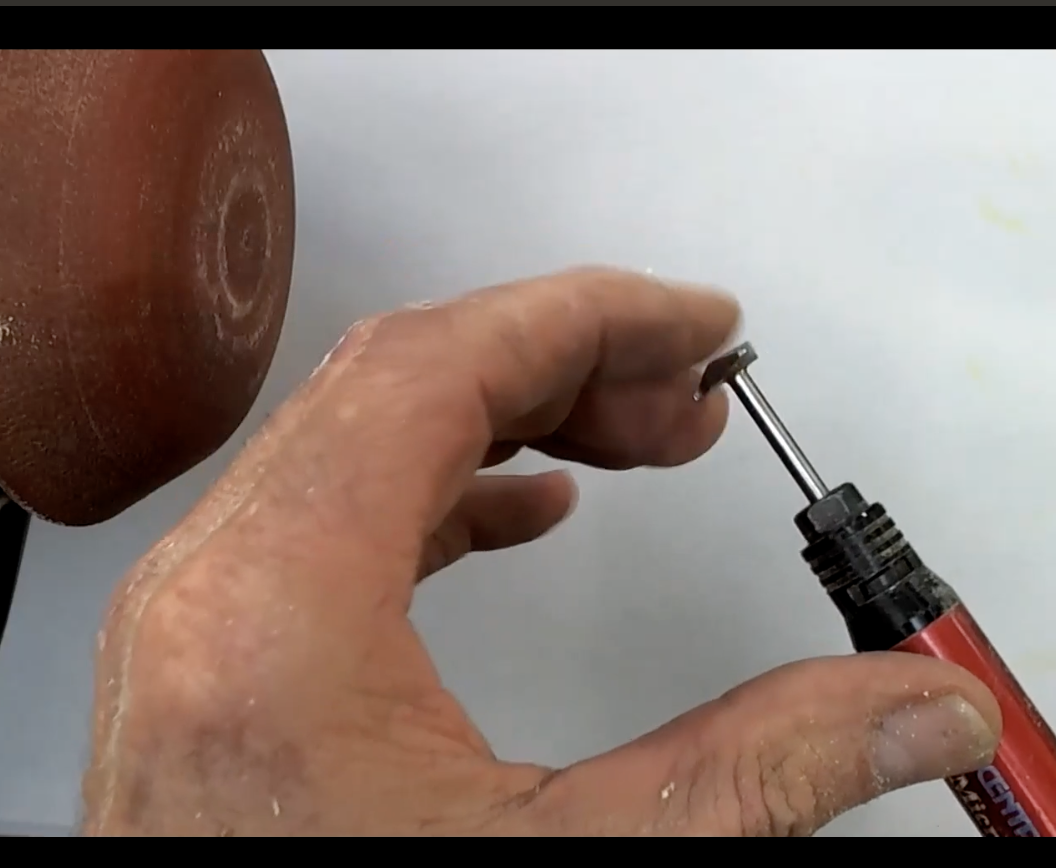
- Rudy draws in the shape of the feet with a pencil and carves out the feet using either a Dremel tool or an air grinder. He uses cone burrs or a round radius corner cutter – from rotorychisel.com
- Sanding – can be done by hand or using mandrel sanders in the chuck. He prefers using the chuck for holding the sander for better control. For final sanding, he uses hand sanding with a rolled sandpaper, and rotary bristle brushes.
Finishing: Rudy uses sanding sealer followed by lacquer – which keeps the wood from darkening. He also uses Waco Danish Oil, or a food safe tung oil type finish. Another option is to bleach a dark wood – like walnut – which lightens the walnut and whitens the grain. This is followed with an oil finish which will make the color a little darker again but enhance the grain.