
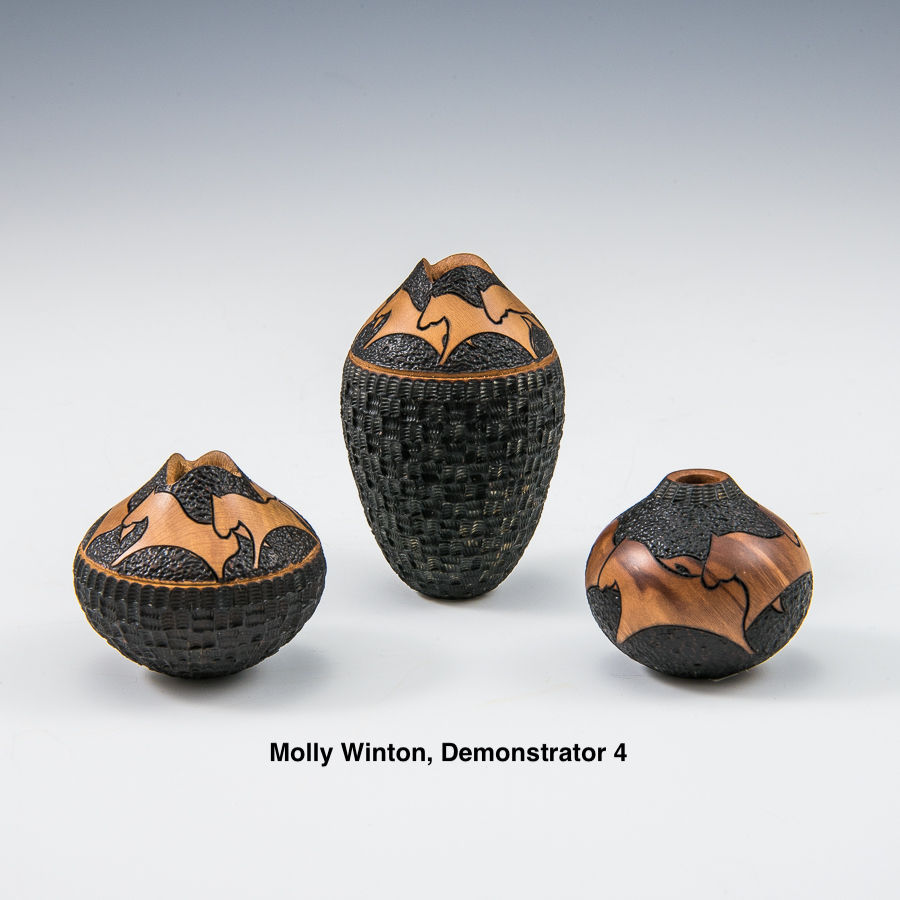

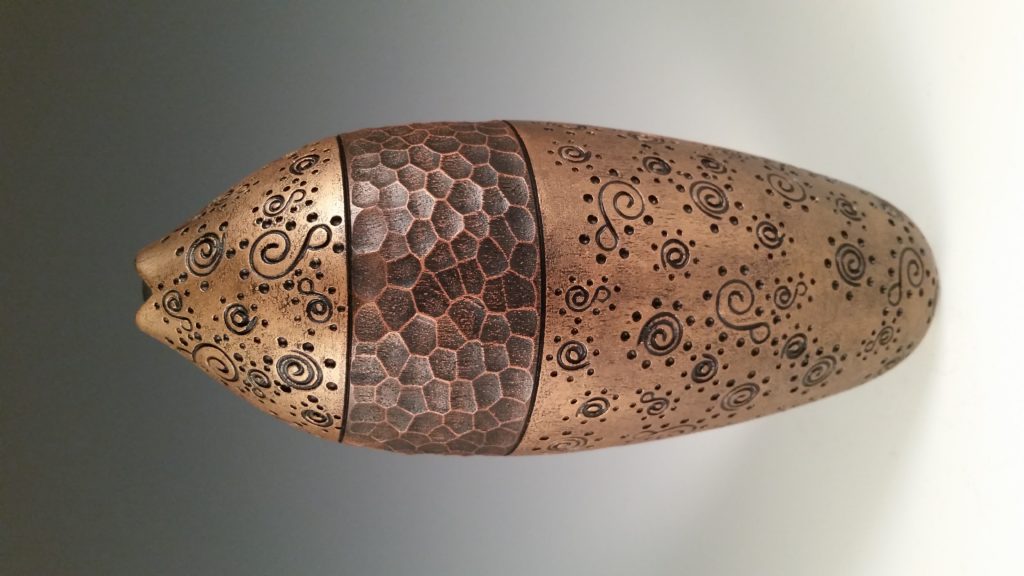
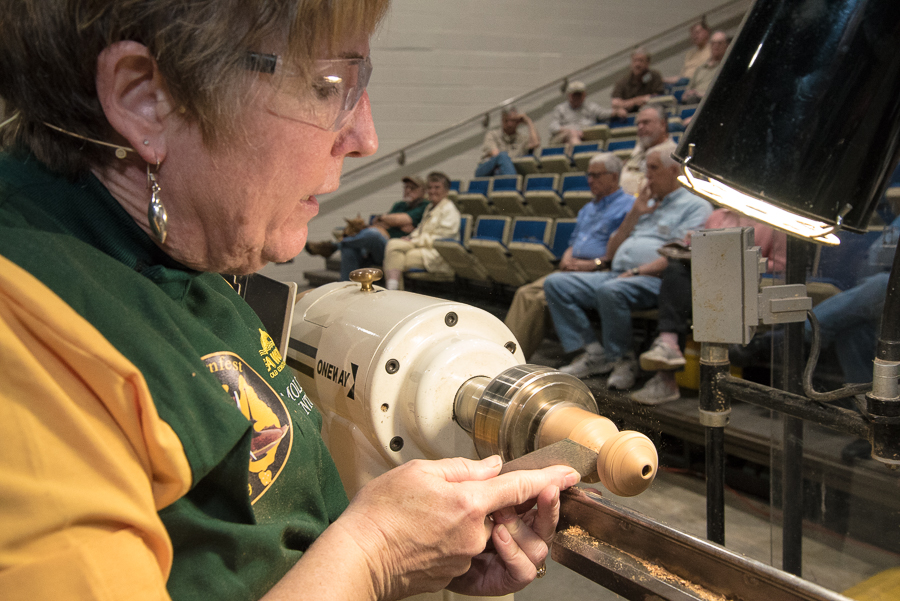
Molly Winton’s highly collectable, signature vessels make her path to success in woodturning appear effortless, but in her demonstration at the Carolina Mountain Woodturners monthly meeting in May, 2019, she helped the audience understand the combination of practice and artistic skill coupled with her passion for design was not developed overnight. She views her unique style as a way to complete her work, not just embellishment for embellishment’s sake.
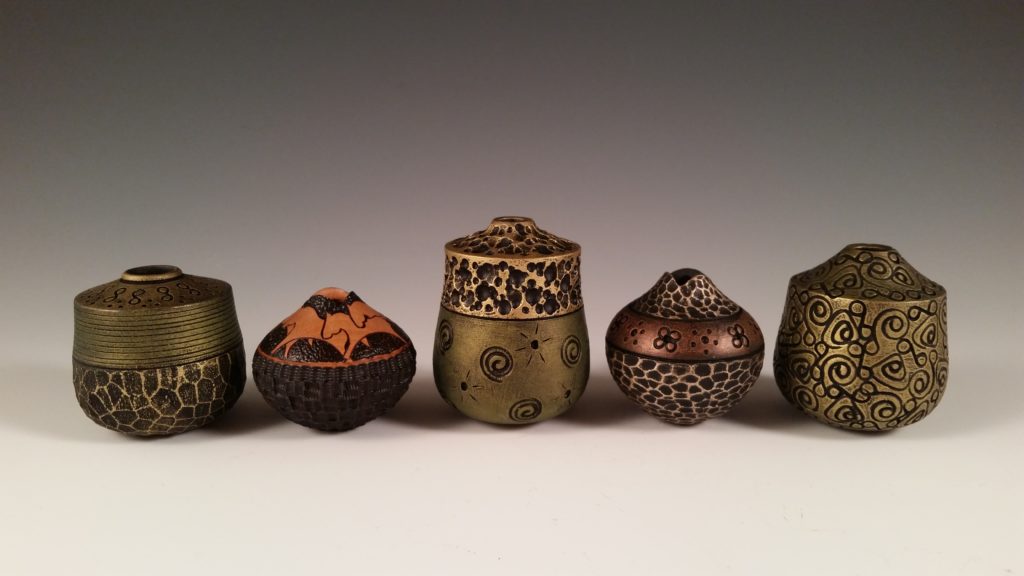
Living in the Pacific northwest, Molly started out making miniature vessels. She gravitated toward textural techniques and discovered the joy of burning for texture. This enhanced the piece beyond the visual enjoyment, creating a vessel that begs to be picked up and touched. Rooted in all her work lies design considerations giving the piece flow. She avoids conflict or struggle with the woodturning’s final form. Turning small pieces allows her to focus on the minutiae of form. When viewing photos of her pieces, she likes the image to belie the actual size. The smaller pieces allowed her to practice without wasting a lot of wood; her favorites, maple and cherry, are not native to the Pacific Northwest, thus, smaller pieces create economy when she turns. She can then scale up the form to larger sizes.
Molly emphasized the value of a critique. Others can help identify what may be off about a piece. She quoted Graeme Priddle – be sure your embellishment comes from a passion in your life – you won’t get bored, but will continue to work on it. Her inspiration comes from the Plains Indians images on baskets. She talked about her own evolution in finding a shape that works with her embellishments. Initially she used a formal, classical shape. A critique enabled to her to see how she really needed a more primitive shape to complete the pieces.
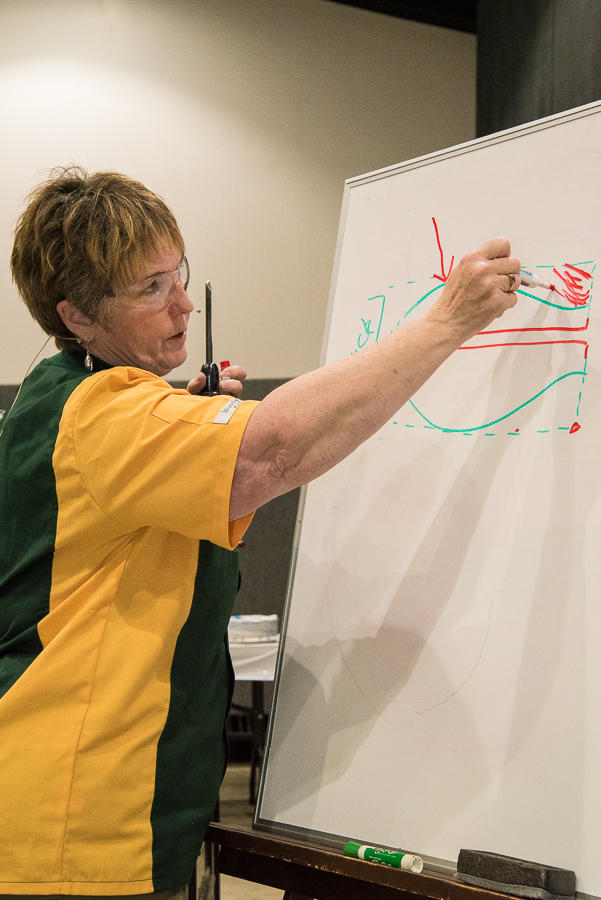
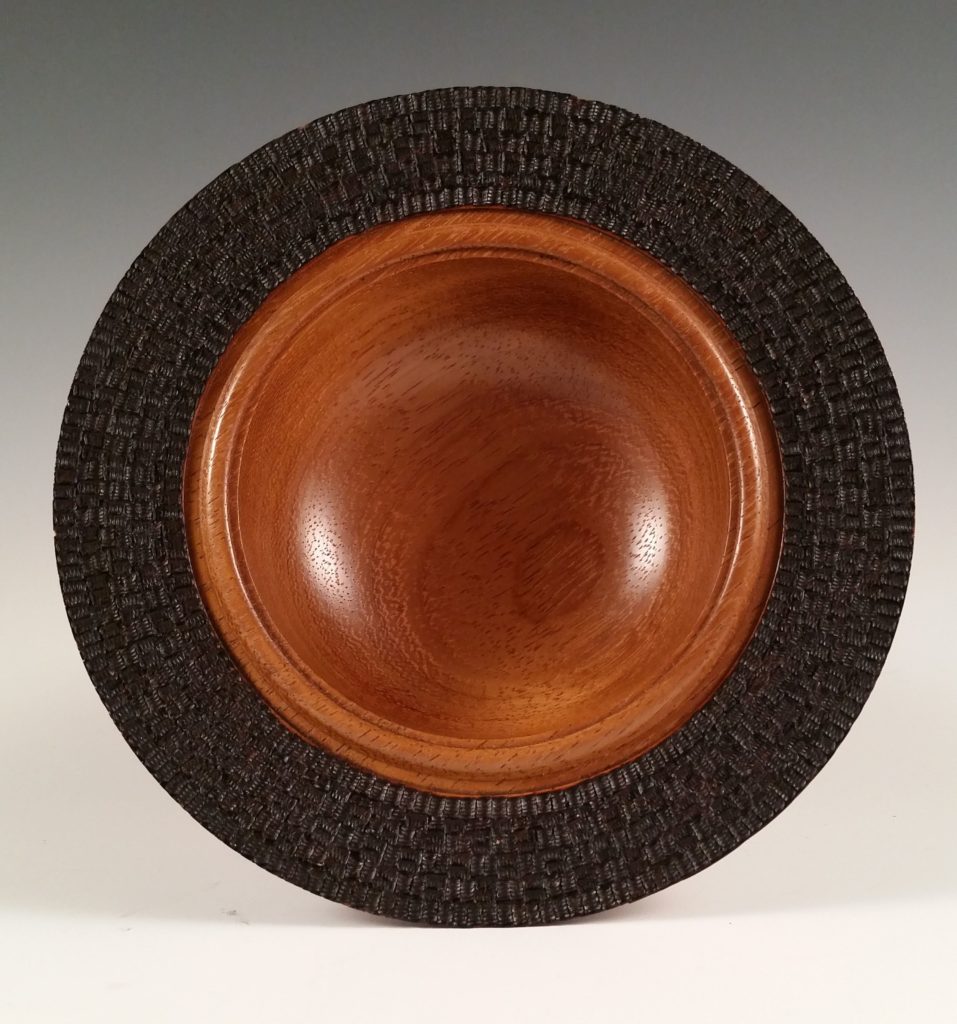
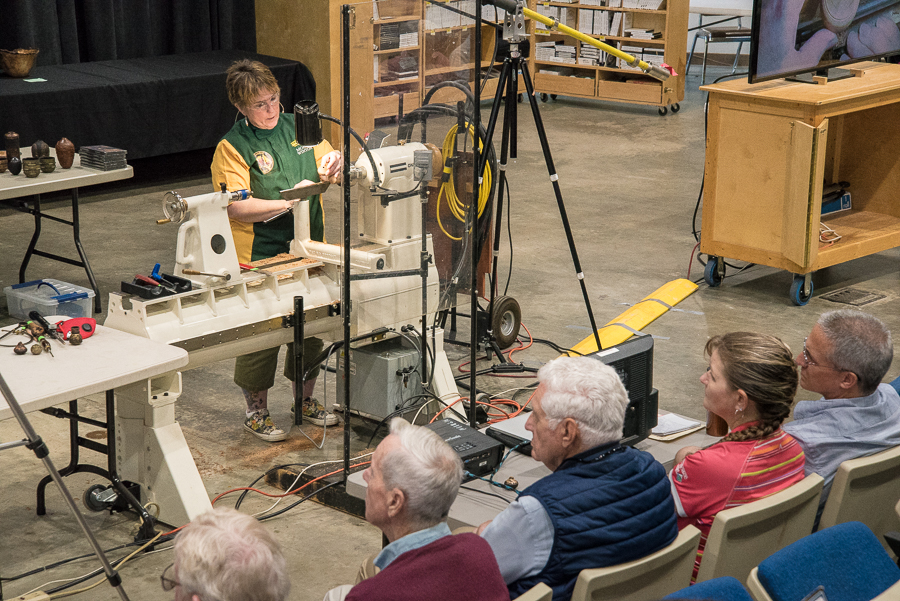
In her demonstration, Molly described while turning, occasionally stopping to draw on the white board behind her. She began with talking about how important the exterior form is and how planning the profile can help avoid design issues in the final piece. What kind of rim will it have, she asks. If it’s round, no calculation needed. But many of Molly’s pieces have a fluted rim that can help the piece look as though it’s actually another medium, giving it a fluid feel, almost like it is the opening of a basket rather than stiff wood. With the fluted edge, she needs to leave enough of the rim to carve away. She also showed us a square rimmed vessel which requires a lot more wood to trim away.
She showed where the most vulnerable part of the form is when hollowing and how to avoid this potential weakness.
Here are the steps she took as she turned the vessel, calculated for fluting:
1. Turn the corner shoulder and true it up
2. Cut away waste wood
3. Turn flute of gouge to about 3 o’clock so the tool does not jump back or run back, then gently open up to 1 o’clock – get a greater cutting edge
4. As waste wood gets taken away, start to form the top portion of the vessel
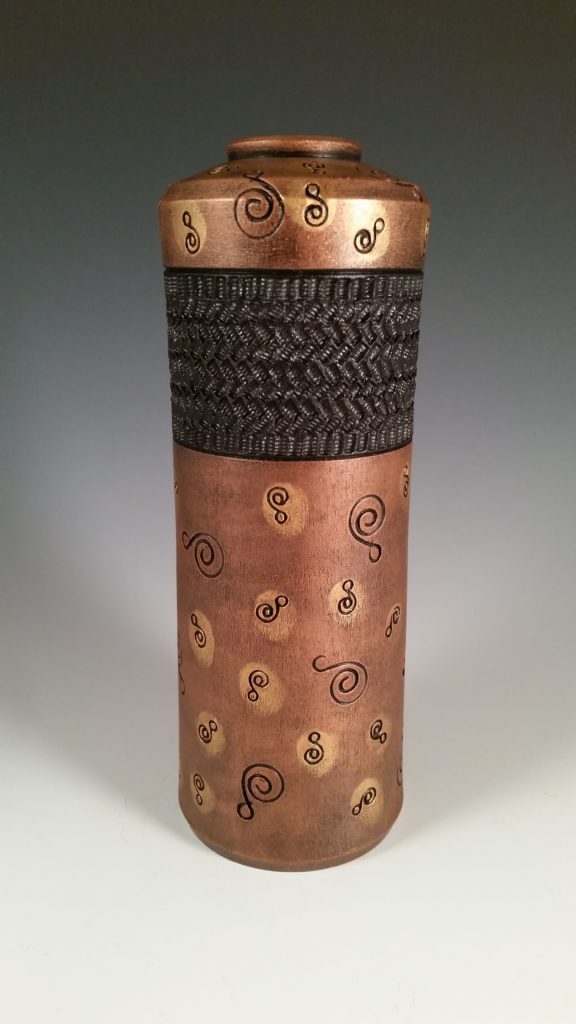
5. She uses woods depending on the outcome, cherry is her favorite – with imagery, closed pore woods give better surfaces areas for burning
6. Cut into end grain, paying close attention to the blunt fibers of the end grain
7. Cut back lower part of wood (side grain) and then return to the end grain
8. Then sheer cut using the edge of her tool, taking refined cuts
9. When adding embellishments, separates into thirds – top third is for the image, bottom two thirds basket weave
10. If you divide a piece in half, the piece ends up looking dumpy – either third on top or base to make it more evenly distributed
11. Pencil mark the top third – can be measured if you like, cut the groove to make the top third – use tip of bowl gouge, specialty tool, or other tool to make the groove
12. Sand only if she is not going to carve or burn
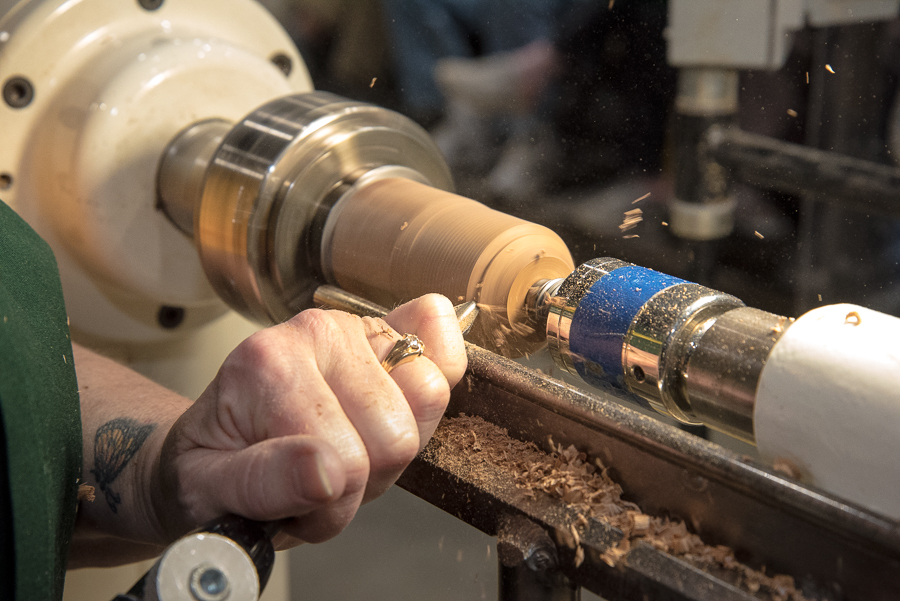
13. Uses a hollowing tool specifically for hollowing small vessels. Flute of gouge must be at 12:00
14. Push – shavings will ride up the flute – then clear frequently – push until it stops
15. Takes waste out with gouge – flute at 12:00 then rotate against herself – inside cutting edge is at 10-11 o’clock
16. Gently cut back and forth – clear shavings frequently – and widen out the space – pulling toward the outer edge – go as deep as far as she can feel it stop
17. Widen out the initial hole
18. Clean up the rim carefully even out
19. Now angle the gouge a bit – pulling out and clearing shavings. Using tip as a probe – to make sure not cutting out the bottom
20. Switch to bowl gouge because the angle of the spindle gouge can no longer reach
21. Molly used allen wrench modified – leaves the 90 degree of the wrench but shortens the wrench and makes a tool – flattens out the top of the allen wrench – see photo
22. Cut at center or slightly below center
23. Start at the rim and pull toward herself- back and forth as she goes down the wall – and she stops periodically to get the chips out – uses the tool to scrape some of the chips and then blows the shavings out. Rotates the chuck as she blows so she removes all the shavings
24. Following the exterior profile, keeping the shape of the vessel
25. After she clears out the shavings, she uses the tip as a probe to see where she last cut
26. You can use a caliper to check wall thickness
27. Do not go micro-thin because if you are piercing or burning, you need the extra wall thickness
28. The curve is where the most likely place to accidentally blow out, so she recommends leaving a lump (see image) and then take that lump out last
29. Now finish the exterior – She recommends not giving in to adding a pedestal if the piece is close to the chuck – she makes a jam chuck for the piece to finish the bottom – not letting her tool get in the way
30. She checks her curve to be sure there are no flat spots on the vessel
31. Rim size to base size – base slightly smaller than rim – although if the piece is really small, she makes them about the same diameter
32. She angles up her parting tool to get the concave base

Embellishing
Using a reciprocating chisel – Molly demonstrated the different depths/profiles from flat to u-shaped
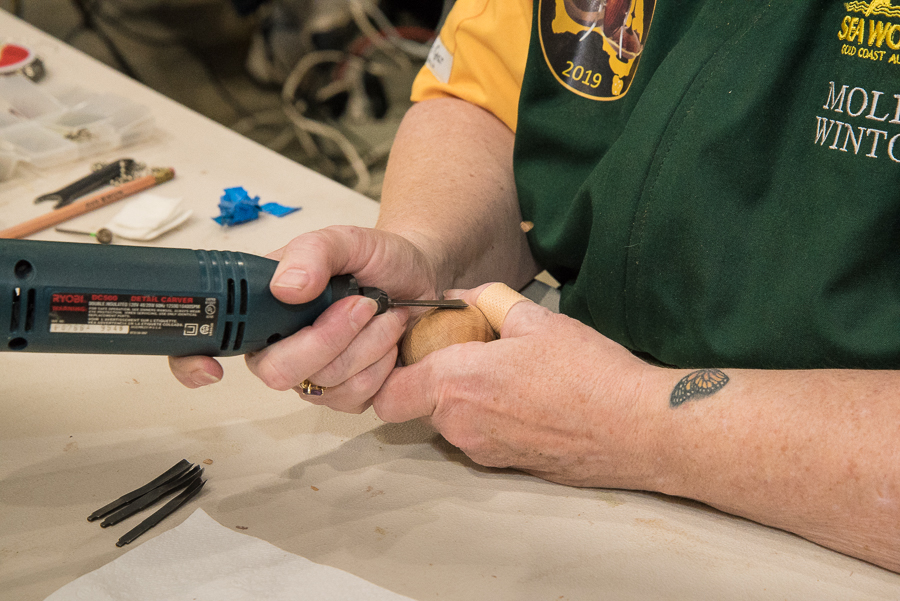
Different levels and widths for different looks
Molly then continued by creating the fluted top of the vessel.
- Divide the circle into three evenly spaced lines to mark where the carving will take place
- Carve edges
- Switches to a diamond edge to finely touch up the fluted top
She then creates a “brand” to use with her Burnmaster to create the basket weave texture on her turning. (A photo montage of the process is located in the Resources section following this article.)
- She commonly uses 20 gauge Nichrome wire (Jacob’s-online.biz)- the greater the number, the finer the wire.
- 4-5 inch piece of wire, pair of needle nose pliers – the brand needs two legs long enough to insert into the burner pen, but short enough to keep its integrity when pushing into the wood.
- drill bits with mandrel 2 sizes ( 5/64, 1/16), cut off the fluting of the drill bit to make the brand, a mandrel helps because is has the flat section to lay the wire against it
- use the vise grips to hold the wire against the mandrel so that you can have consistent pressure to make sure the wire is even.
- Wrap the wire around the mandrel five times for five coils
- Hold the coil with needle nose pliers as you straighten out the two legs of the brand
Once the brand has been created, Molly inserts the legs into the Burnmaster pen and finds the right heat by testing it on a piece of wood. She methodically and skillfully burns the wood.
Molly Winton can be contacted at her email address – [email protected]
If you would like to renew your membership so you can utilize our library, participate in our popular Arrowmont Retreat or attend TLC classes, please visit – http://z83.628.mywebsitetransfer.com/…/basic-membership
Resources
Thanks to Ann Ogg for being the author of this article. Thanks to Scot Roberge for taking the Instant Gallery photos as well as photos related to Molly Winton’s ‘live’ demonstration.
Edited and respectfully submitted by Mike Seltzer