
Tucker Garrison Demonstrates for CMW on 02/16/2019
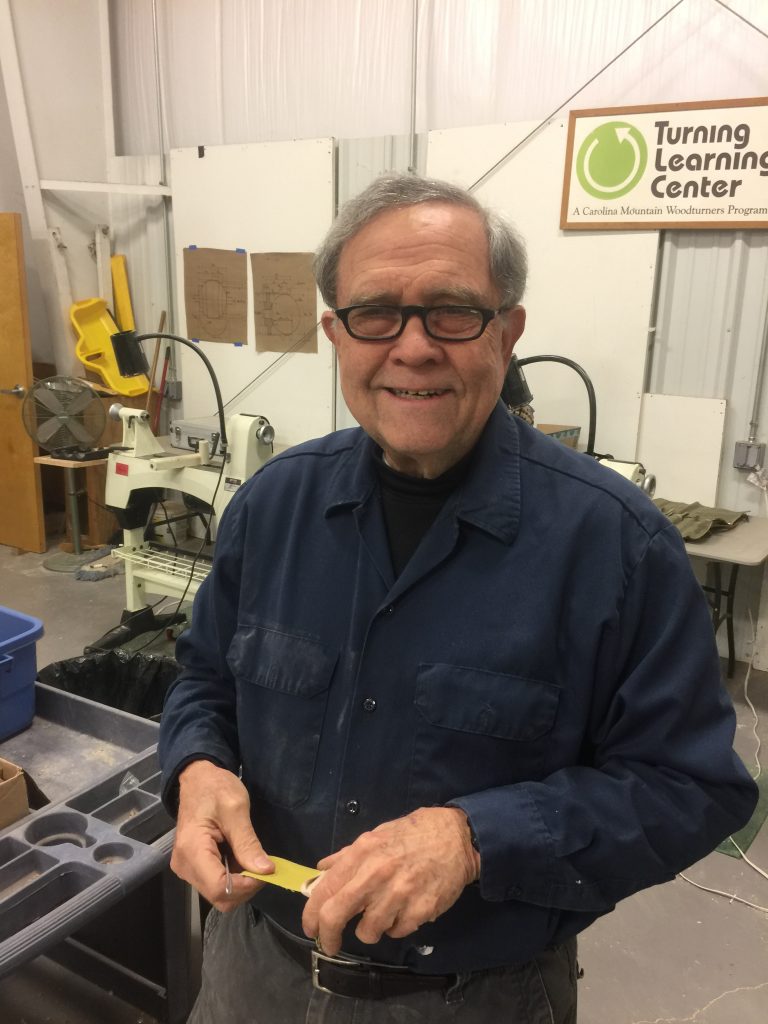
CMW was privileged to have one of its own members, Tucker Garrison, be the Demonstrator for February, 2019. Tucker has been a long standing member and Board member of CMW. He has been instrumental in coordinating many of the educational activities of our organization. One example of his efforts is arranging our annual and very popular Arrowmont retreat.
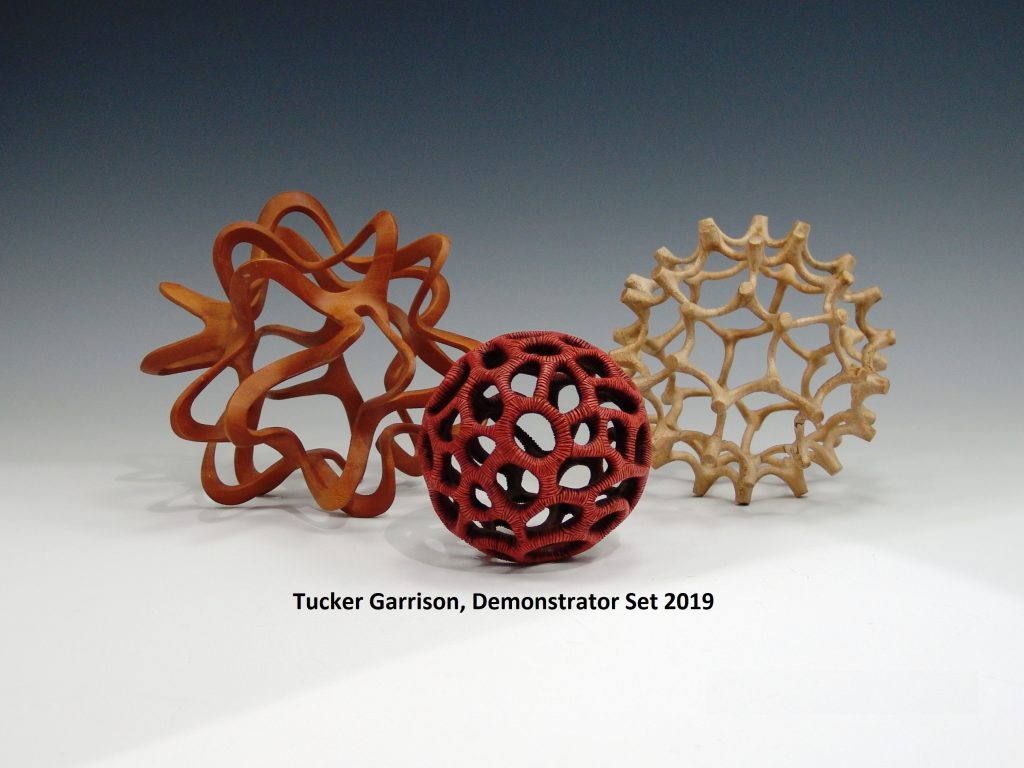
The focus of Tucker’s demonstration was on how to turn a 4.5 ” spherical form and then the creative options for shaping and carving this form. Key to the completion of this project was the creation of a chuck (jig) that allowed the sphere to be captured and held on the lathe.
It is impossible to share all the information, methods, tricks and data that Tucker imparted. It really helped to have been there in person. It was especially helpful to have participated in his 3 days of subsequent class instruction.
The morning session began with an outline of turning the chuck. The idea of a spherical chuck requires a positive mindset on the part of the audience; one that can not only grasp ( pun intended) the details of the piece and the turning skills required; but, also to be aware that this very complicated piece is a means to an end and not the end itself.
A schematic of the sphere chuck ( jig ) is included here.
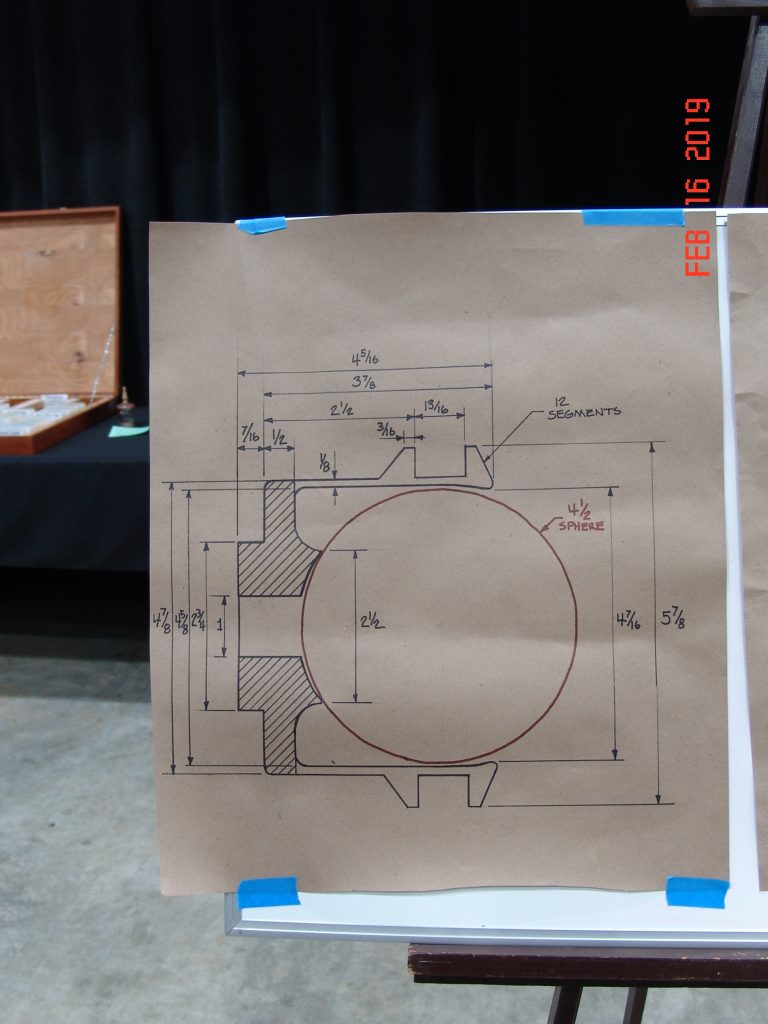
Tucker began by turning an 8-10″ long semi-green block of Ambrosia Maple to an O.D. of 6 “. A tenon should then be turned on one end appropriate for the size and shape of your chuck jaws and perfectly flat or with a slight concavity. A tenon depth ( thickness) of 7/16” was recommended for support if your chuck jaws allow this depth. He then applied fiberglass cloth backed by blue masking tape to 3 places on the tenon and base of the chuck, with CA glue, to help prevent cracking from wood shrinkage.
The exterior was turned to its final dimensions, noting the raised area surrounding the aviation ( hose type ) clamp slot which is designed to provide knuckle protection.
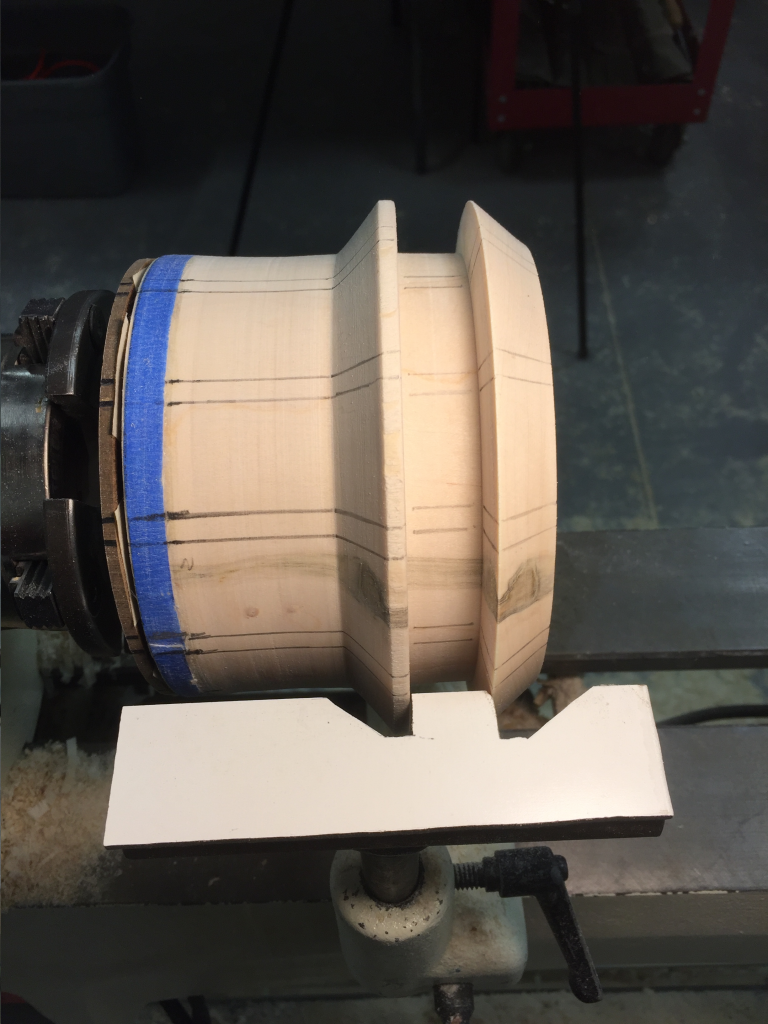
The chuck was then hollowed with a combination of tools ranging from hook tools to bowl gouges and round nosed scrapers. Particular attention was given to the outside wall thickness since variations in thickness would allow the chuck to compress unevenly.
The piece was then symmetrically marked around the circumference to show the 12 ” fingers” and waste material was removed with a Foredom tool followed by hand sanding.
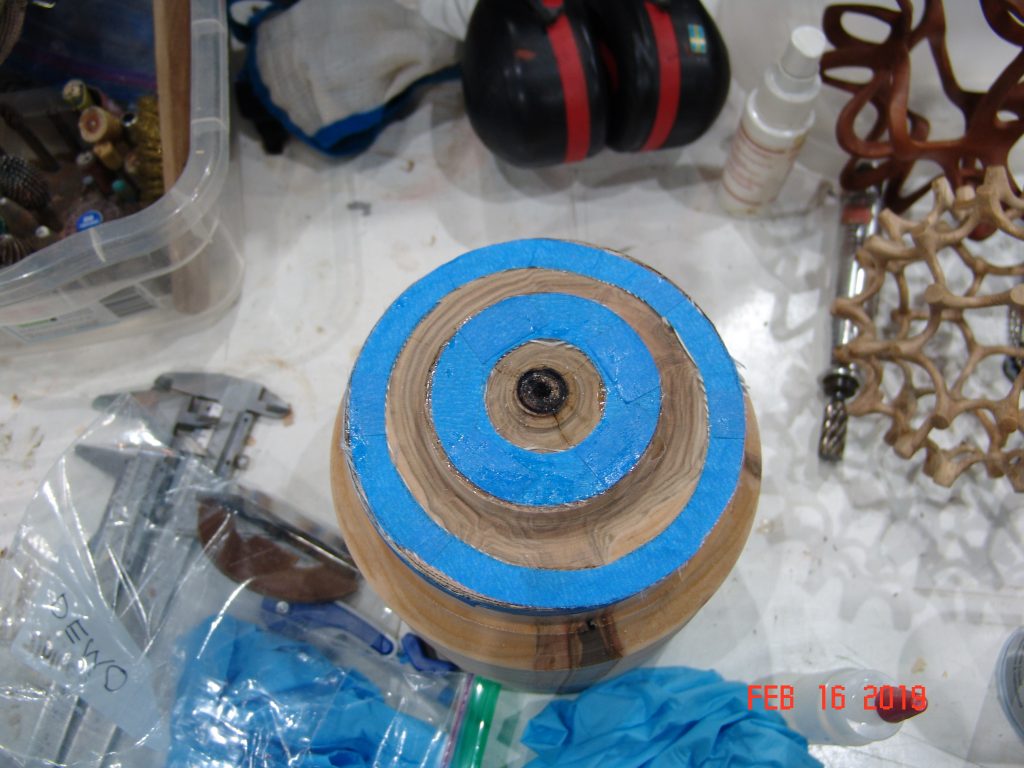
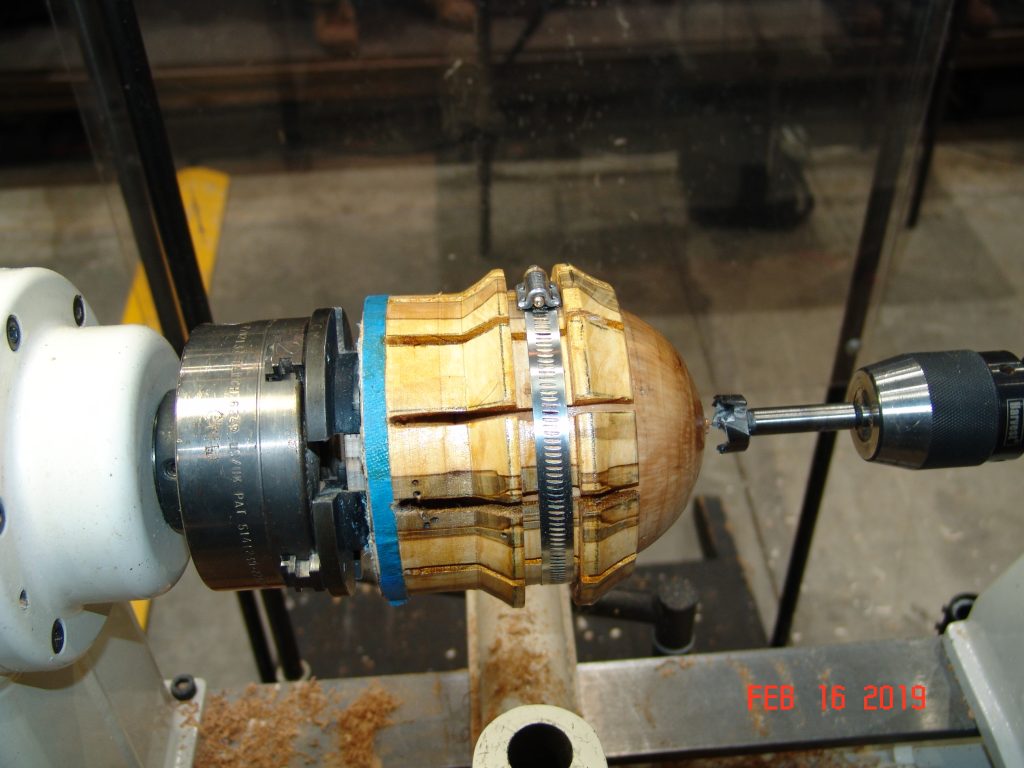
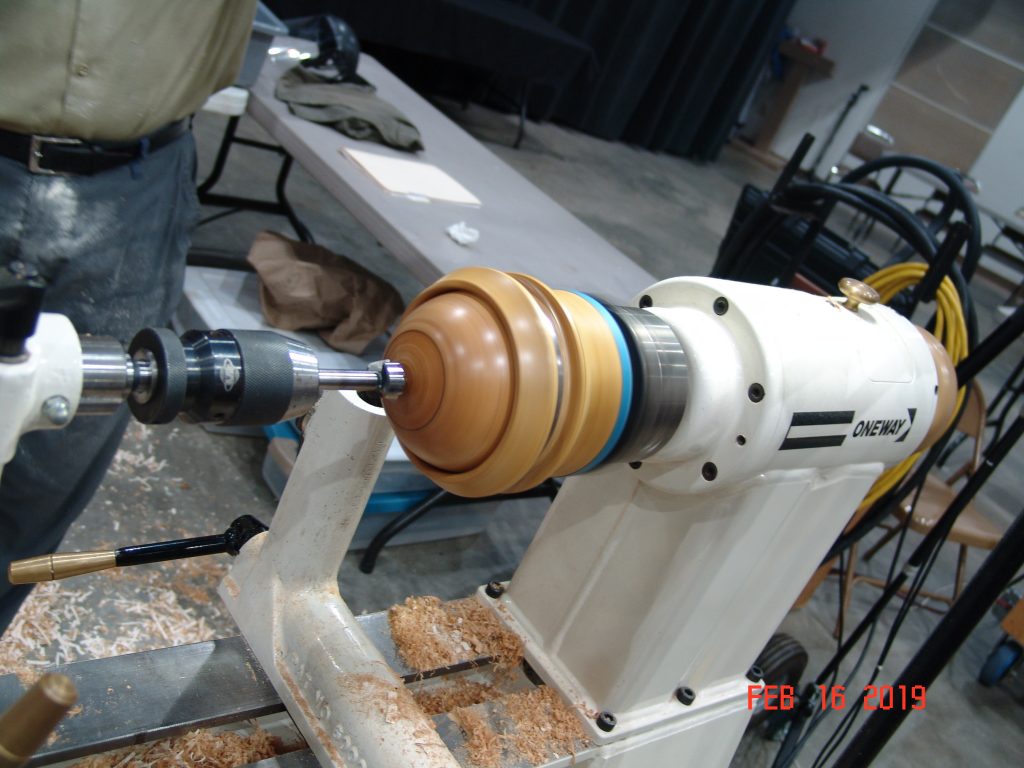
Photo below of completed chuck ( jig ) holding sphere.
Next a 4.5″ sphere was turned. Another Maple blank was chucked and turned to a 4.5″ sphere using calculated step points based on circular geometry to facilitate this turning. A schematic was also provided for this step and is illustrated below.
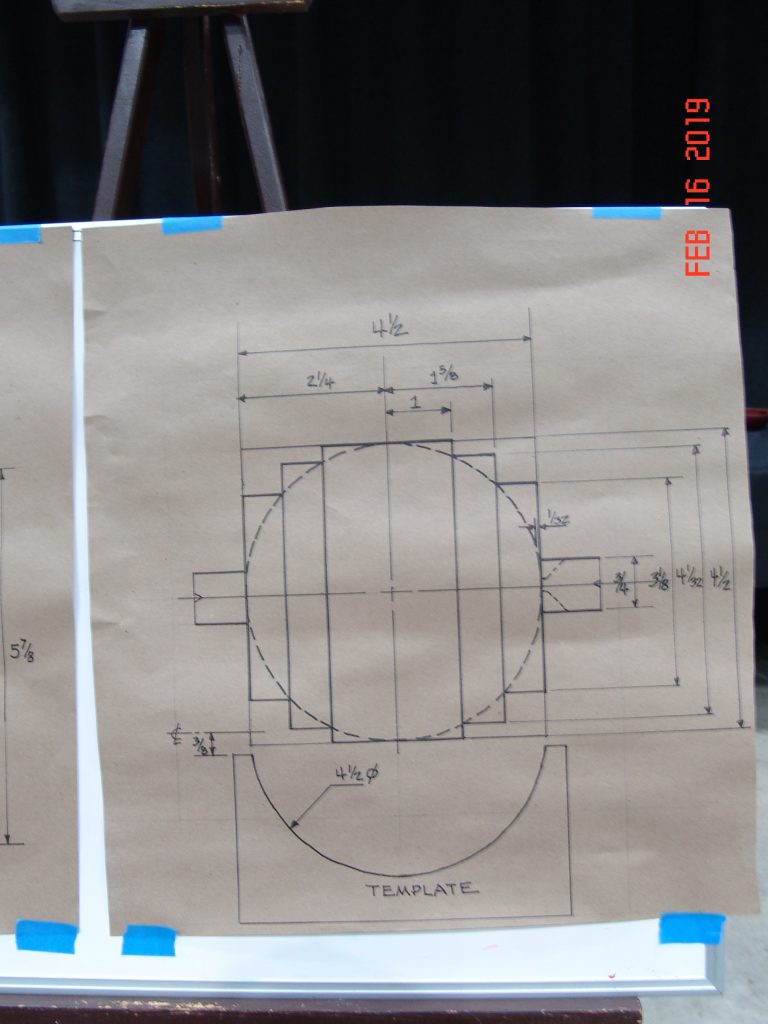
A 4 1/2″ curved semi-circular template was utilized to facilitate accurate creation of the sphere.
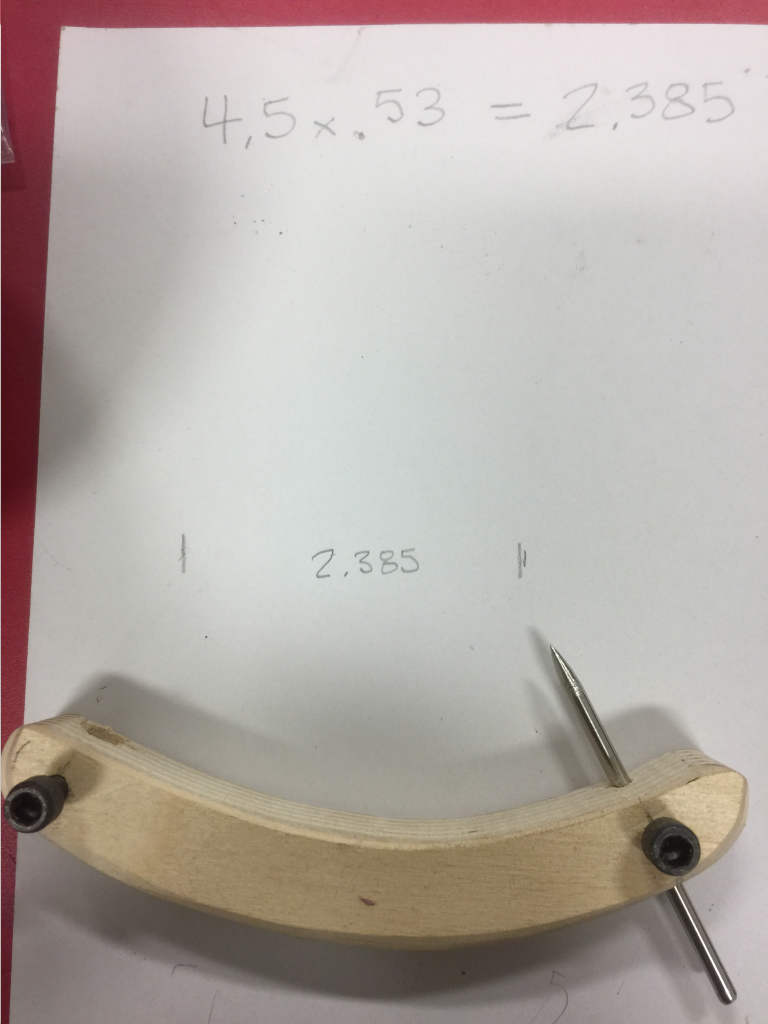
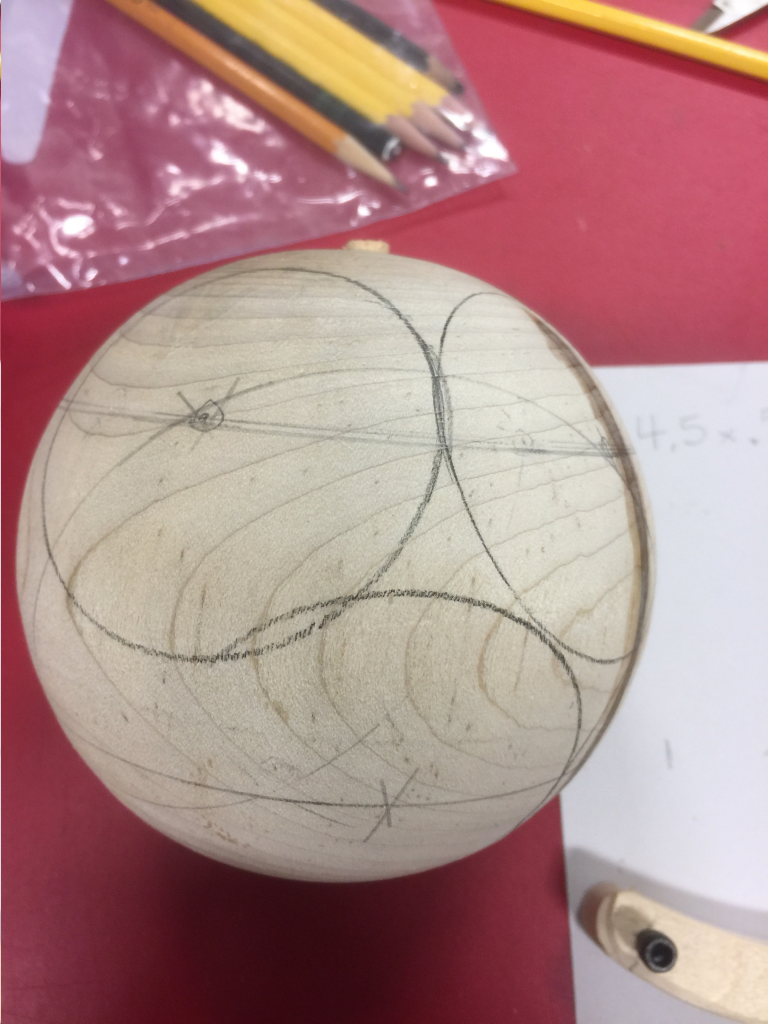
Next, Tucker used his own spherical compass design to mark out 12 equally spaced points on the Maple sphere. This was calculated to be close to 2.4 inches. Note a pencil will be inserted in the other hole so that the pencil tip and the nail point are the calculated distance apart.
Next, using a regular compass, circles were drawn on the sphere with with the edges of each circle hopefully just touching the adjacent circles. The diameter of each circle was again very nearly 2.4 inches.
Now is when design opportunities abound. The above ” marked” sphere is placed in the chuck. A convexity, which will be illustrated, or a concavity, or neither, can be turned. Initially a small hole ( 1″) to facilitate hollowing is created using a Forstner bit.
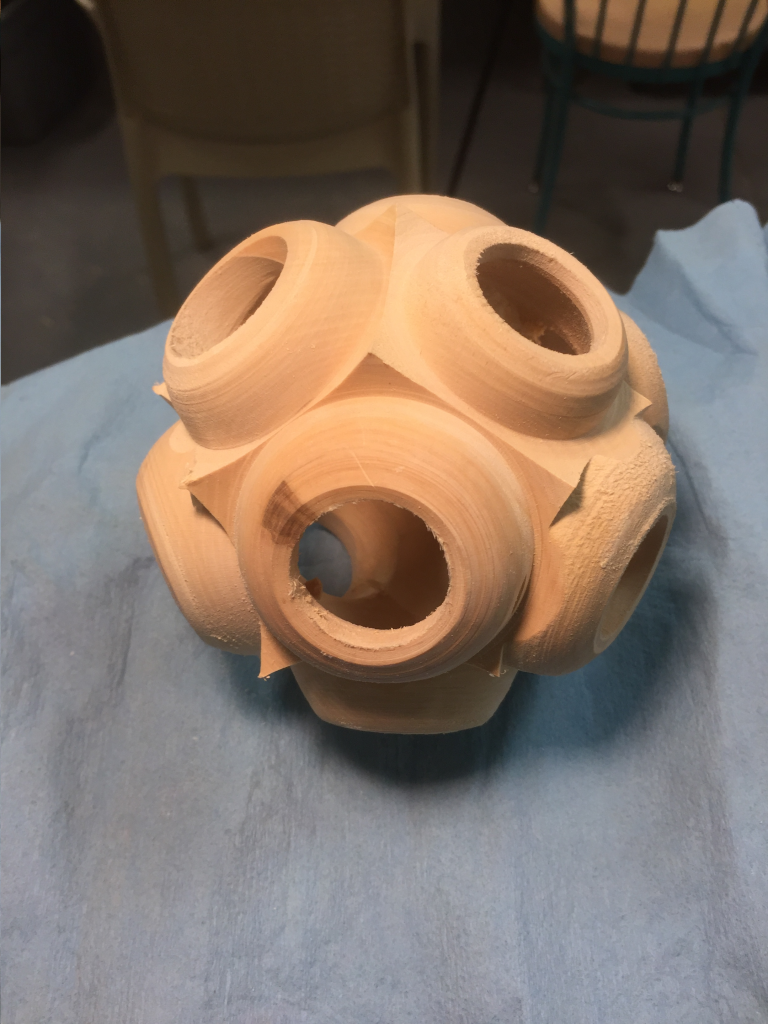
Next a convexity is turned almost to the diameter of each circle and then each convexity is hollowed.
After doing this 12 times one is left with the following:
At this point a decision was made to create a free form asymmetrical sphere. One way to conceptualize how to outline doing this is to draw asymmetric circular shapes around each convexity so that at least one high point ( next to the drilled opening) and one low point ( the valley between the two convexities) is included. This pencil line is then widened to approximate the diameter of the wood to be kept. The remainder will be carved away.
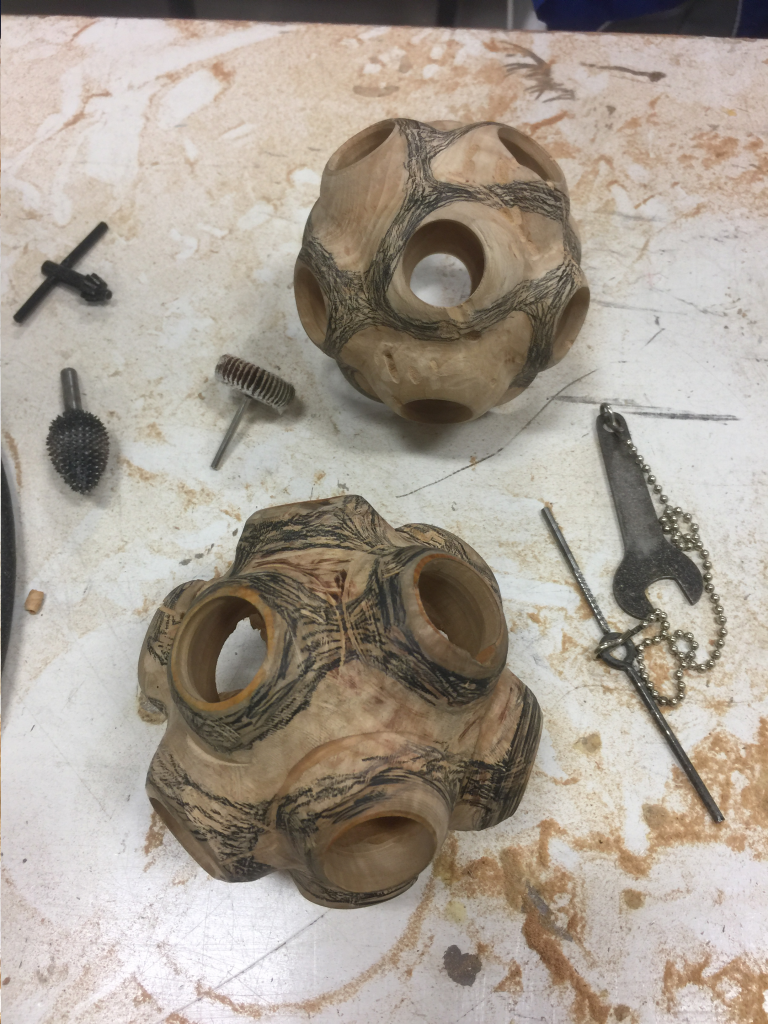
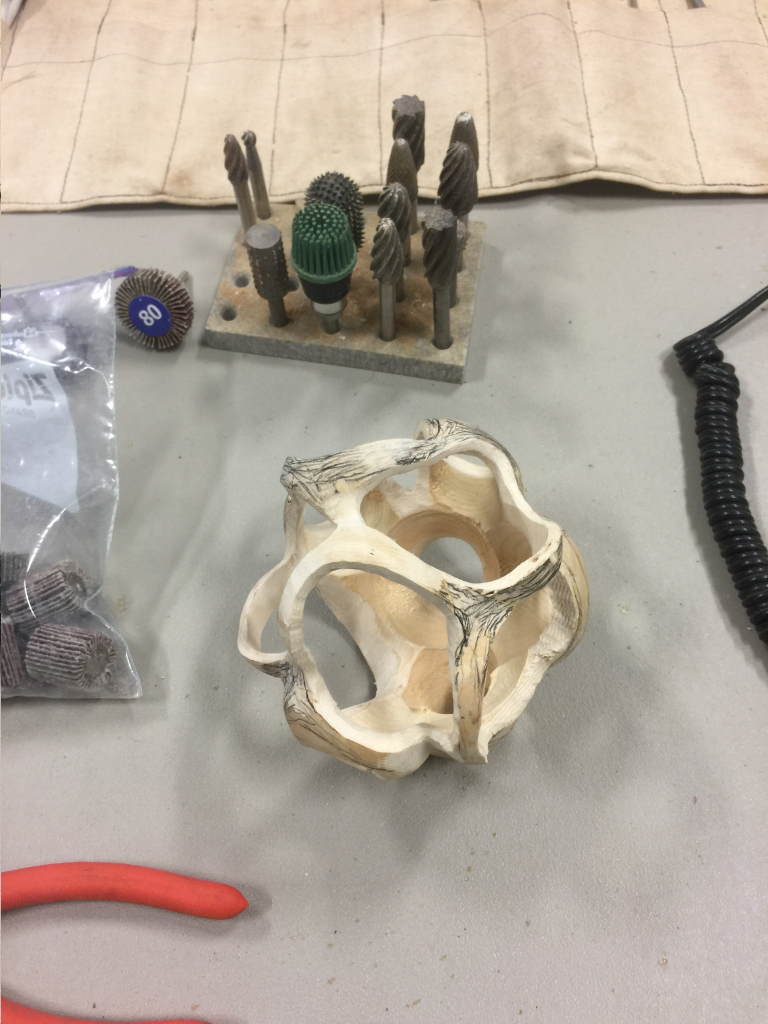
Next, using various drill bits and burrs removal of the unmarked wood is done which results in the appearance similar to the following:
At this point a great deal of additional time and energy is required for final shaping, sanding and finishing. In answer to a question from the audience Tucker indicated that it requires 30 hours or more to complete a piece of this type. More symmetrical convex or concave shapes with no or less wood removal carving could certainly require much less time.
Next is a photo which visually summarizes the steps taken.
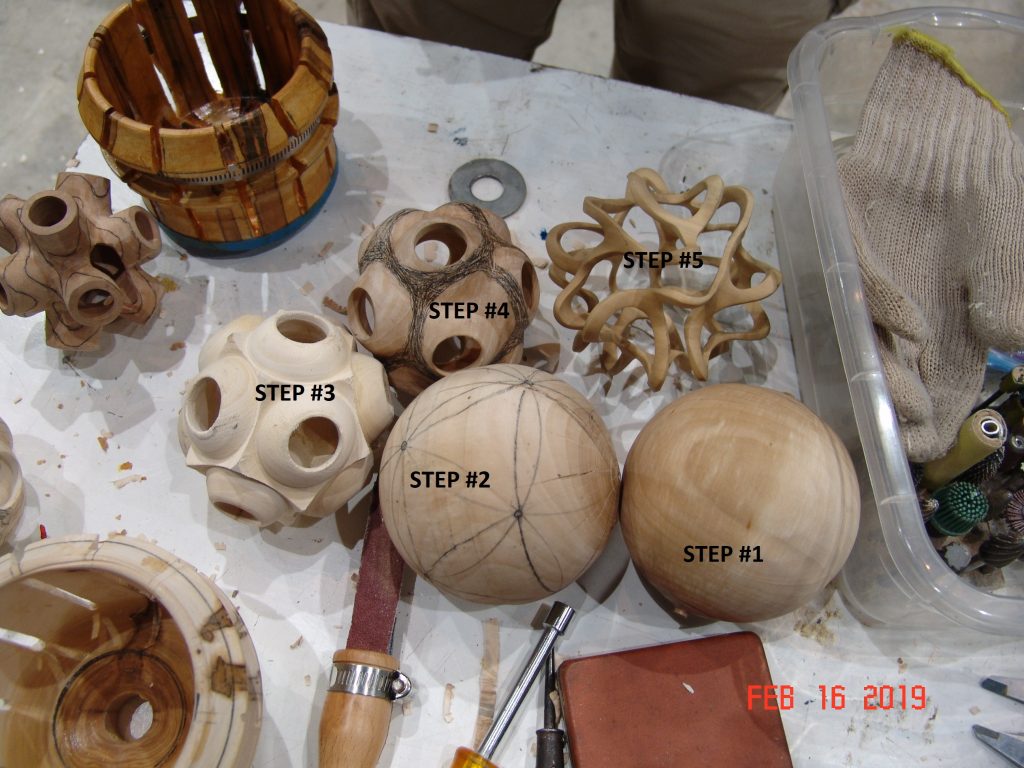
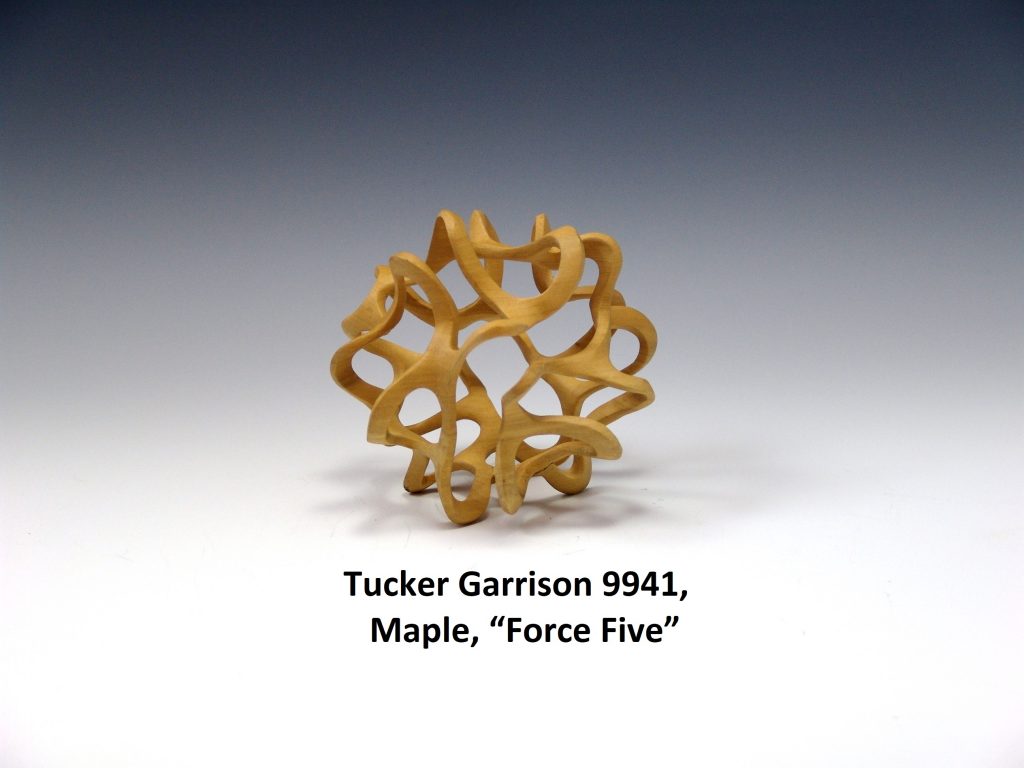
Photo that follows is ” Final Result”!
It should be acknowledged that Tucker spent three full days providing class instruction and also provided measuring jigs, templates and even a 1/4″ high speed steel curved hollowing tool for use and to take home by the class participants. His energy and enthusiasm were greatly appreciated by all of the CMW members. Thanks very much.
To contact Tucker Garrison please use the following email address: [email protected]
If you would like to renew your membership so you can utilize our library or participate in TLC classes, please visit –
http://z83.628.mywebsitetransfer.com/…/basic-membership
Co-Authors: John Brown & Mike Seltzer
Photos courtesy of Tina Collison and Mike Seltzer
Edited and respectfully submitted by Mike Seltzer.