
Mark Garner Demonstrates for CMW – January 21, 2023
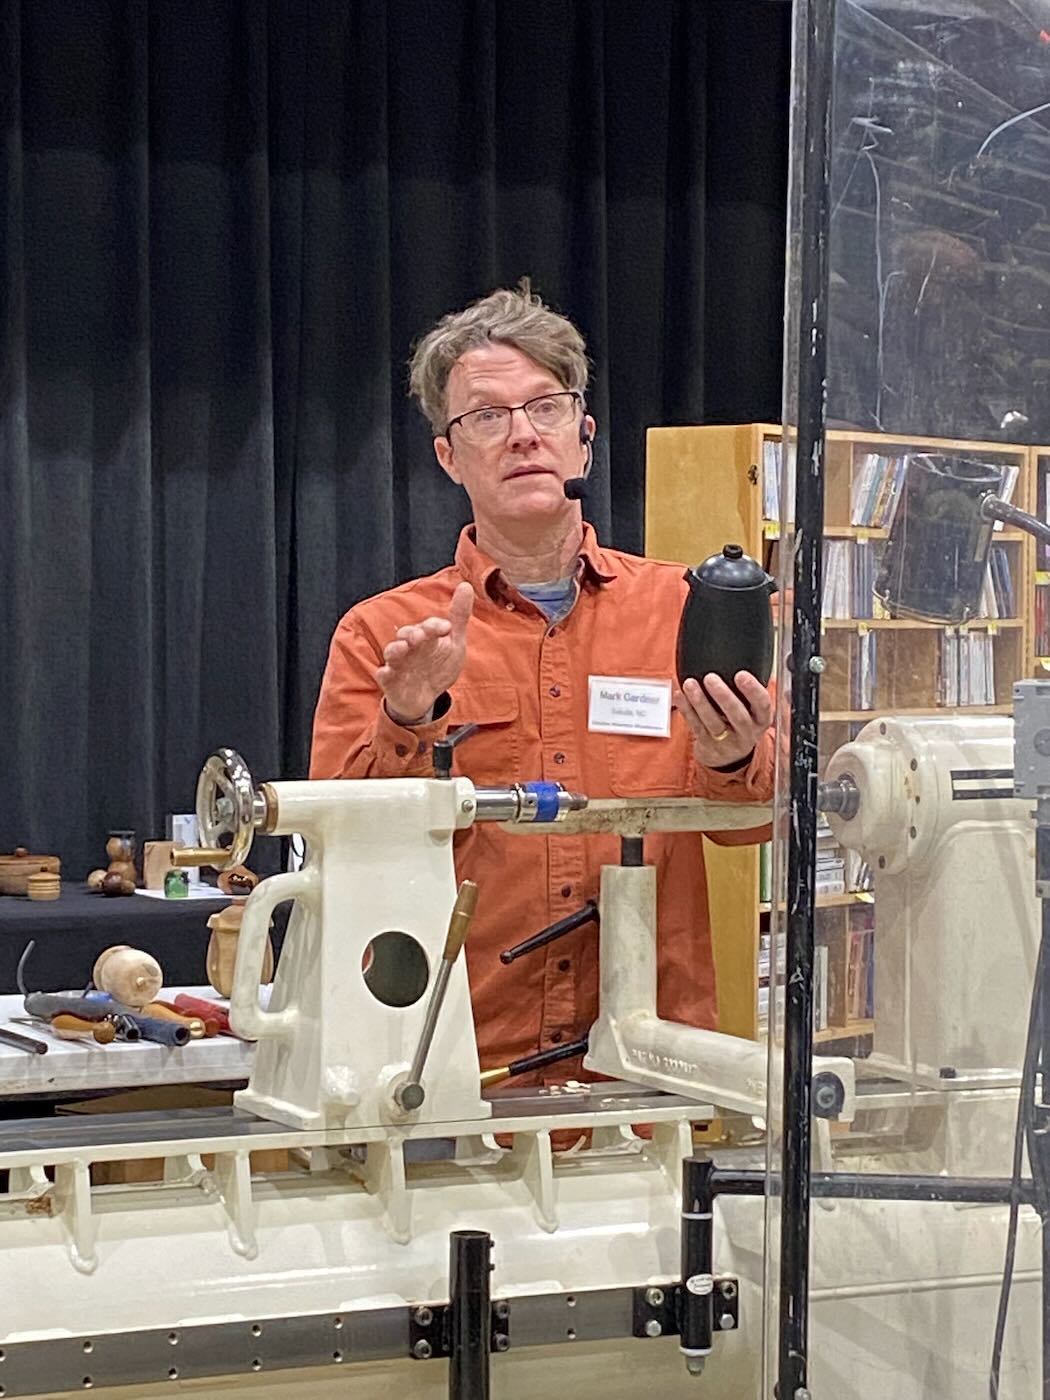
Mark comes to us from Saluda and is also a CMW member. In this demonstration, Mark uses green wood to make a hollow form without hollowing. Then he showed us several techniques for embellishing using texturing, milk paints and dyes.
Creating the hollow vessel without hollowing:
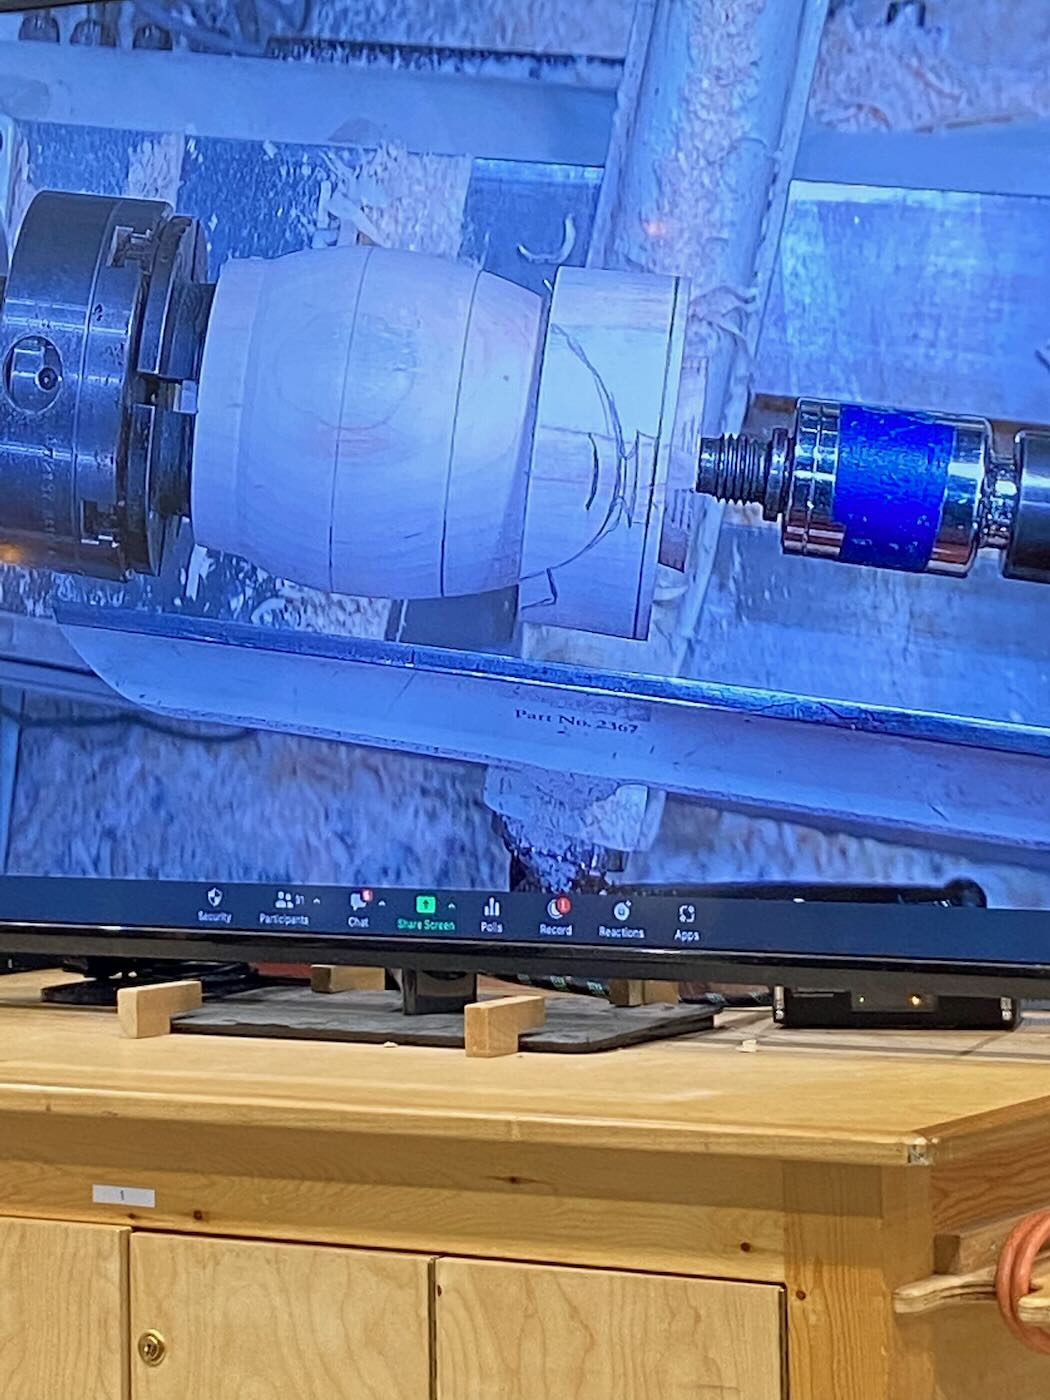
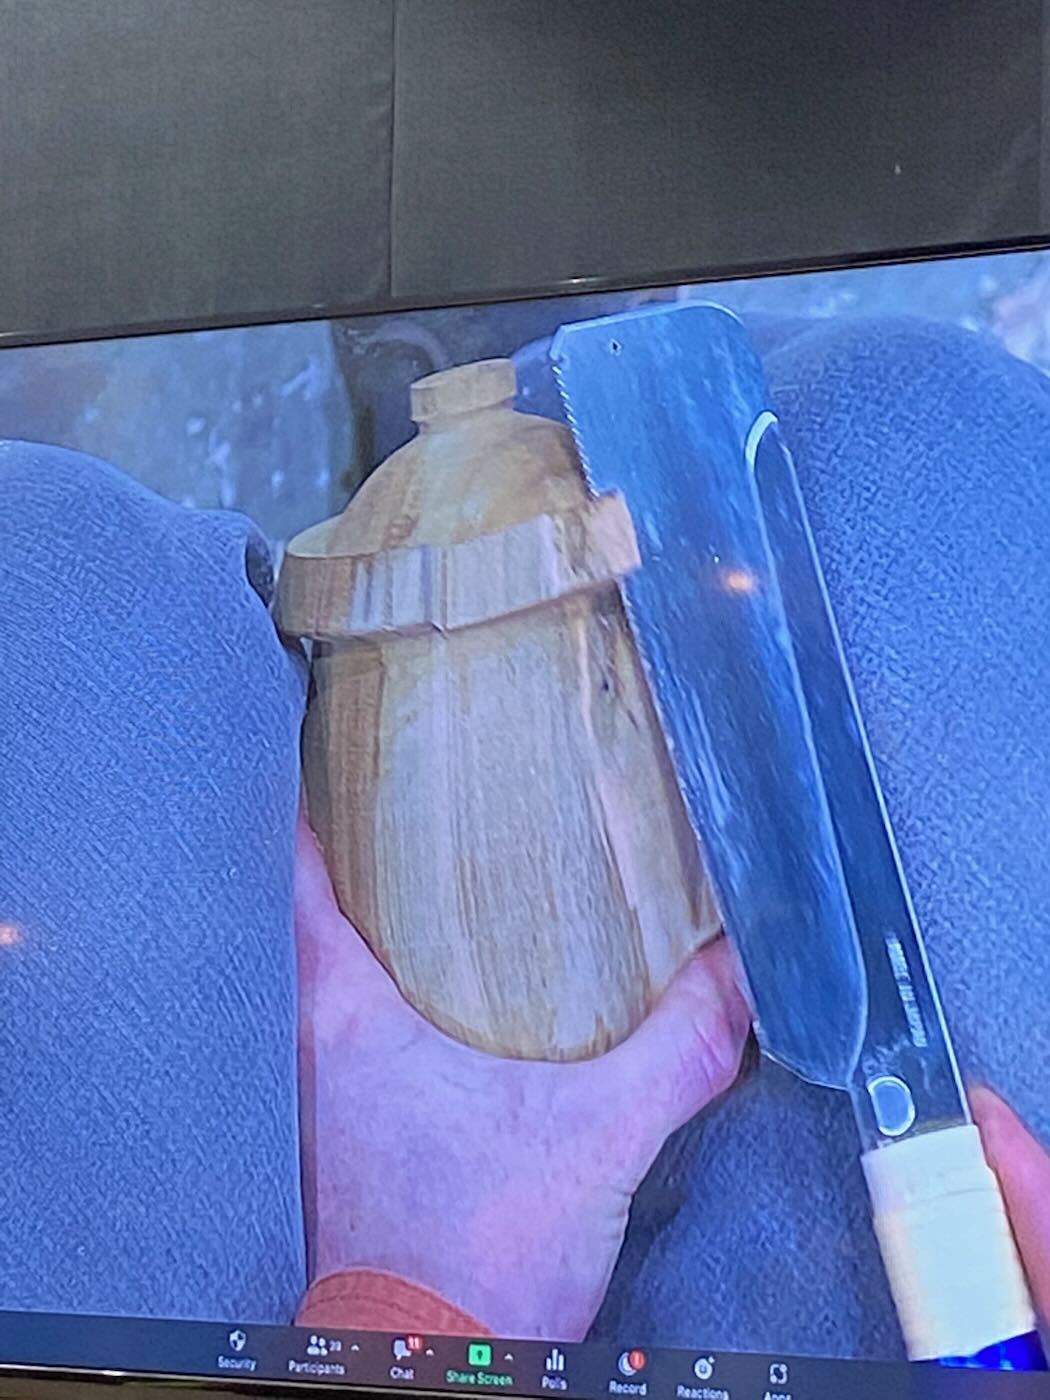
A rectangular piece of green wood is used for this project which has been cut like a spindle blank. For this demonstration, Mark used Red Maple. Other good stable woods for this project are walnut, Cherry (without sap wood), or Ash. Avoid fruit woods, or oak. These vessels are made with Mark’s signature handles on the upper third of the vessel.
- Round the blank and create a tenon on both ends
- Design the piece – independent of the tenon length
- Mark where the handles will be first using a “V” cut and shape the upper portion of the piece.
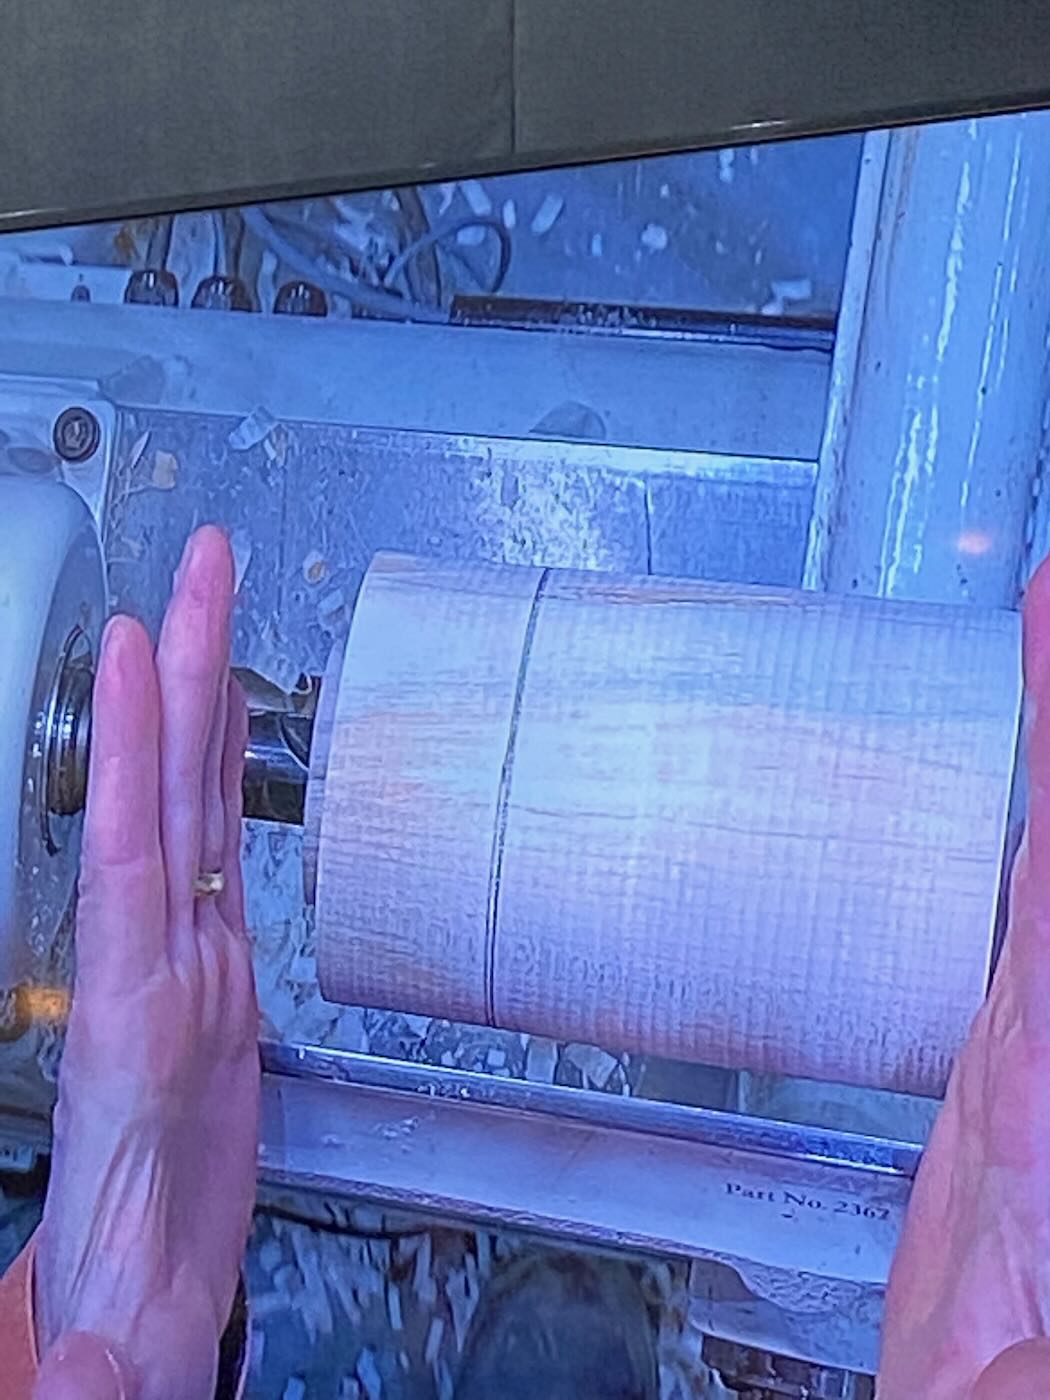
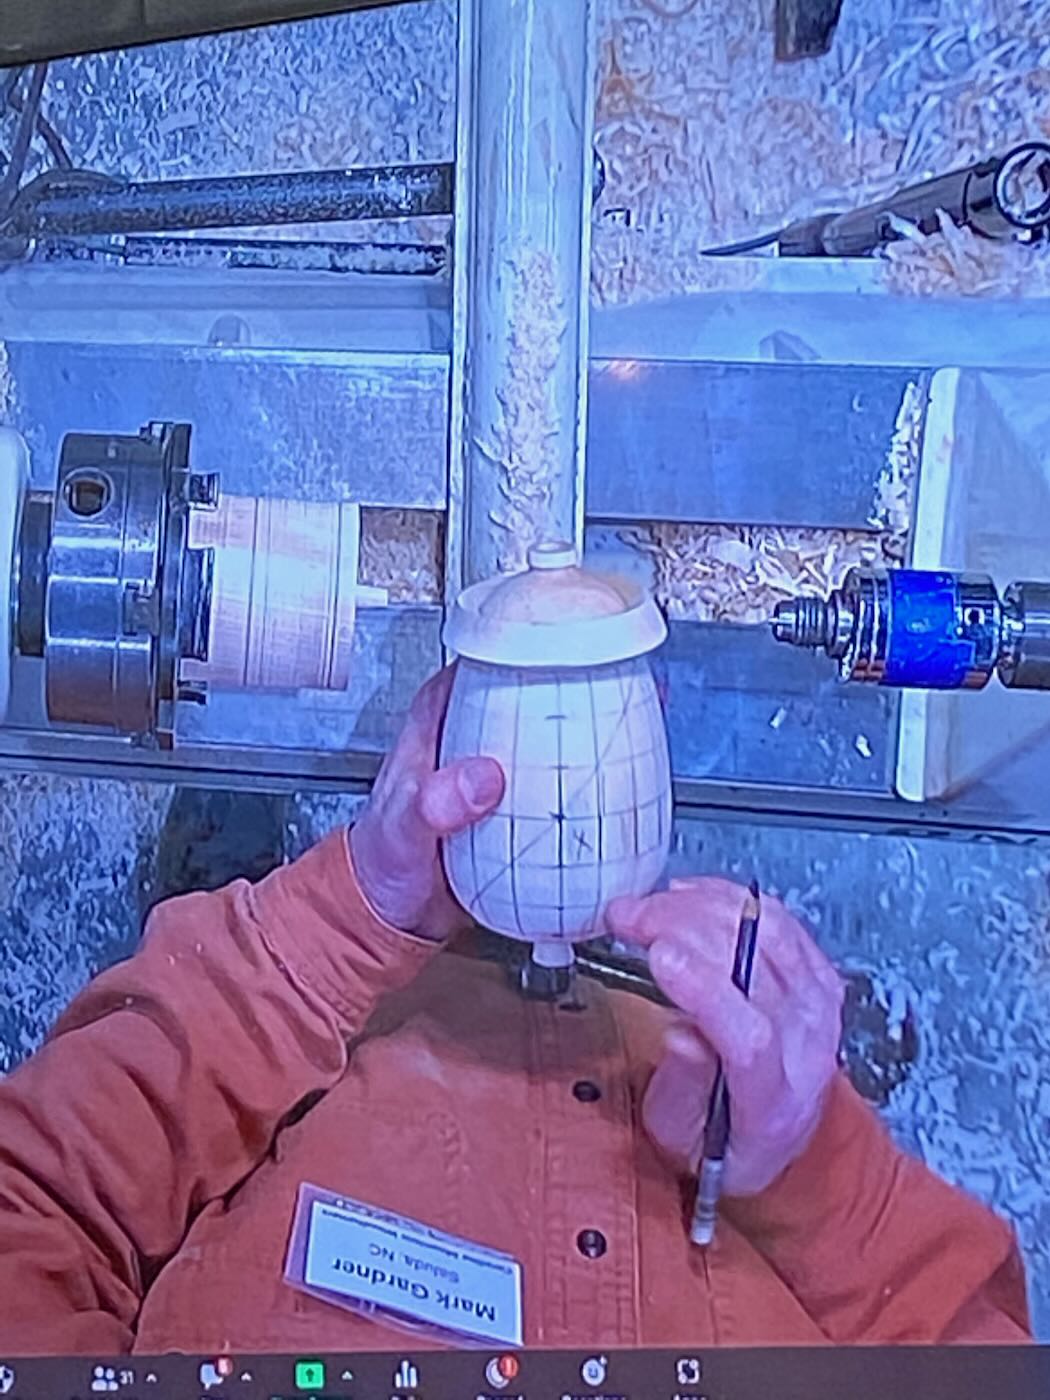
- Shape the bottom – usually “egg” shape – with the narrow part of the egg at the top
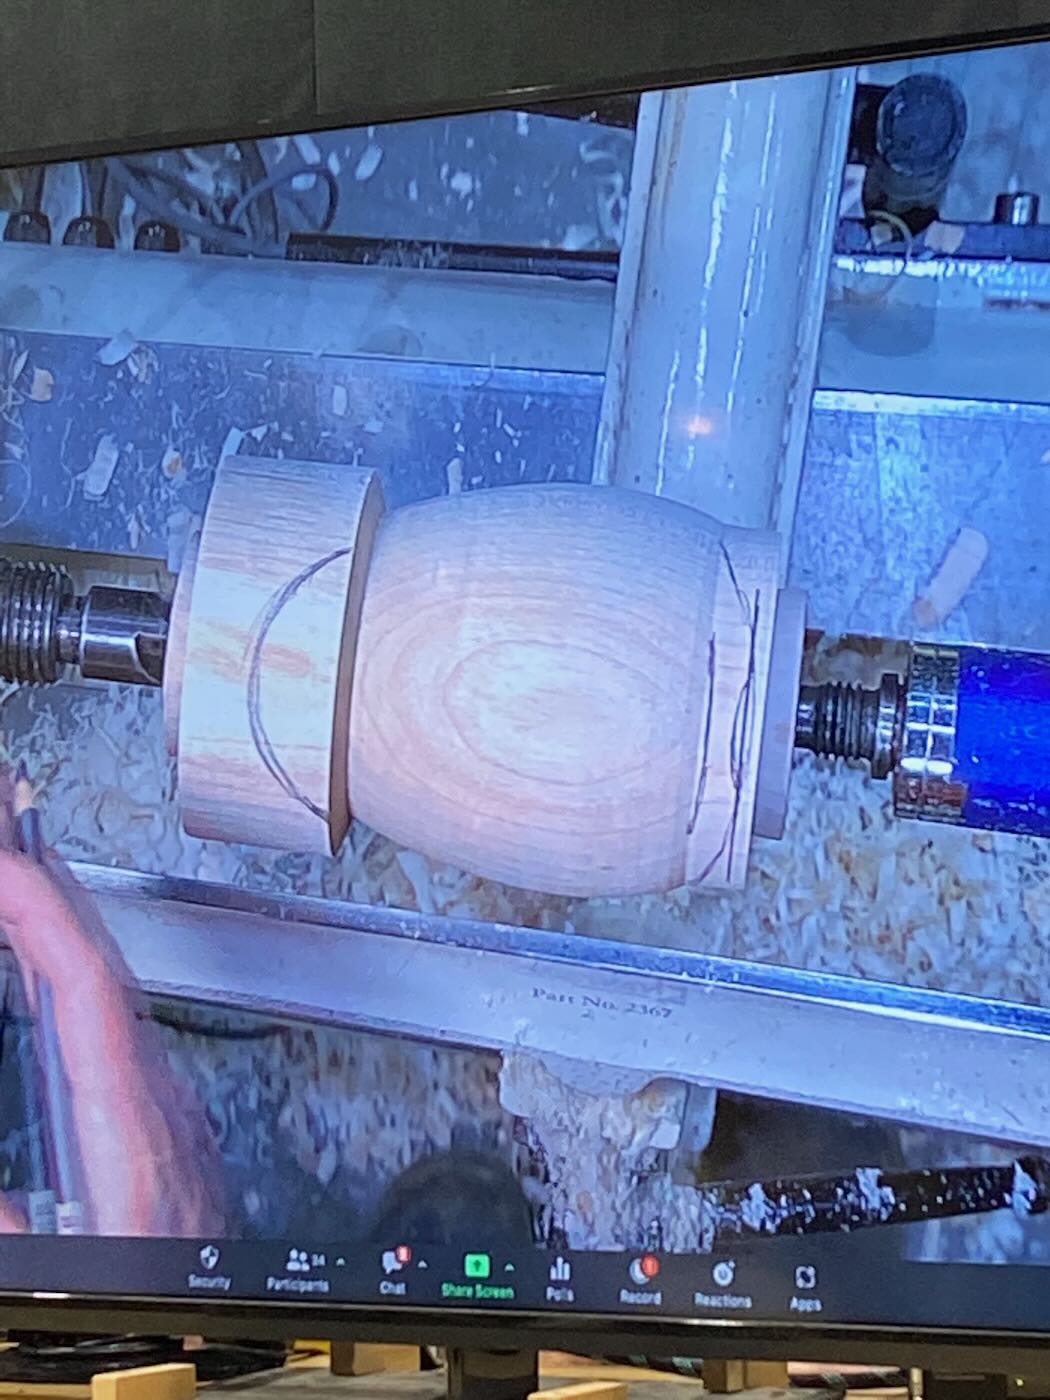
- Clean up the surfaces and with a pencil mark where the “depth” will be on both the bottom and top portions of the vessel – i.e. the depth of the hollowing.
- Cut the piece in half at the top using a thin parting tool, followed by a small saw.
- This cut will end up below the handles
- Put the tenon from the bottom portion in the chuck and clean up the surface. The mortise portion of the joint will be in the bottom of the vessel
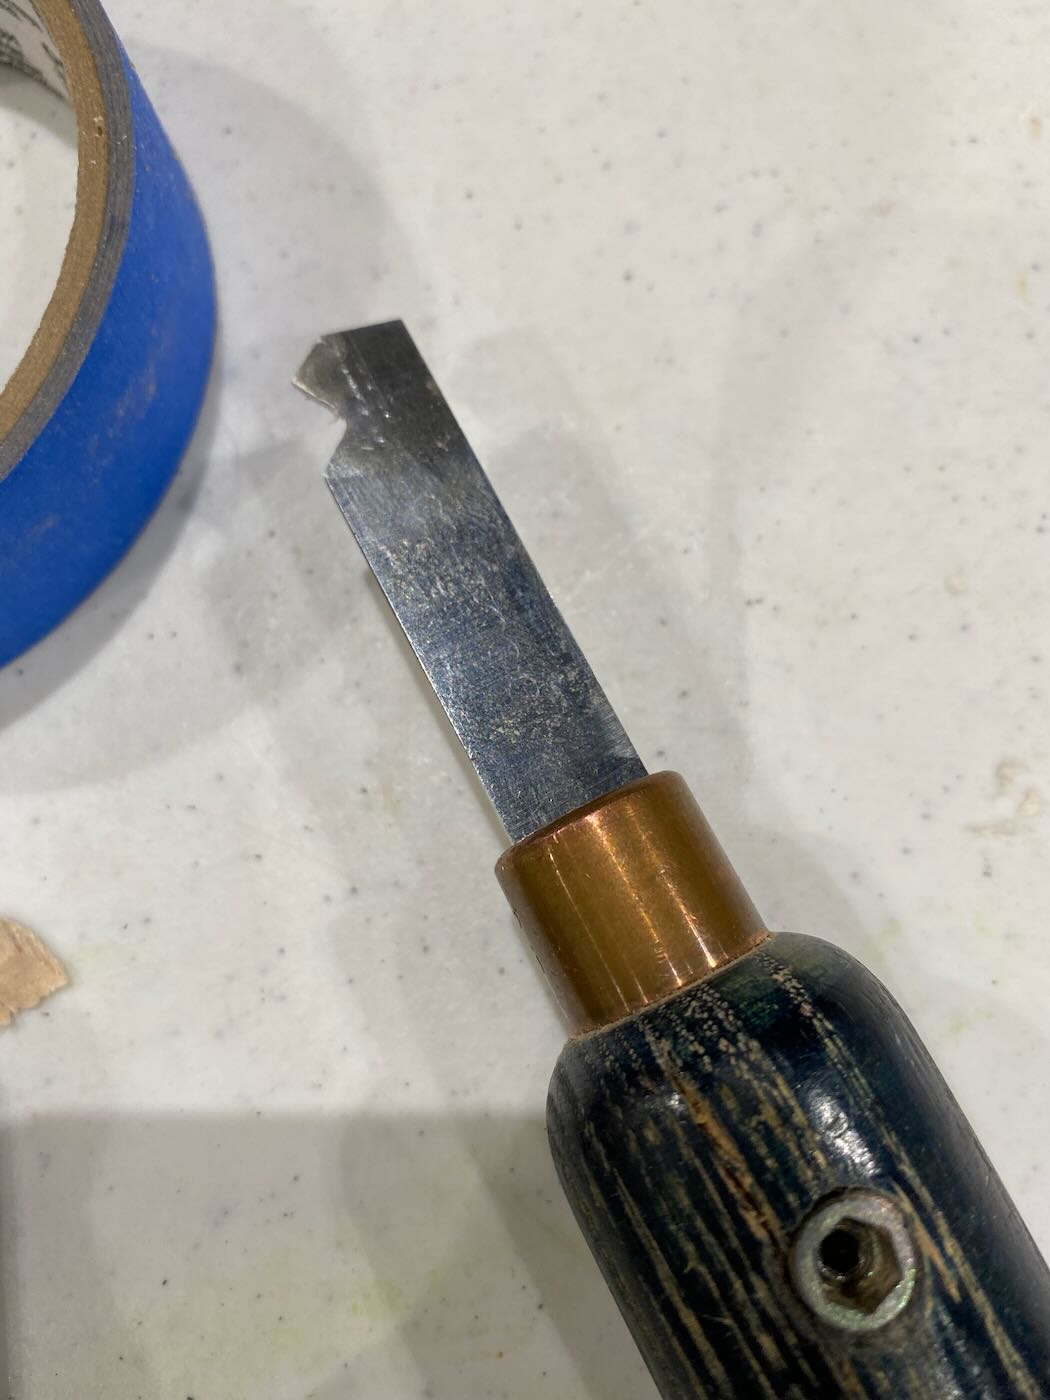
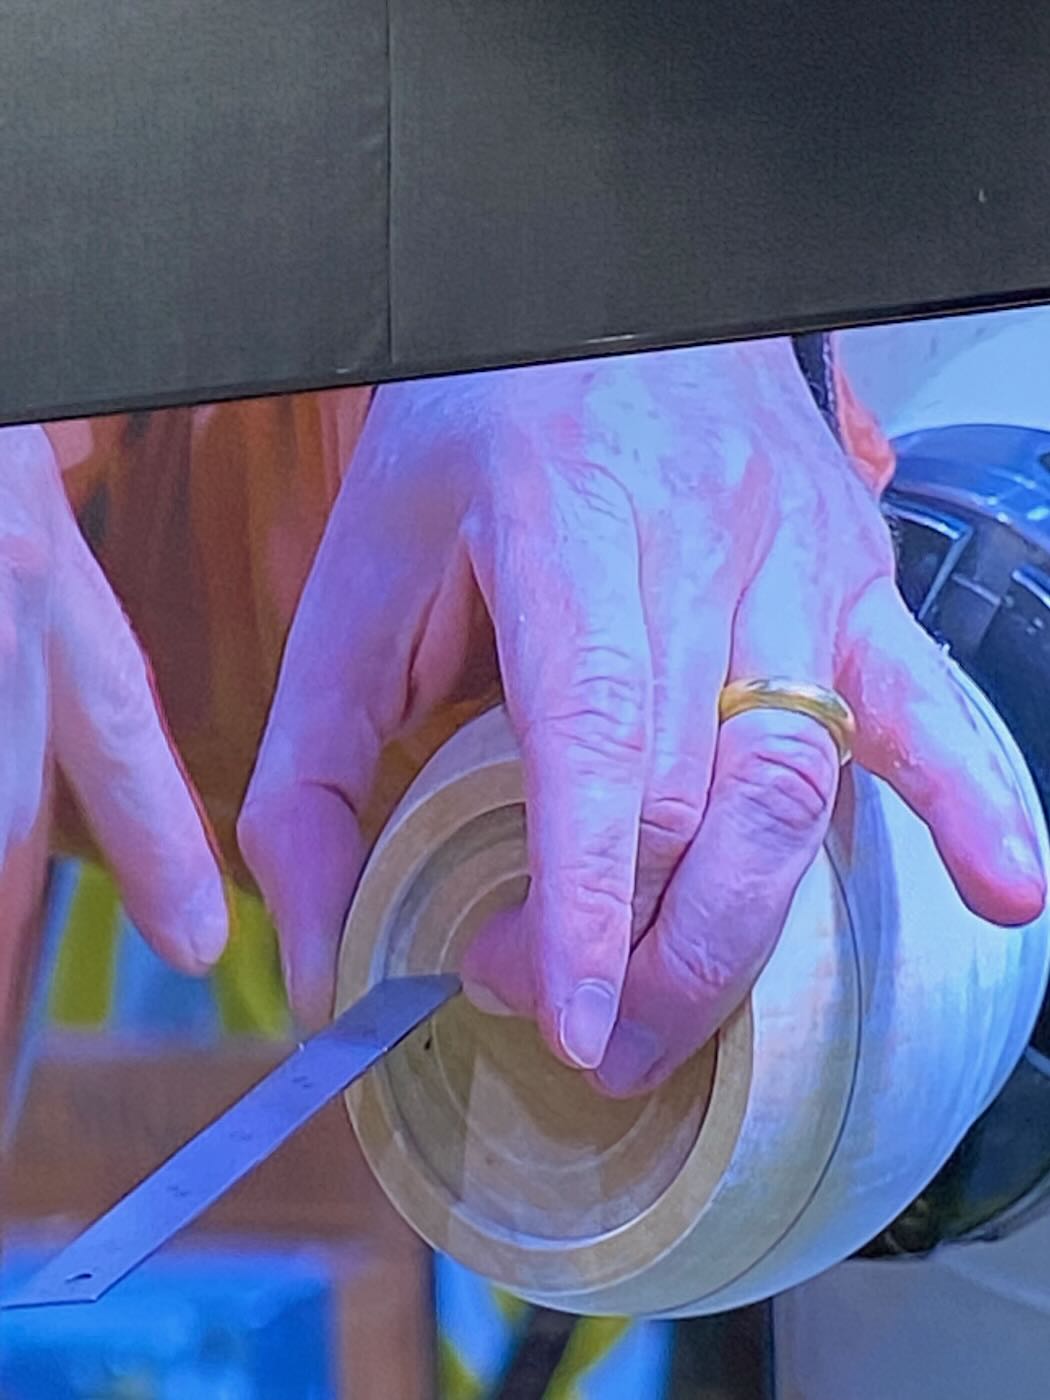
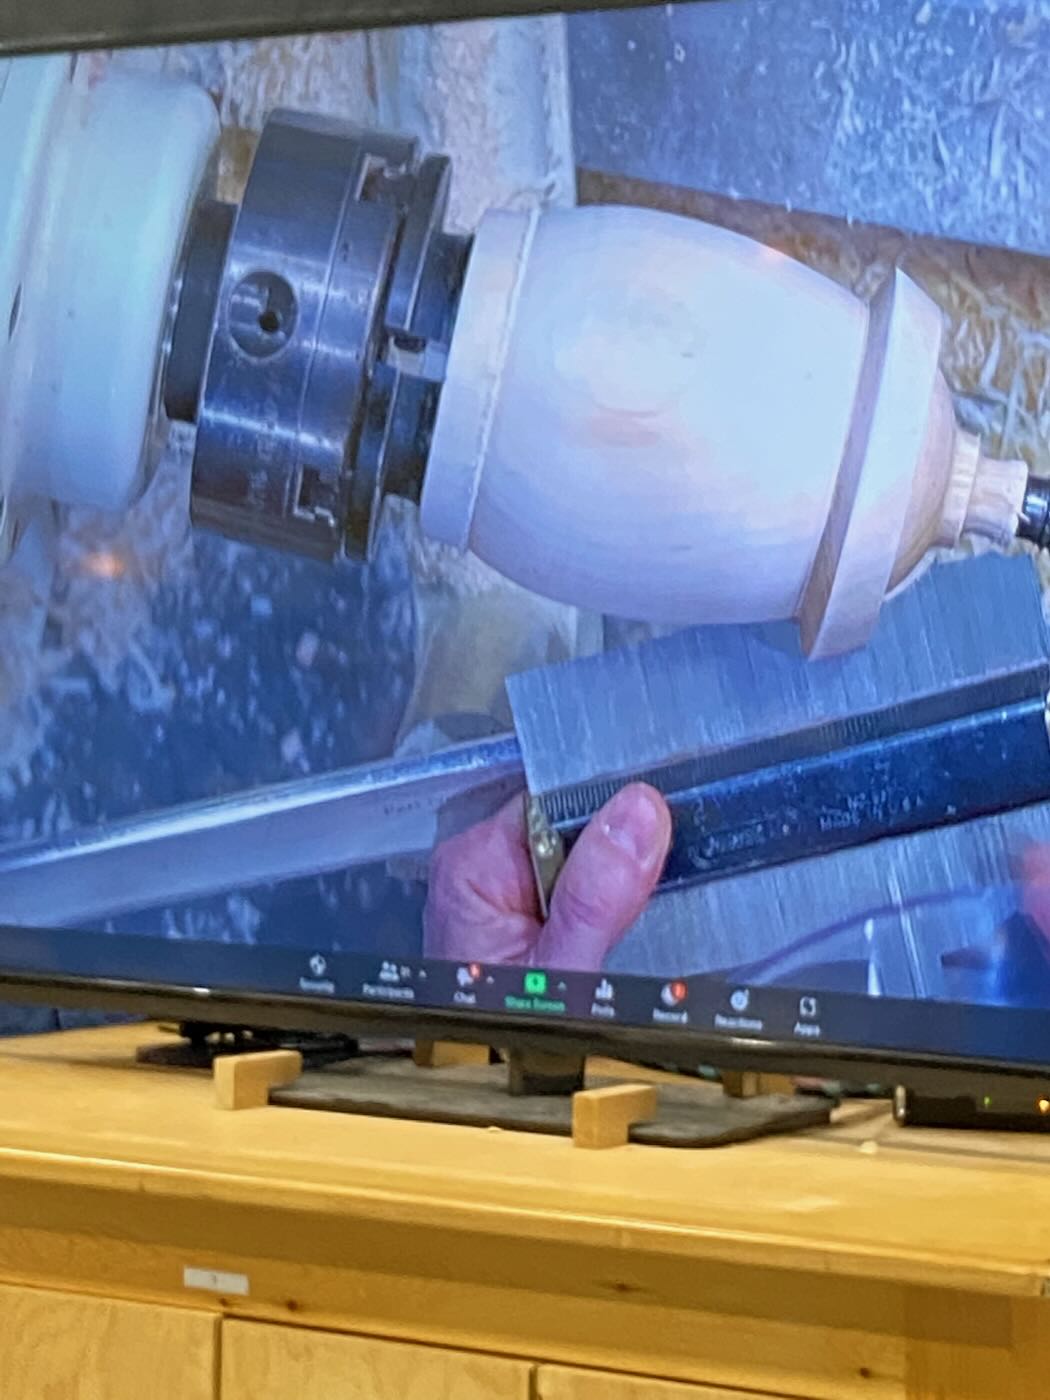
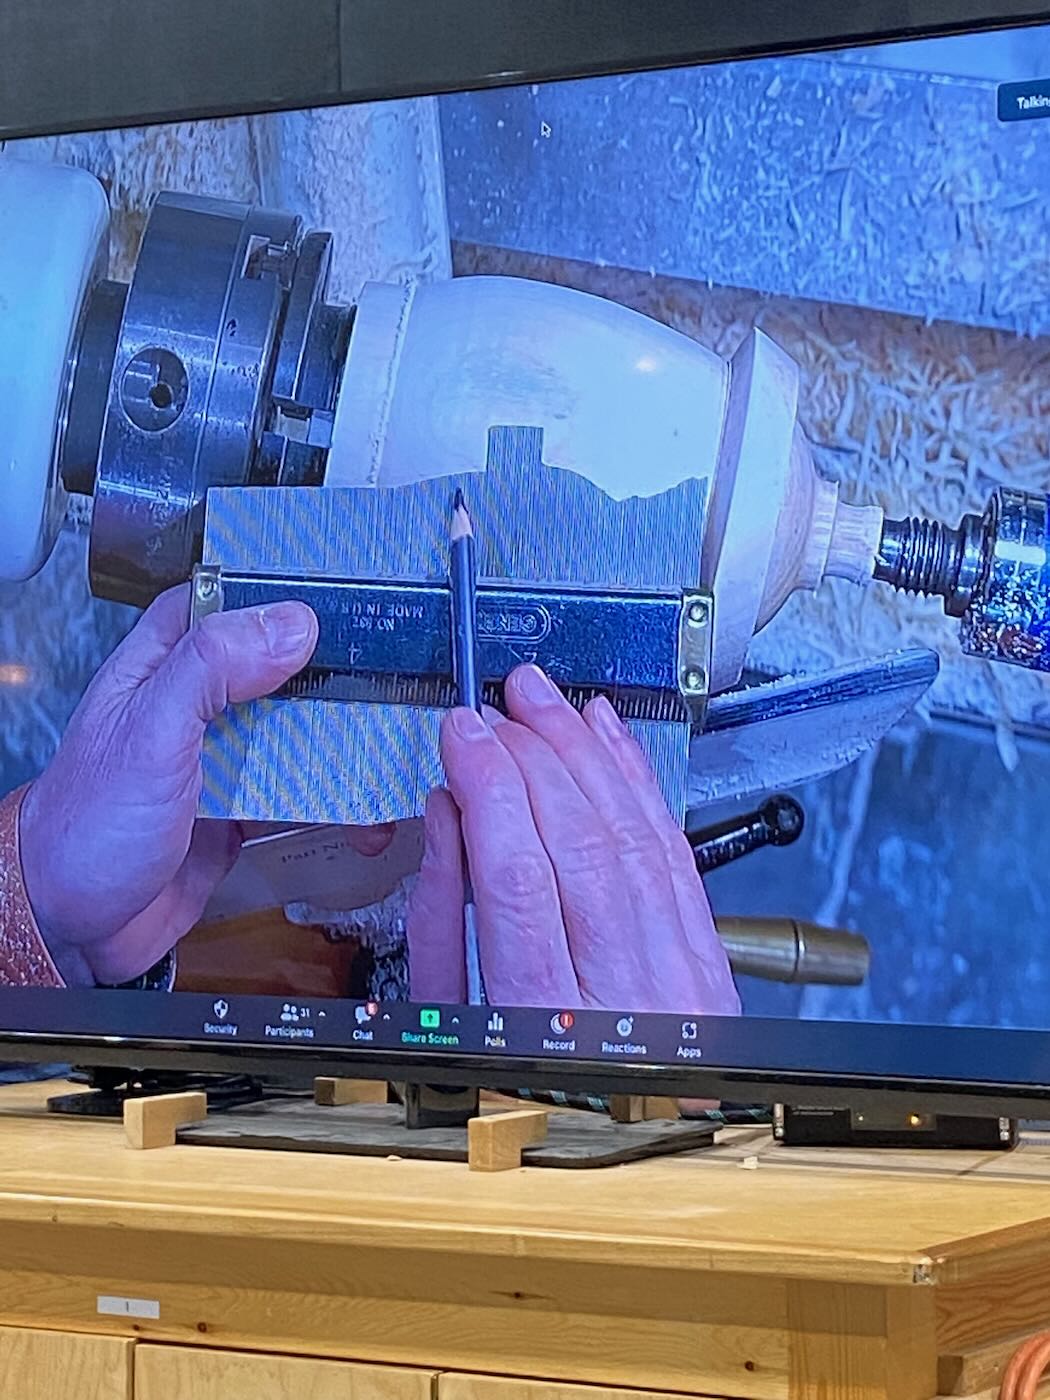
- To create the mortise – the shoulder should be ~3/16” with the vessel wall thickness ~ 3/8’. You want the inside of the shoulder to be parallel to the flat part of the mortise. Mark has a special tool he used for that purpose, but you can also check by using the flat side of a small ruler against the edge of the vessel. The ruler edge should sit flat against the top of the wall.
- Drill to the depth of the vessel leaving ~3/8” from your bottom
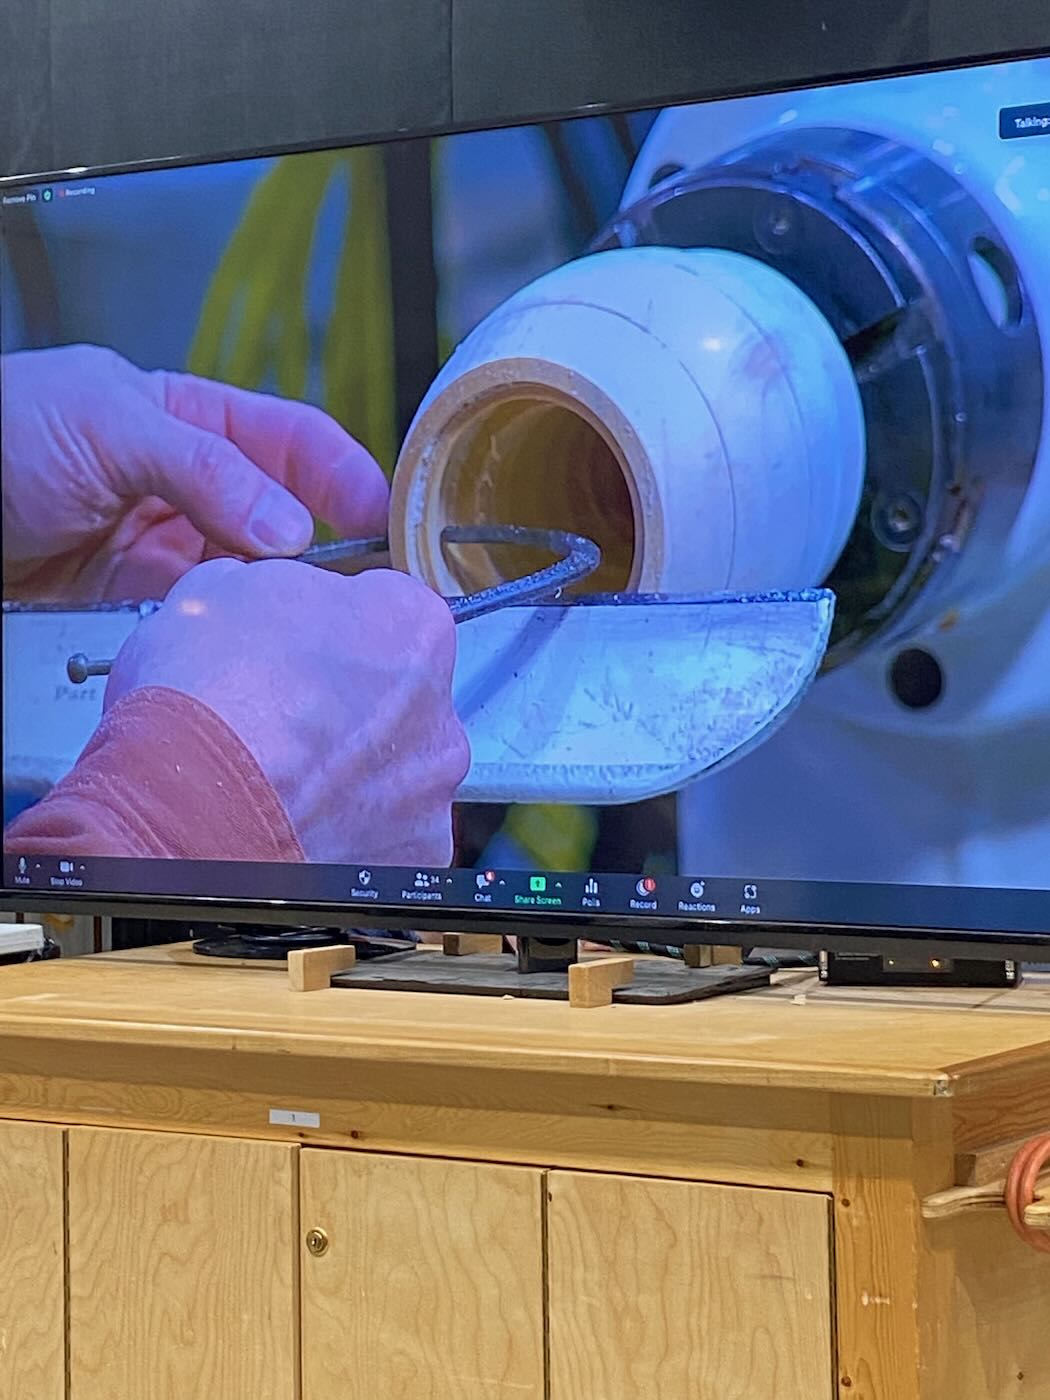
- Hollow using any tool of your choosing going from the center to the outside to cut across the end grain of the wood. Start at the top to create a wall thickness of ~3/8” and move down the length of the wood ~1inch at a time. Do not go back once you have the correct thickness to maintain stability of the wood.
- Mark the position of the chuck jaws on the tenon because you will be putting the piece back on the chuck later. Remove bottom from the chuck
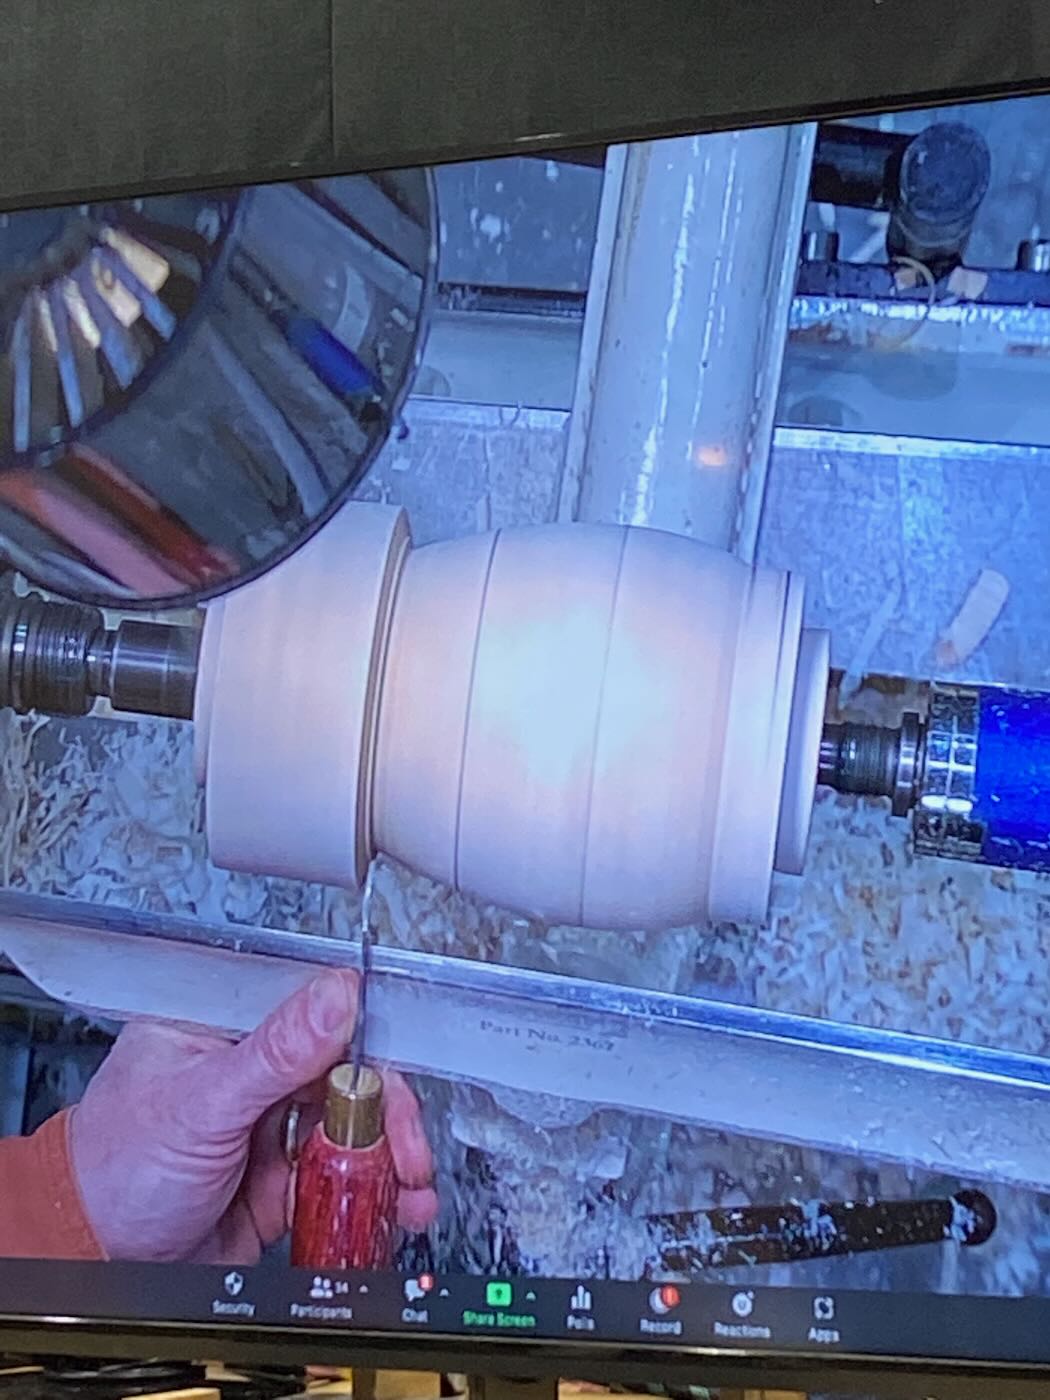
- Put the top portion of the vessel in the chuck and clean up the face. Mark where the top and hands will be with a pencil.

- Using dividers, mark the size of the opening in the bottom portion of the vessel
- Using a parting tool, cut your tenon about the width of the parting tool. Check frequently to see that the tenon creates a tight fit with the bottom. Check to see that the grain matches and mark the line to help align the top and bottom when gluing up. It’s important to have the grain lines match because you will be gluing on green wood. This will ensure that the wood will move the same way when drying.
- Hollow out the top to the depth line. Keep the thickness the same as the bottom
- Using medium CA glue, glue the top and bottom together matching the grain line. Glue along the top edge of the tenon. If any glue squeezes out, use shavings to wipe it away. Clamp the bottom to the top using the tail stock. Do not use accelerator – there is enough moisture in the wood to set the glue. Guerrilla or wood glues will not work because they take too long to dry.
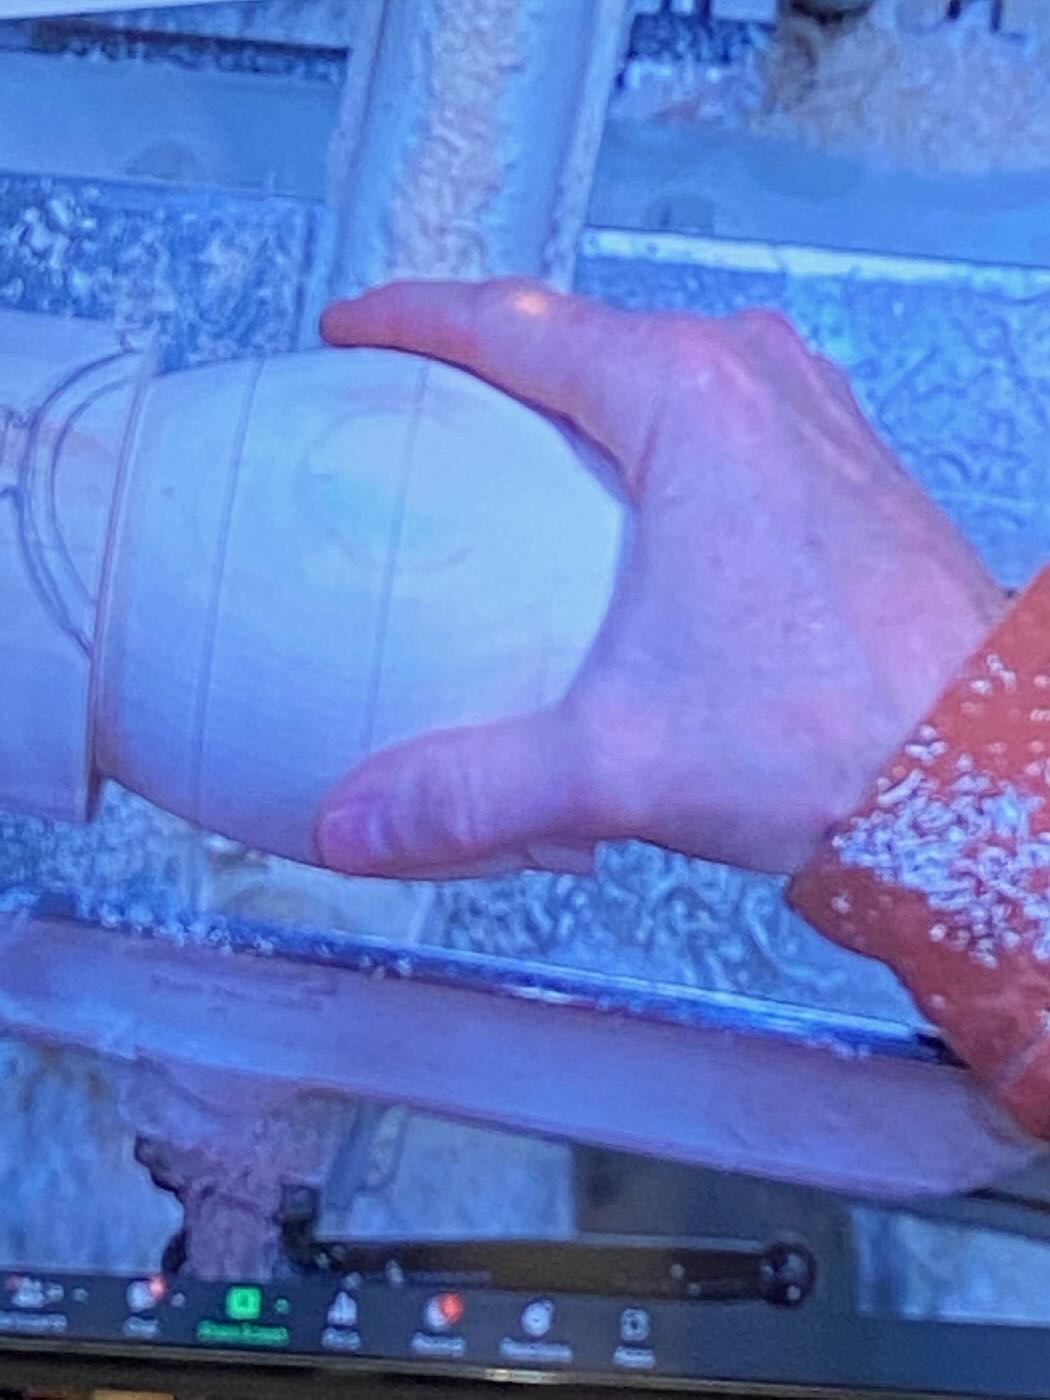
Put the base back in the chuck – line up with the chuck markings to keep it aligned. Finish the top of the piece based on the drawing you made earlier. Cut any excess wood down close to the diameter of the live center to give you more room for shaping.
- Cut down to the handles in small cuts to gradually undercut the handles. The base should flow into the top. Mark uses a contour gauge to check that the bottom flows under the handle and over the top. Shape the top of the vessel and cut away from the tenon in the chuck.
- Drill a small hole in the top or use a small spindle gouge. Round the edges of the opening – you can open the hole up slightly. Check the wall thickness. You can use a small hollowing tool to gently scrape the top as needed.
- Sand. It’s possible to blow a lot of the water out of green wood using compressed air. Dry the surface so that it is easier to sand. Removing some of the water will help keep a lighter color of the wood.
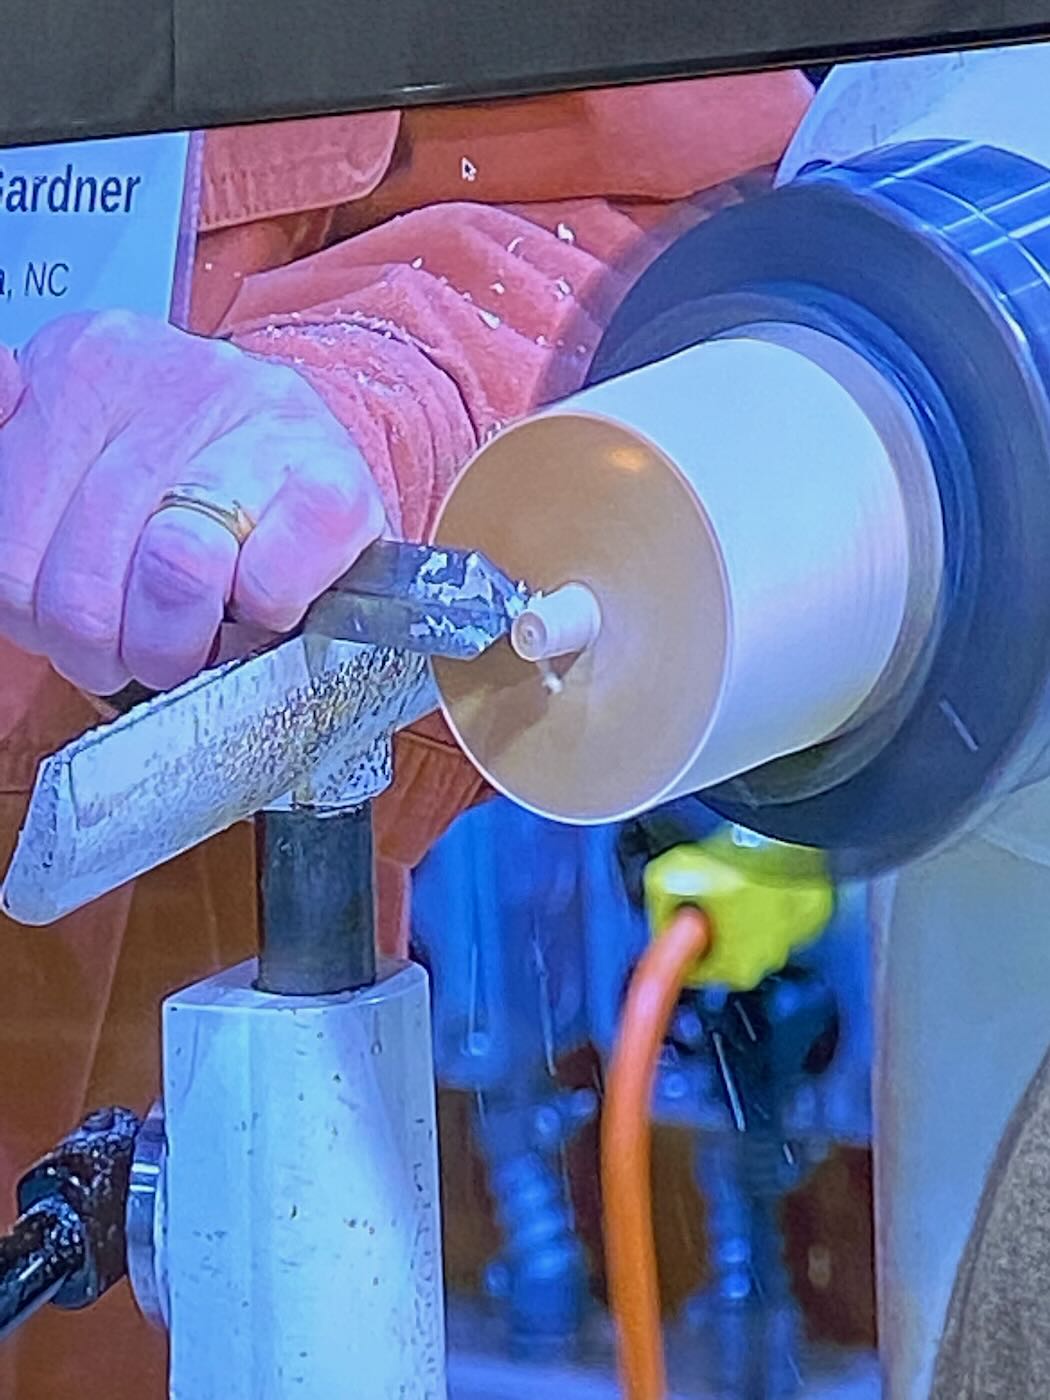
- Create a jam chuck with a small piece of wood. Round, create a tenon to fit the chuck and a small tenon to fit into the opening of the vessel. Use the bottom center mark for the tail stock.
- Undercut the bottom. Let dry for a couple weeks before embellishing.
Embellishing:
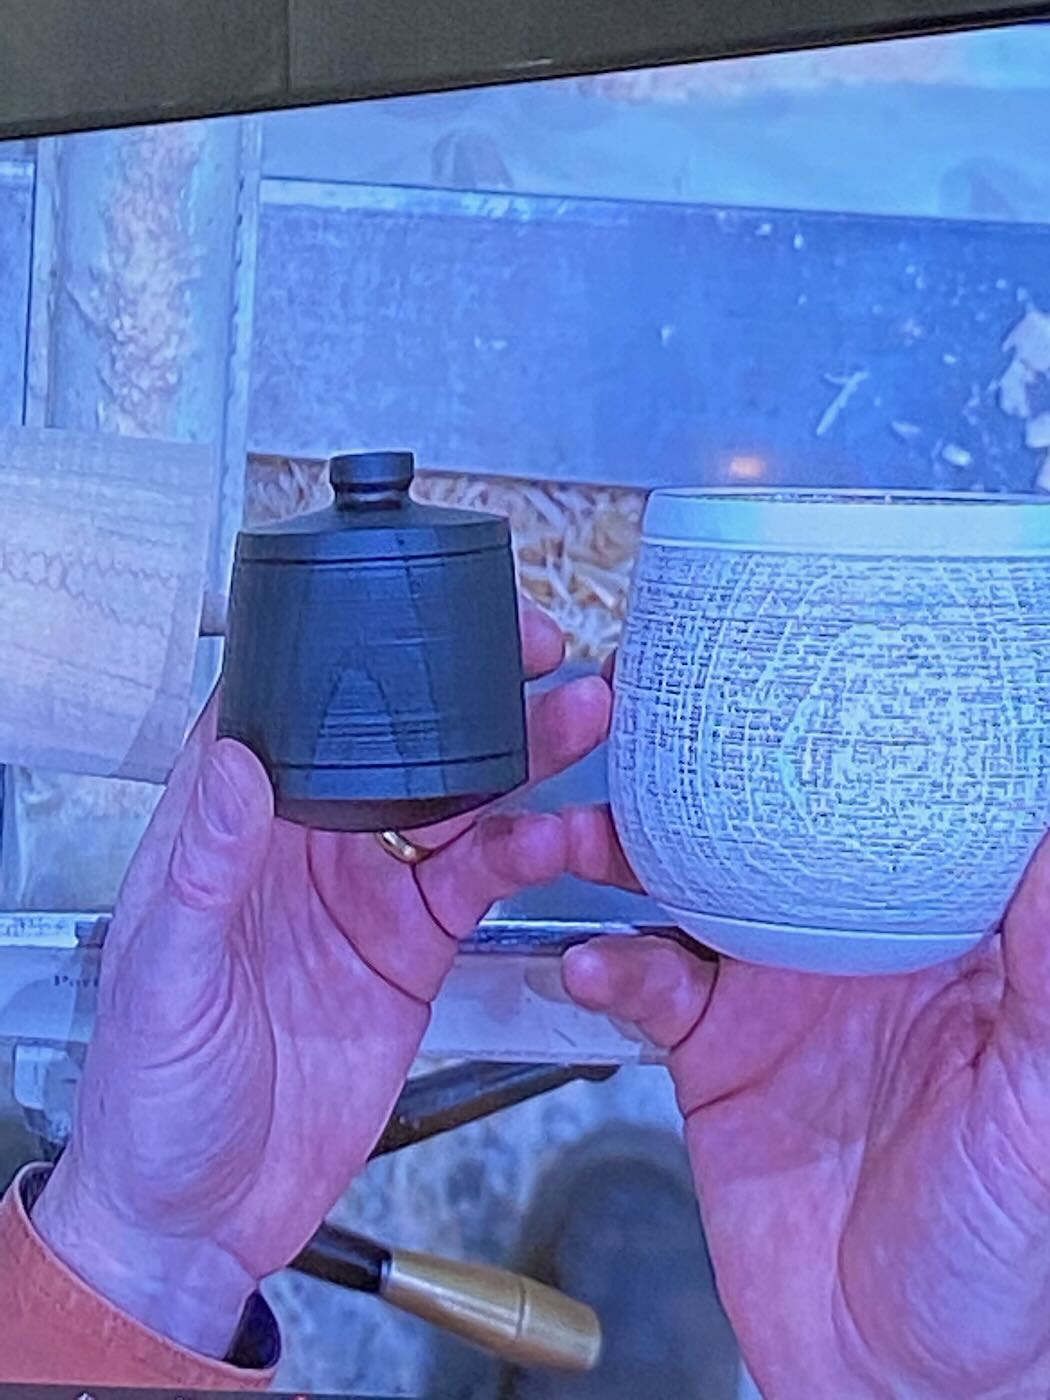
- Mark showed slides of examples of surface embellishment.
- Patterns are first drawn and then carved.
- How to lay out a grid for texturing
- Mark does these by hand – he finds the indexing wheels on your lathe rarely has the appropriate division.
- Begin by marking horizontal hash lines from the handle down with a pencil. These lines are drawn around the vessel using a jig or on your tool rest
- Visually divide the horizontal lines into squares. A good number of squares is 18 since it divides by 3. Use a jig or tool rest to continue the lines
- To make a spiral, connect the lower left corner of square 1 to the upper right corner of the adjacent square – i.e over 1 and up 2. Make a second set of lines going in the other direction – over 1 and up 2. Another pattern is made by just making diagonal lines through each square in both directions – I.e. dividing each square into 4 squares. Each of the resulting triangles is then marked horizontally or vertically as you like
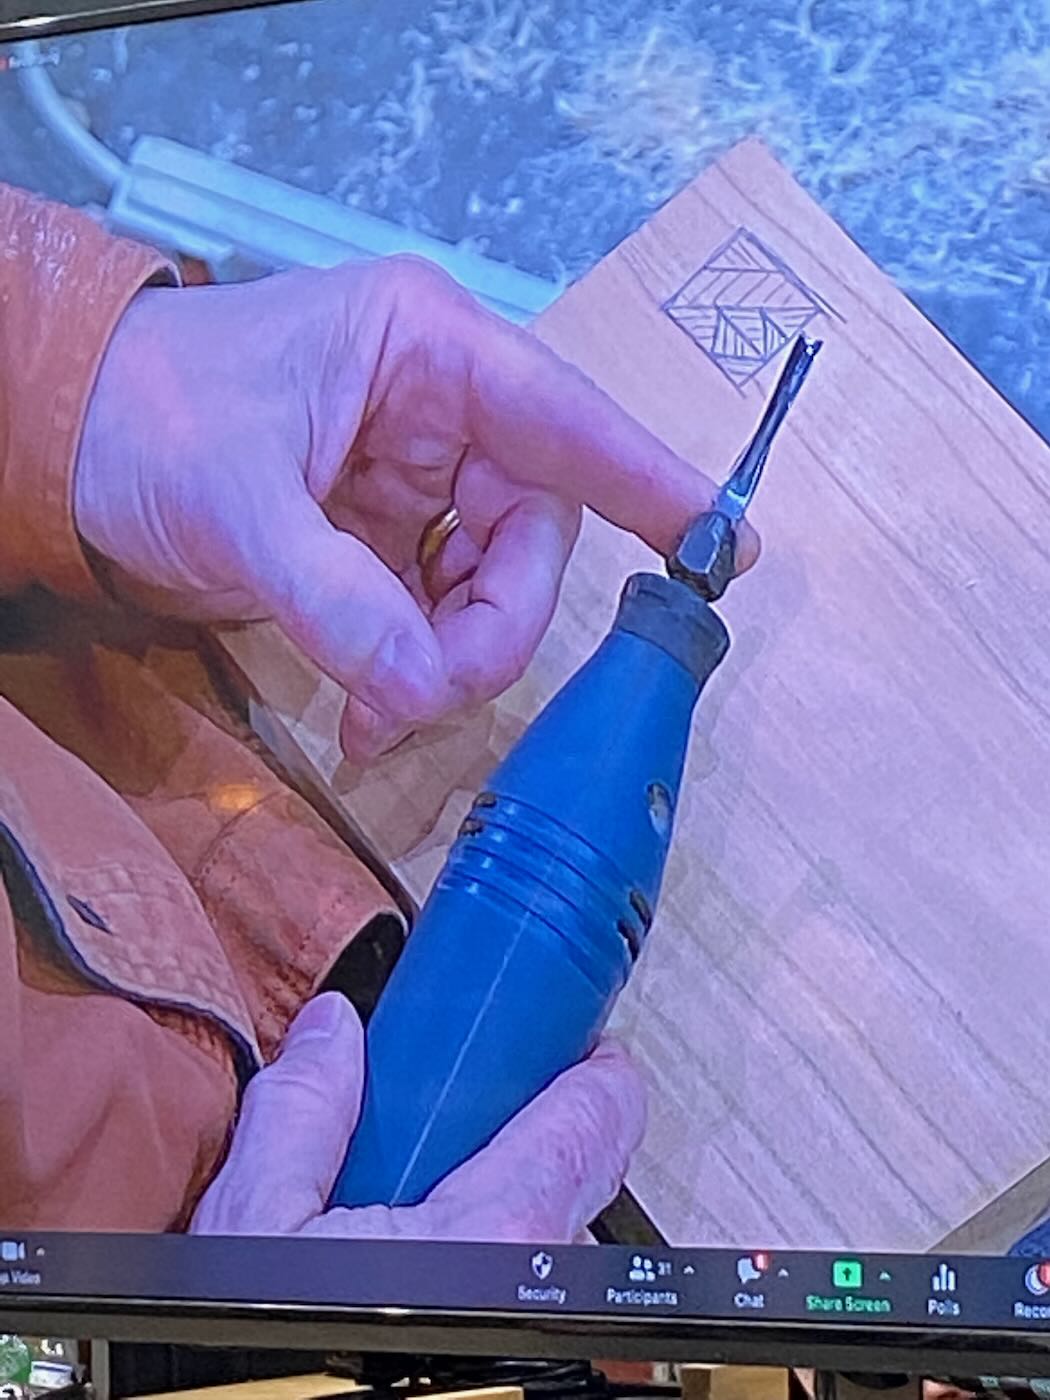
- Go over each line with a power carver, engraver etc

- Power or hand carvers
- Ryobi has a power carver which is a reciprocating carver – ~$100. Replace chisels with ones from Flex Cut
- Mark uses an Automach Woodcarving tool (HCT-30) – ~$300. The chisels that come with this tool are OK but you can also use the Flex Cut chisels
- WeCheer also has a power carver with a flex shaft that can be used with a Fordham motor.
- Engravers
- Dremel Electric engraver. Draw pattern first then hold the tool perpendicular to the work surface. These tools tend to follow the wood grain so hold tight
- Pneumatic engraving pens – made by Sioux. Use them at ~75-80 PSI. These were designed to work on metal. They work like a reciprocating carver and sound more like a dental drill. These are good for signing your name on the bottom of your piece.
- Wire Brushing – done on the lathe on either green or dry wood
- Surface must be free of tool marks so sand to at least 150grit or to final grit if other parts of the vessel will not be embellished
- Make a “v” cut to mark brushed area and tape off other areas with blue tape
- Use a coarse wire wheel – not brass – Black and Decker has one
- Use light touch at first to begin the grooves, then push harder. The brush will follow grooves you made with the light touch
- Sand lightly – 400grit
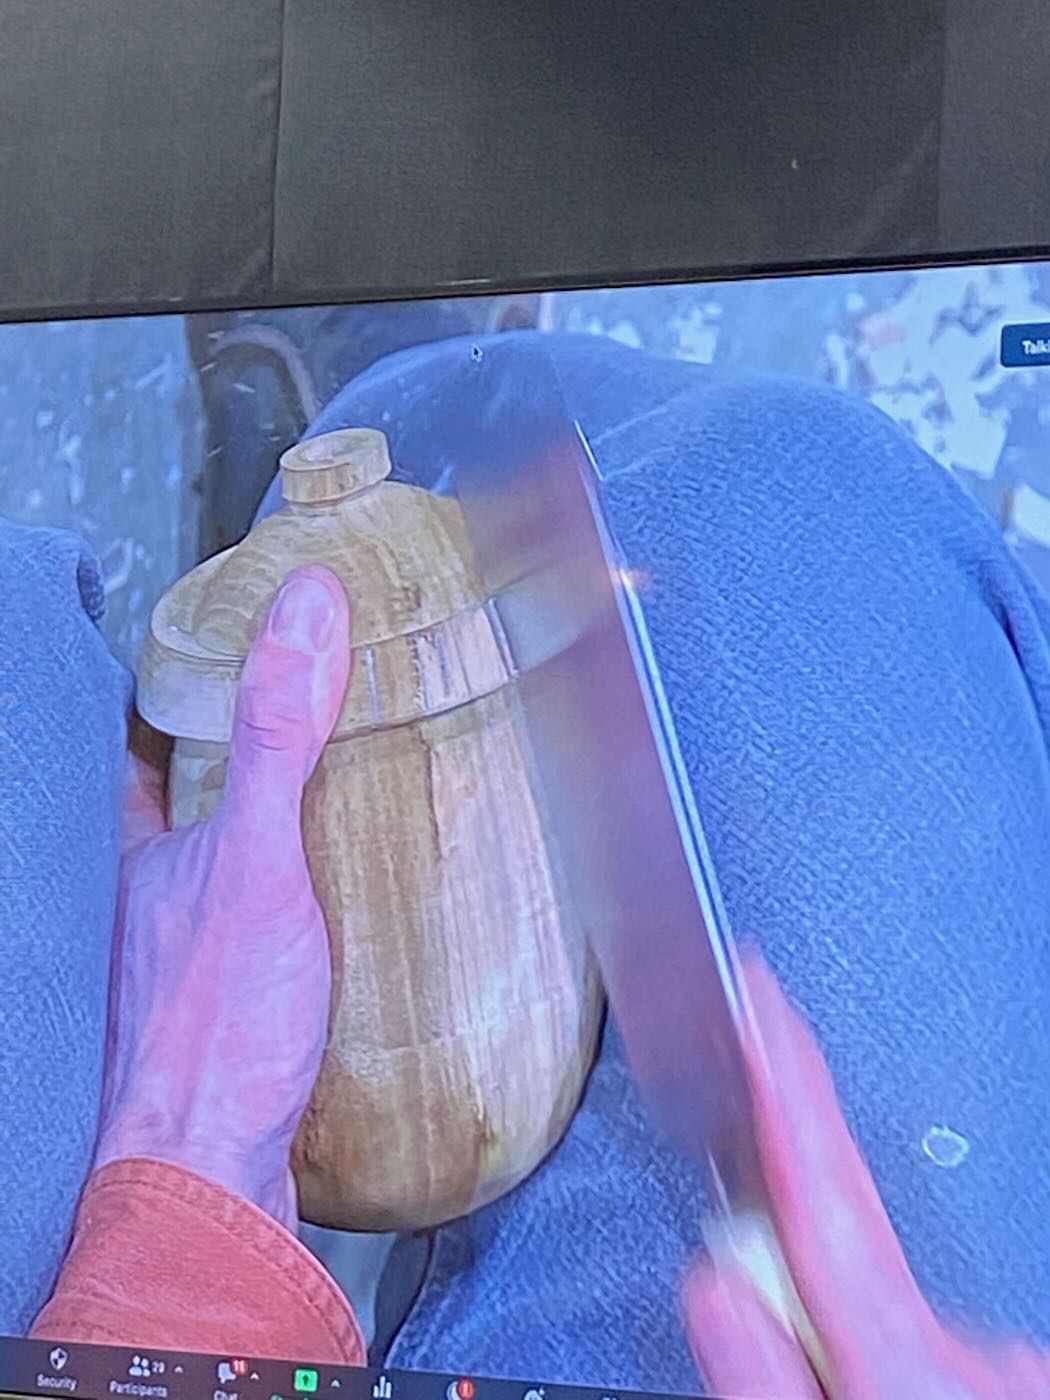
Carving the handles
- Decide where the handles should be based on the shape of the vessel or any figure in the wood you want to highlight. Mark the edges of your handles with pencil marks and carry these marks over the rim left for the handles.
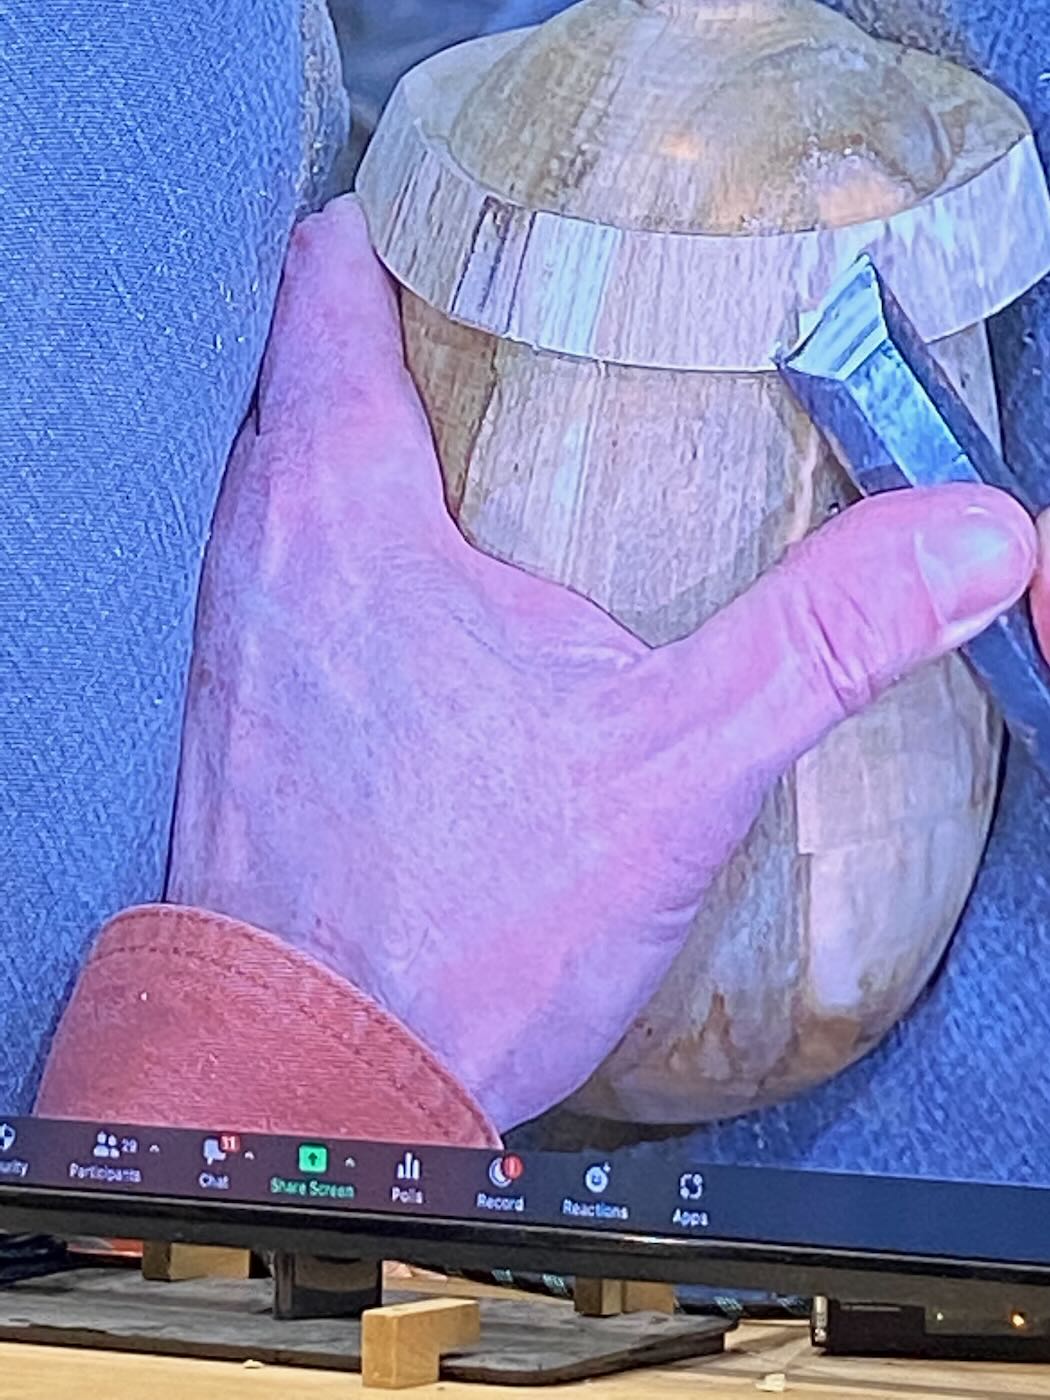
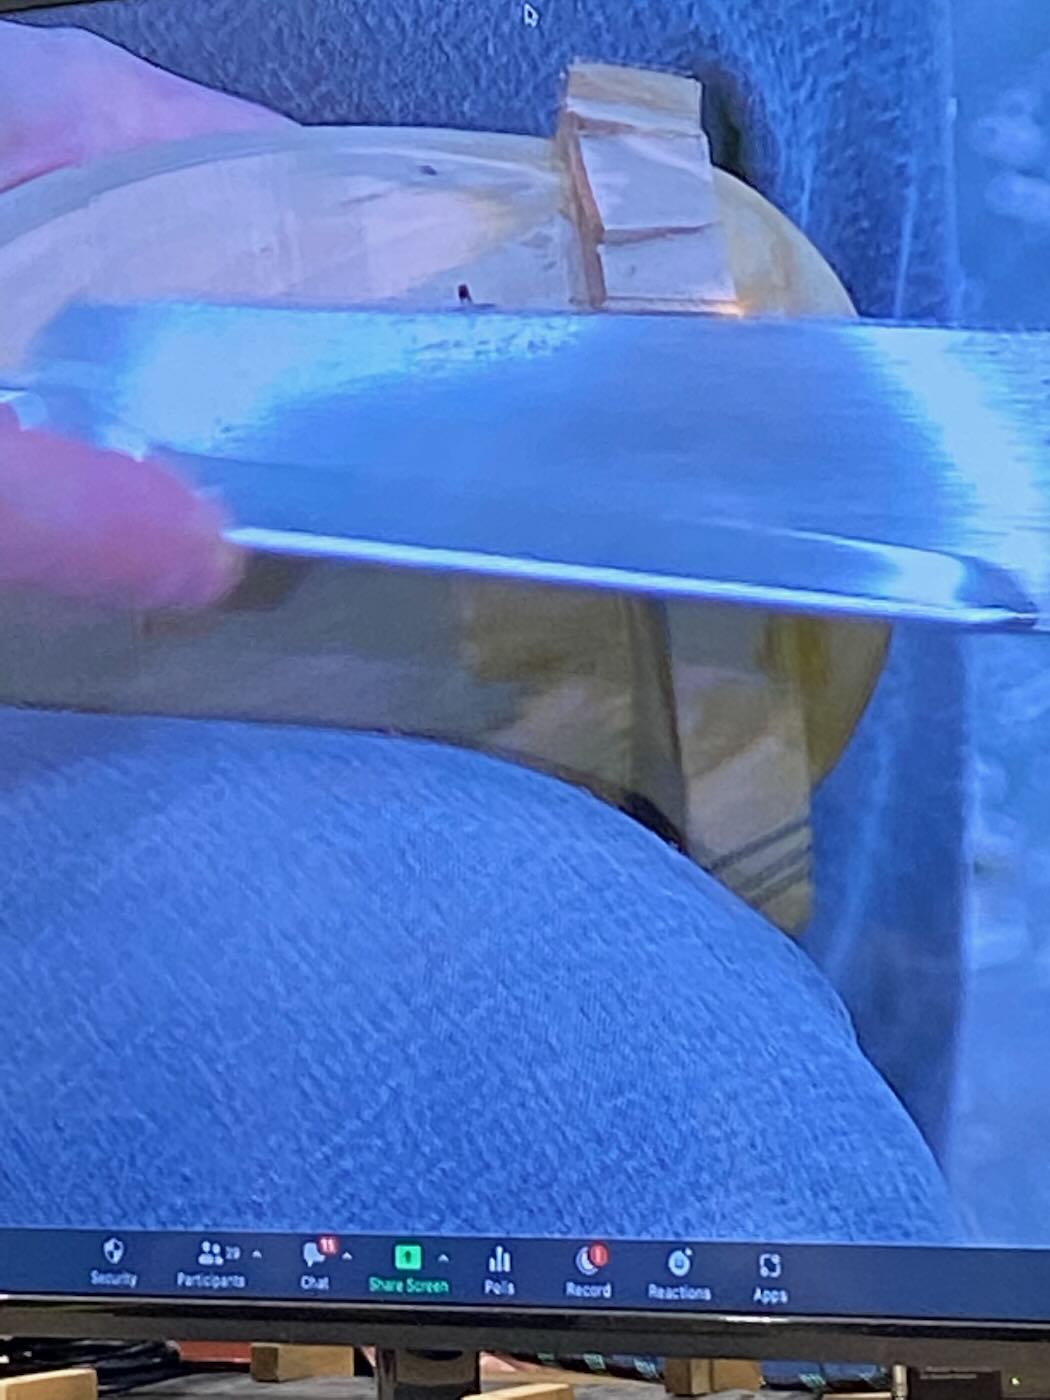
- With the vessel between your knees, cut away most of the wood between handles. Mark uses a hand saw. You could use power tools but there is risk of them slipping.
- Using a saw, cut straight in toward the body of the piece. Then with the saw on its side, cut off the rim between handles.
- Use a ¾” chisel with a push cut to get the surface even
- Slightly undercut the edges and soften the edges
- Shape the handles. Mark divides them in sections and using a flex cut knife cuts straight in making a “v”cut. Curve over the edges – this will look like a stack of beads.

Coloring:
- Black dye – use Fiebing leather dye. This is an alcohol based aniline dye that comes in a quart or 4oz size. This will give you a true black color. You can get it from Tandy leather.com or at a shoe repair place. Do not use the Tandy dyes for this- they do not penetrate well and will give you an uneven color. Use gloves and brush the dye on the outside. For the inside, dump some dye in, swirl it around and dump it out again. Use 1 or 2 coats
- Colors – Use transtint
- Milk paint: Milk paint will not peel or crack. Old Fashion Milk Paint brand has more colors. Keep powder in a mason jar and mix the day you want to use it. Mix 1:1 with water for a creamy consistency. Let sit a while before using it.
- Surfaces can be first painted with several layers of milk paint and carved through.
- Can make a gradation of color using many layers of Milk Paint
- Milk Paint can also be diluted with water to make a wash
- Finish – Use spray on Krylon Matte finish. Use 2 light coats then buff with 0000 steel wool. The best place to get this is Walmart – (cost more at Michaels).