
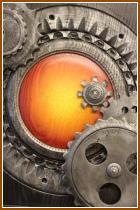
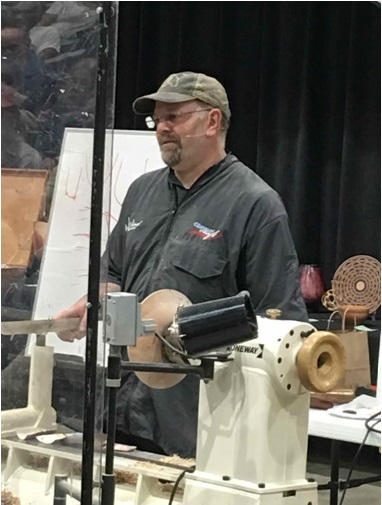
We were fortunate to have Nick Agar with us for his demonstration and for 2 days of classes. He describes himself as a “wood shopper” and an “embellisher”. Nick come to us originally from England, but with his new green card, is settling in Savannah Ga. There he is in the process of setting up his wood-turning studio and school – “NICK AGAR’s STUDIOS” with an opening scheduled for December. He began his demonstration with a fast paced slide show of his work. His inspiration comes from nature – including the ocean, fossils, stones, and clay – and uses embellishment – both texturing and airbrushing – to change the visual perception of his pieces. He often uses metals – gears etc – in his large wall pieces and reactive paints to create metal patterns on his smaller bowls/platters. He prefers air brushing because it gives a light even coating and more control over the paint.
Nick demonstrated several techniques to embellish with reactive paints, texturing and stencils:
1. The use of textured reactive paints and rotary carvers
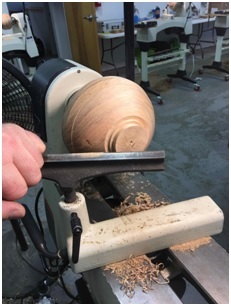
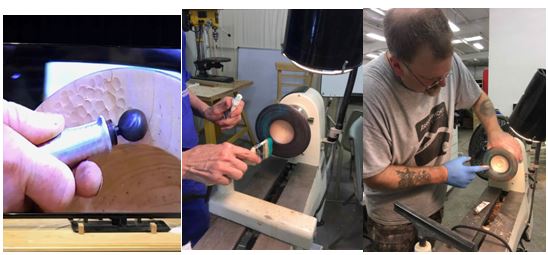
a. Using a screw chuck, the bowl was shaped and a tenon formed.
b. Nick’s preferred grind on his bowl gouge was a parabolic flute with a gentle curve enabling him to make a cleaner cut at the bottom of the bowl without hitting the shoulder and creating a tool mark. He also prefers using a leather strop, using a Tormek system for maintaining a sharp tool.
c. He demonstrated several ways to use a rotary cutter.
1). Using a decorating tool – texturing the sides of the bowl with deeper “gouges”
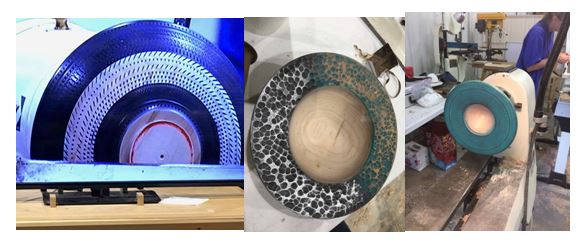
2). Using an Orbi Cut 20 slicing blade, cutting slits along the rim of a bowl. The edges were shaped, the sharp edges were then smoothed using first a green then a yellow powered rotary bristle pad.
3). After texturing – he emphasized the importance of removing any dust from the piece before painting – using either an air compressor blast, or rubbing the surface with shavings.
d. The process for Painting the outside
- Prime the piece – using any method you like and let dry
- Dry brush on “Road Rust” – Rustina from Chroma Craft – this has a grit in it to produce texture.
- Dab on gun-metal gray over the road rust using a cloth.
2. Using Web-FX from Chroma Craft – this product produces a horse-hair effect and was the one we used in class
- Using a screw chuck, the block was shaped and a tenon formed. Nick likes to leave a small rim ~ 1/8-1/4 in from the tenon – this can mark the bottom of the bowl or can be used as an edge if you want to form feet on the bowl. This piece will have a wide rim that will be painted – so the back is shaped accordingly.
- Sand the back to ~400 grit if you plan to paint the surface. Sand to ~1200 grit if you plan to use a wood dye on the surface. This will produce a slight variation between end-grain or side grain because of the difference in how the wood dye penetrates the wood.
- Remove the screw chuck and mount in the chuck. Face off the top of the surface and begin to make a small bowl with a wide rim approximately 1/3 the diameter of the bowl. You can give the rim a slight convex curve to produce a more ”porcelain” look. Make small “V” cuts ~ ¼ in on the outer and inner sides of the rim. Sand to ~220-320 grit on the rim area.
- Remove the piece from the lathe while still on the chuck. Cover the chuck with towels to keep paint from getting on it and prime with Rustoleum Flat protective enamel – we used white – or another sealer. Let dry ~1/2-1 hr. You can also air brush color on the rim using several coats of paint – lightly sprayed.
- Once the primer is dried, lightly spray the Web-FX over the base paint in a sweeping motion. Before spraying, test the spray characteristics on paper and maintain the same distance from the bowl as you decided what resulted in a pleasing effect on your test spray. Several colors can be used. This paint dries quickly.
- Put the bowl back on the lathe and round off the edges of the rim to clean paint from the rim edges – the bowl hollow can also be cleaned up or left painted. Sand the edges or the bowl interior if it was cleaned up.
- The tenon can be removed using Cole jaws and finished. Nick likes to use Chroma Craft clear acrylic lacquer top coat because it is clearer – less yellow – than other lacquers- or use lacquer of your choice – this gives the appearance of porcelain. The unpainted surfaces can be oiled. You could also use WRU 20 – a water reducible urethane that can go through an air brush.
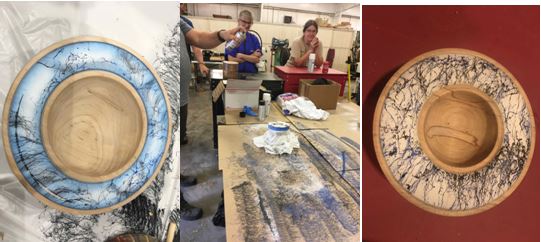
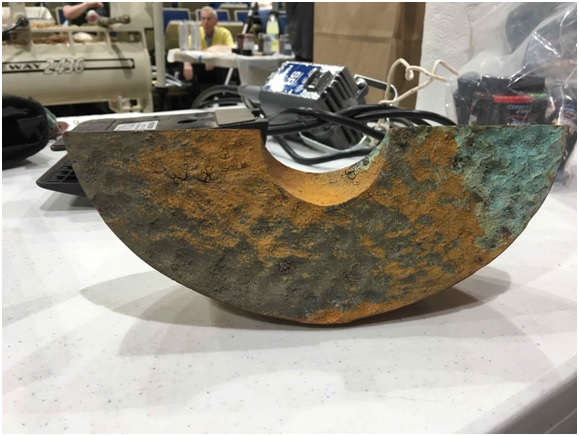
3 The use of texturing, dyes and metallic paints. This technique was also tried in class. This bowl was prepared as before using a screw chuck and shaping the bottom and squaring off the edges. The bowl was turned around and while in the chuck, the face was sheared across and the rim area sanded. The bowl was hollowed only part way to designate the area of the rim and to provide support for texturing. The back of the bowl was textured using a Sorby spiral texturing tool. The Rim of the bowl was texturized using a rounded cutter to make “divots” in the rim. After texturing, it is important to burnish the wood with shavings or 400-600 grit sand paper to remove small burs on the edges of the textured area.
Coloring process:
- Wood dye was airbrushed on while the lathe was spinning at a low –medium speed to provide a thin smooth coat of pigment. Acrylics could also be used at this point.
- Next, a clear dye sealer was applied to prevent the color from coming up into the next layer. The sealer was also “fogged” on using an air brush.
- A thin layer of Verdigris ( green) – Chroma- Gilt was applied with a stiff brush to get the paint into the textured surface. It’s better to use 2 layers of paint – allowing ~ 12 hours to dry between coats.
- Chroma- Gilt bronze was then applied with fingers on the surface of the textured areas using a good pair of gloves.
- Bronzing solution can then be applied with an air brush.
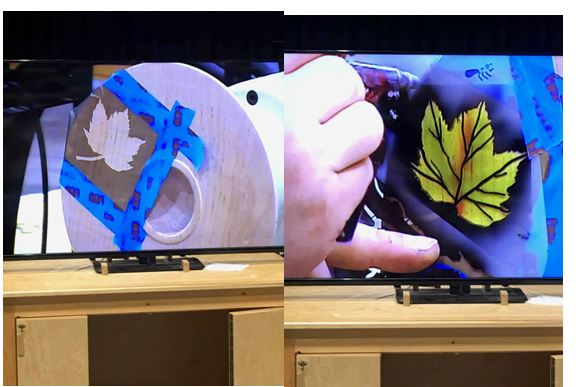
4. Stenciling
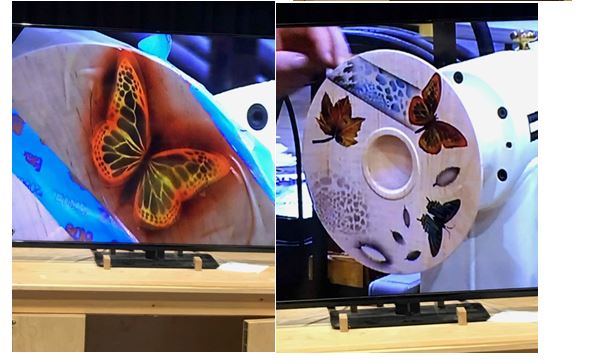
Nick has developed a series of stencils that can be used for embellishing your work. He prefers using an airbrush to give you more control of the color and allows you to apply multiple coats with layers of details. Surfaces to be colored are prepared as above. He always begins with the lightest color and goes to the darkest for details. The stencil set for the maple leaf had various sizes of leaf, stems, and “spots”. Other sets contained details of a butterfly as well as a set of “bugs” and textures.. The stencils were taped onto the surface with blue tape before air-brushing, smaller detail stencils could be held onto the surface by hand.
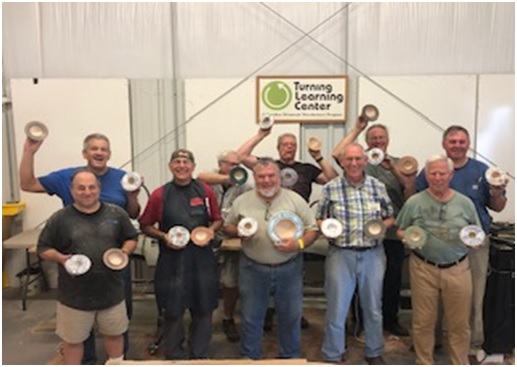
Special thanks to Nick for offering 2 classes which allowed a total of 18 students to participate. Projects included preparing 2 bowls using Web-FX spray paint as well as the metallic paints. We found Nick to be a patient teacher who set a pace that enabled everyone to complete each step before going on. We all took home 2 bowls with only the tenons to remove and lots of ideas for more texturing and embellishing.
Nick Agar – June 16, 2019 – Class at TLC
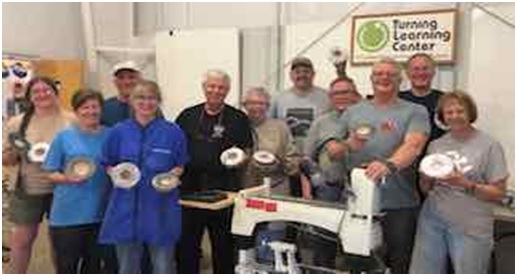
Nick Agar – June 17, 2019 – Class at TLC
Nick Agar can be contacted using the following email address:
Thanks very much to Jo Miller for taking the time to author this article and add pertinent photos.
Thanks to Kaye Schmidt for taking and then uploading Instant Gallery photos to the CMW website. Thanks to Bruce and Trish Pratt for assisting with the IG photography set up, photos, and take down.
If you would like to renew your membership so you can utilize our library or participate in TLC classes, please visit – http://z83.628.mywebsitetransfer.com/…/basic-membership
Edited and respectfully submitted by Mike Seltzer